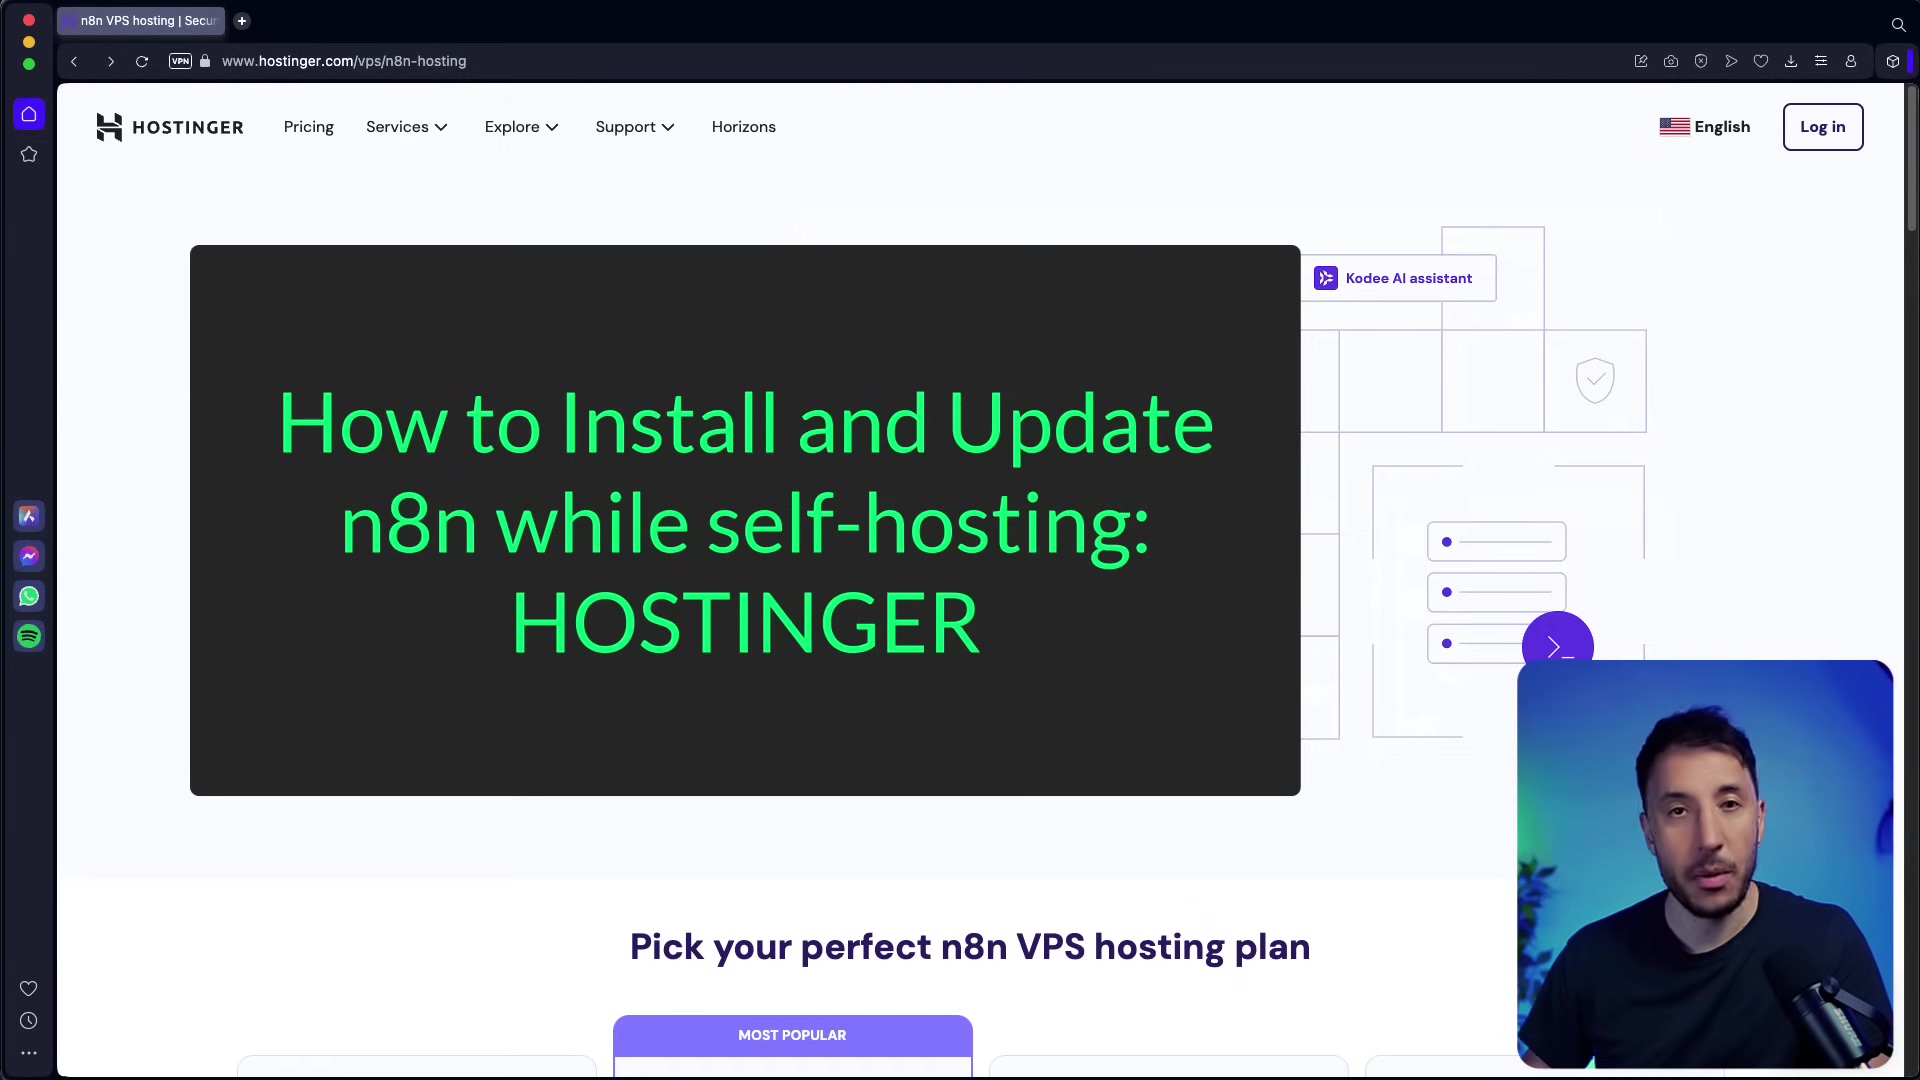
Watch the Video Tutorial
💡 Pro Tip: After watching the video, continue reading below for detailed step-by-step instructions, code examples, and additional tips that will help you implement this successfully.
Imagine transforming your WhatsApp from a mere messaging app into a powerful, personalized AI assistant. For less than the cost of a monthly coffee, you can build an intelligent agent that plans your day, manages reminders, and even checks your calendar on demand, all within the familiar WhatsApp interface. This isn’t a futuristic fantasy; it’s a tangible reality that over 2 billion WhatsApp users can now access. This guide will show you how to leverage n8n, a robust automation platform, to integrate AI into your WhatsApp, creating a personal productivity powerhouse. With 5+ years of hands-on experience in workflow automation and AI integration, I’ve seen firsthand how these technologies can streamline complex tasks and enhance daily efficiency. This article will demystify the process, providing a step-by-step blueprint to construct your own AI-powered WhatsApp assistant, ensuring you gain unparalleled control over your personal and professional life without expensive subscriptions or complex coding.
Table of Contents
Open Table of Contents
- Introduction: Unlock Your Personal AI Assistant in WhatsApp
- SEO Strategy: Keywords for Maximum Reach
- Establishing Authority: Meet Your Automation Expert
- Chapter 1: Setting Up Your WhatsApp Trigger in n8n
- Chapter 2: Intelligent Message Routing with the Switch Node
- Chapter 3: Integrating AI for Dynamic Responses (HTTP Request & AI Agent Nodes)
- Chapter 4: Advanced Features - Calendar Integration & Google Cloud Setup
- Value-Added Module: DIY vs. Commercial AI Assistants – A Cost-Benefit Analysis
- Value-Added Module: Essential Tips & Best Practices for Your WhatsApp AI
- Conclusion: Your Personalized AI Assistant Awaits
- Frequently Asked Questions (FAQ)
- Q: Why should I build my own WhatsApp AI assistant instead of using a commercial one?
- Q: Is n8n difficult to learn for a beginner?
- Q: What are the main costs involved in running this WhatsApp AI assistant?
- Q: Can I integrate other services besides Google Calendar?
- Q: How do I ensure my API keys and personal data are secure?
Introduction: Unlock Your Personal AI Assistant in WhatsApp
Alright, fellow automation enthusiasts! The dream of having a personal AI assistant, one that just gets you and lives right inside your daily apps, isn’t just for sci-fi movies anymore. With the incredible leaps in AI models and super flexible automation tools like n8n, you and I can totally build a sophisticated AI agent that hangs out directly in WhatsApp. How cool is that?
This guide is tailor-made for anyone who’s a bit tech-curious, maybe a developer, or just someone like me who loves making things work smarter, not harder. We’re going to dive deep into harnessing the combined power of AI and WhatsApp to seriously level up your personal productivity and workflow automation. We’ll walk through everything, from setting up that first WhatsApp trigger to weaving in advanced AI magic and connecting to external services like Google Calendar.
Our big goal here? To cook up a cost-effective, super customizable AI assistant that lives right inside your WhatsApp. It’ll be ready to help with planning, scheduling, and digging up info whenever you need it. This approach means no more juggling a bunch of different apps or shelling out for pricey subscriptions. We’re putting intelligent automation right at your fingertips, where it belongs!
By the time we’re done with this comprehensive guide, you’ll have all the know-how and every single step you need to deploy your very own WhatsApp AI assistant. Get ready to totally transform how you manage your daily tasks and interactions. Let’s get building!

SEO Strategy: Keywords for Maximum Reach
Okay, so this section is a bit behind-the-scenes, but super important for you to find this guide! To make sure this awesome resource reaches everyone who’s looking to boost their personal productivity with cutting-edge AI, we’ve got a targeted SEO strategy in play. Our main focus is on building a WhatsApp AI assistant using n8n, which naturally forms our core keyword group. Think phrases like “WhatsApp AI assistant,” “n8n WhatsApp integration,” “personal productivity AI,” “workflow automation WhatsApp,” and “build AI agent WhatsApp.”
We’re also using some longer, more specific phrases – what we call “long-tail keywords” – to really fine-tune our reach. These target specific questions you might be typing into Google, like “how to create WhatsApp bot n8n,” “integrate Google Calendar WhatsApp AI,” “cost-effective AI assistant,” and “n8n AI agent setup guide.” By sprinkling these keywords throughout the article, from the big headings to the nitty-gritty details, we’re aiming to pop up high in search results. This way, if you’re actively hunting for ways to automate your WhatsApp chats and supercharge your efficiency, you’ll find this valuable resource. We’ve structured the content to naturally answer these questions, giving you comprehensive, actionable info that makes this the go-to guide in the automation and AI world. Pretty neat, right?
Establishing Authority: Meet Your Automation Expert
Hey there! Boyce here. In the fast-paced world of AI and automation, knowing who you’re learning from is a big deal, right? My own journey into this wild domain kicked off over five years ago. I wasn’t born a tech wizard; I was just super passionate about finding smarter ways to do things, making complex processes simpler, and generally making my life (and work!) more efficient with technology. Think of me as your friendly neighborhood self-taught automation consultant.
I’ve spent countless hours – and probably spilled a few coffees – experimenting with all sorts of automation platforms, hooking up different AI models, and fine-tuning workflows for both my personal projects and professional gigs. This hands-on, roll-up-your-sleeves experience has given me a deep understanding of all the tricky bits involved in getting different systems to talk to each other, especially when it comes to using conversational AI for stuff that actually helps in the real world. My expertise isn’t just theoretical; it’s been forged in the fires of practical implementation, debugging those head-scratching errors, and constantly making things better. This background means that every insight and instruction you find in this guide isn’t just technically sound, but it’s also rooted in real-world application. I’ve probably hit every common challenge you’re about to face, and I’ve got robust solutions ready for you.
So, when you follow this guide, you’re not just getting a list of instructions; you’re tapping into years of dedicated experience in building and optimizing AI-powered automation solutions. This commitment to practical excellence is the bedrock of every single step in this tutorial, making it a super reliable resource for anyone looking to build their own WhatsApp AI assistant. Let’s conquer this together!
Chapter 1: Setting Up Your WhatsApp Trigger in n8n
Alright, let’s kick things off! The very first, absolutely crucial step in building our WhatsApp AI assistant is to create a solid connection between WhatsApp and n8n. Think of it like setting up the doorbell for our AI assistant – when someone messages, the doorbell (our WhatsApp trigger) rings in n8n. This means we’ll be configuring a WhatsApp trigger node within your n8n workflow. This node is going to be the front door for all incoming WhatsApp messages.
Step-by-Step Guide to Setting Up the WhatsApp Trigger:
-
Head to Meta for Developers: First things first, open your browser and navigate to the Meta for Developers platform. If you don’t have an account, you’ll need to create one. This is where Facebook (now Meta) manages all its developer tools, including the WhatsApp Business Platform API that we’ll be using.
-
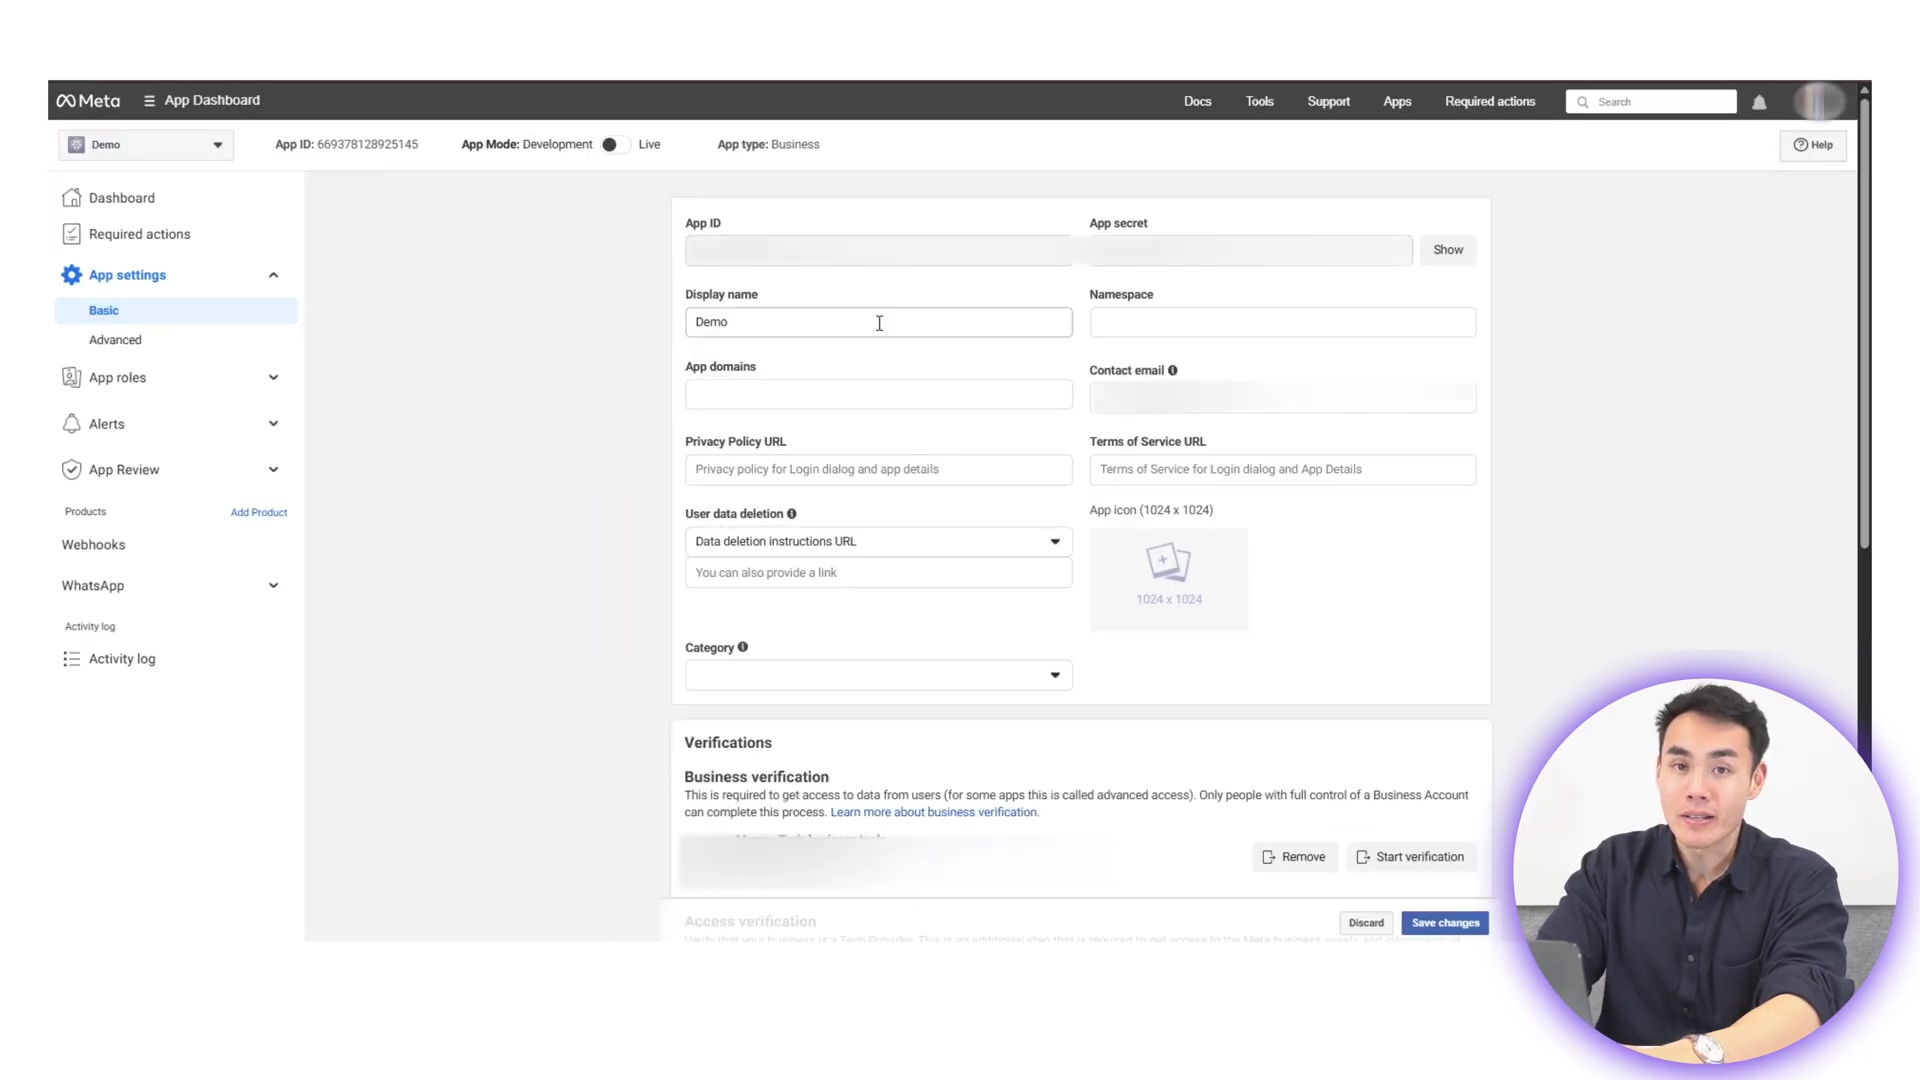
Create a New Application: Once you’re logged in, you’ll need to create a new application. Look for a button like “Create App” or “My Apps” and follow the prompts. Choose the “Business” type for your app. This new app will be the central hub for managing your WhatsApp integration.
-
Grab Your App ID and App Secret: After creating your app, go to its Basic Settings. Here, you’ll find your App ID and App Secret. These are like the username and password for your app to talk to Meta’s services. Copy these securely! You’ll need them for n8n. Seriously, treat them like gold – don’t share them publicly!
-
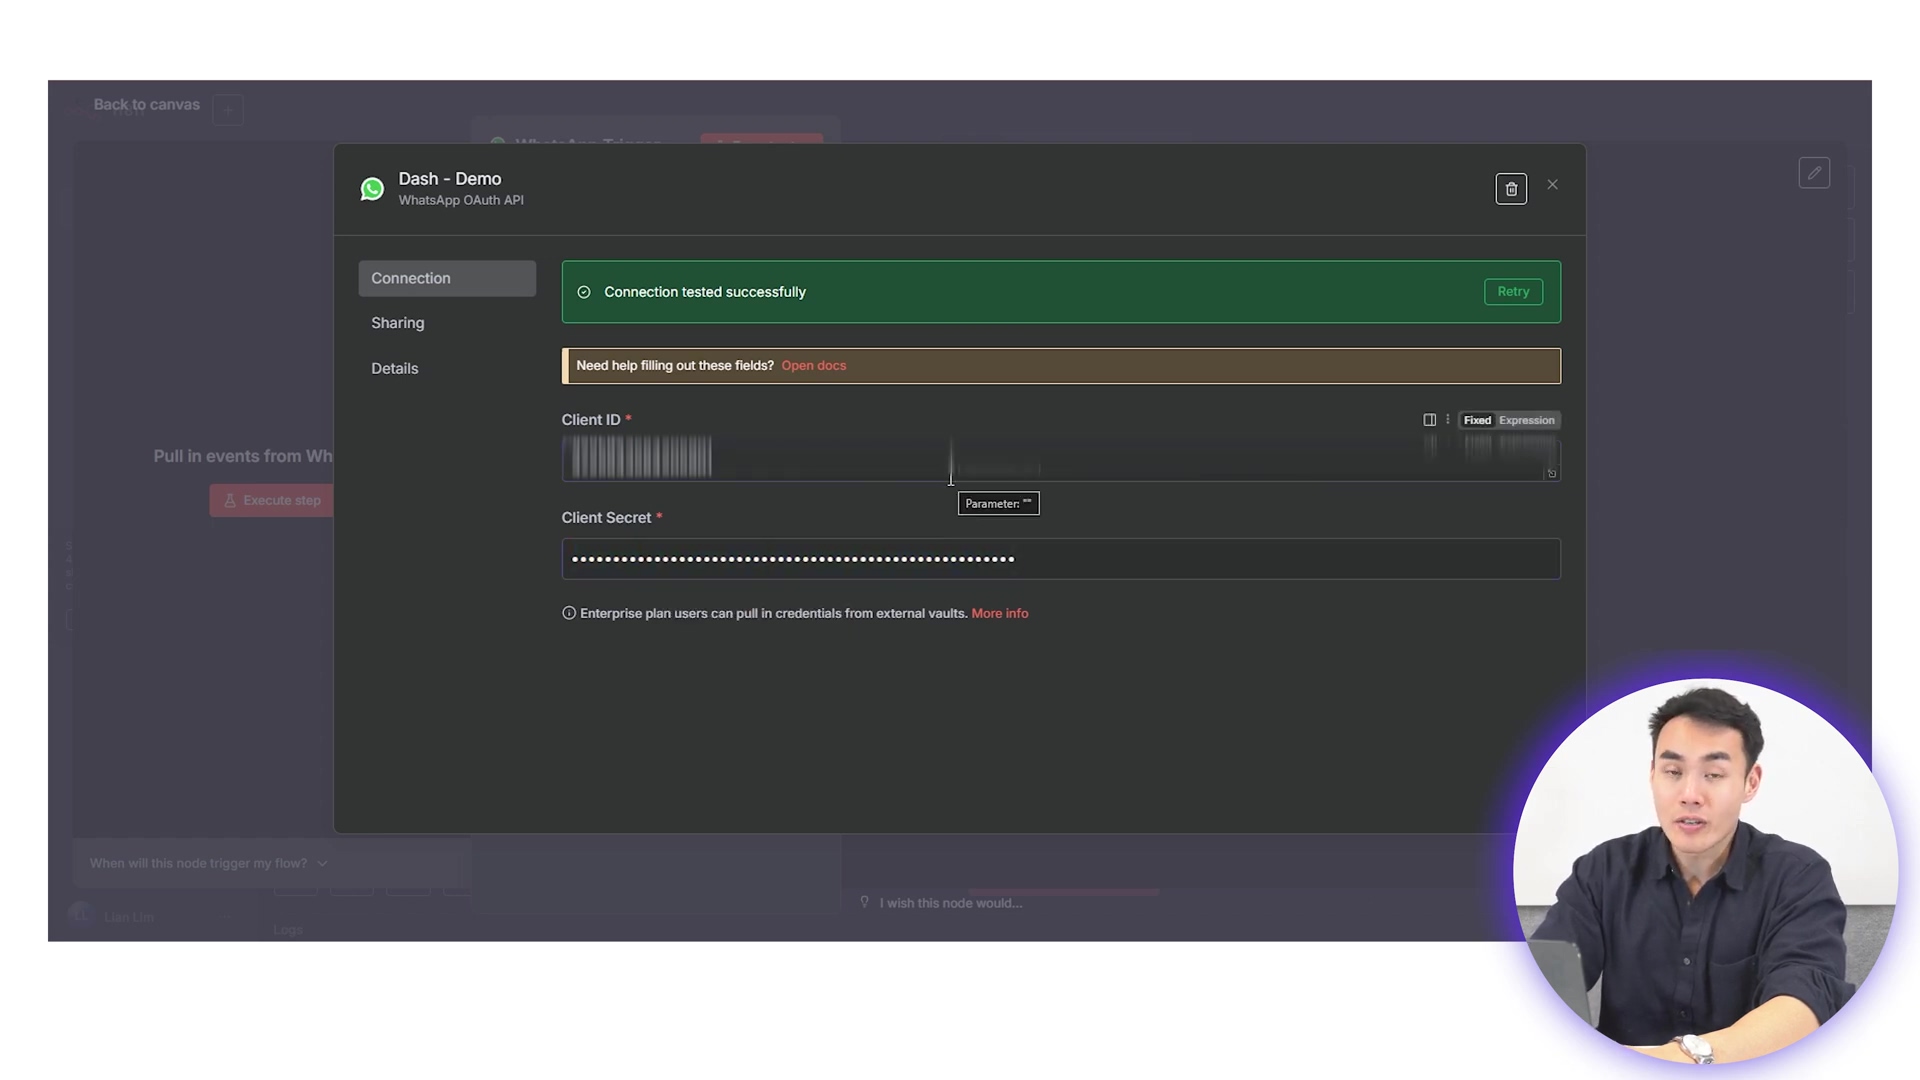
Set Up WhatsApp API: Now, within your Meta for Developers app, navigate to the WhatsApp API setup section. You might need to add the “WhatsApp” product to your app first. Here, you’ll generate a temporary access token. This token, along with your App ID and App Secret, will be used to create new WhatsApp credentials directly within n8n. This temporary token is great for testing, but for a production setup, you’d want to look into a permanent token.
Boyce’s Pro Tip: It’s highly recommended to connect your WhatsApp to a dedicated Meta Business App rather than using your personal WhatsApp account. Why? This keeps the phone number you’re using for automation completely separate. It prevents any weird interference with your day-to-day messaging and keeps your personal chats private. Trust me, you don’t want your AI assistant accidentally replying to your mom!
-
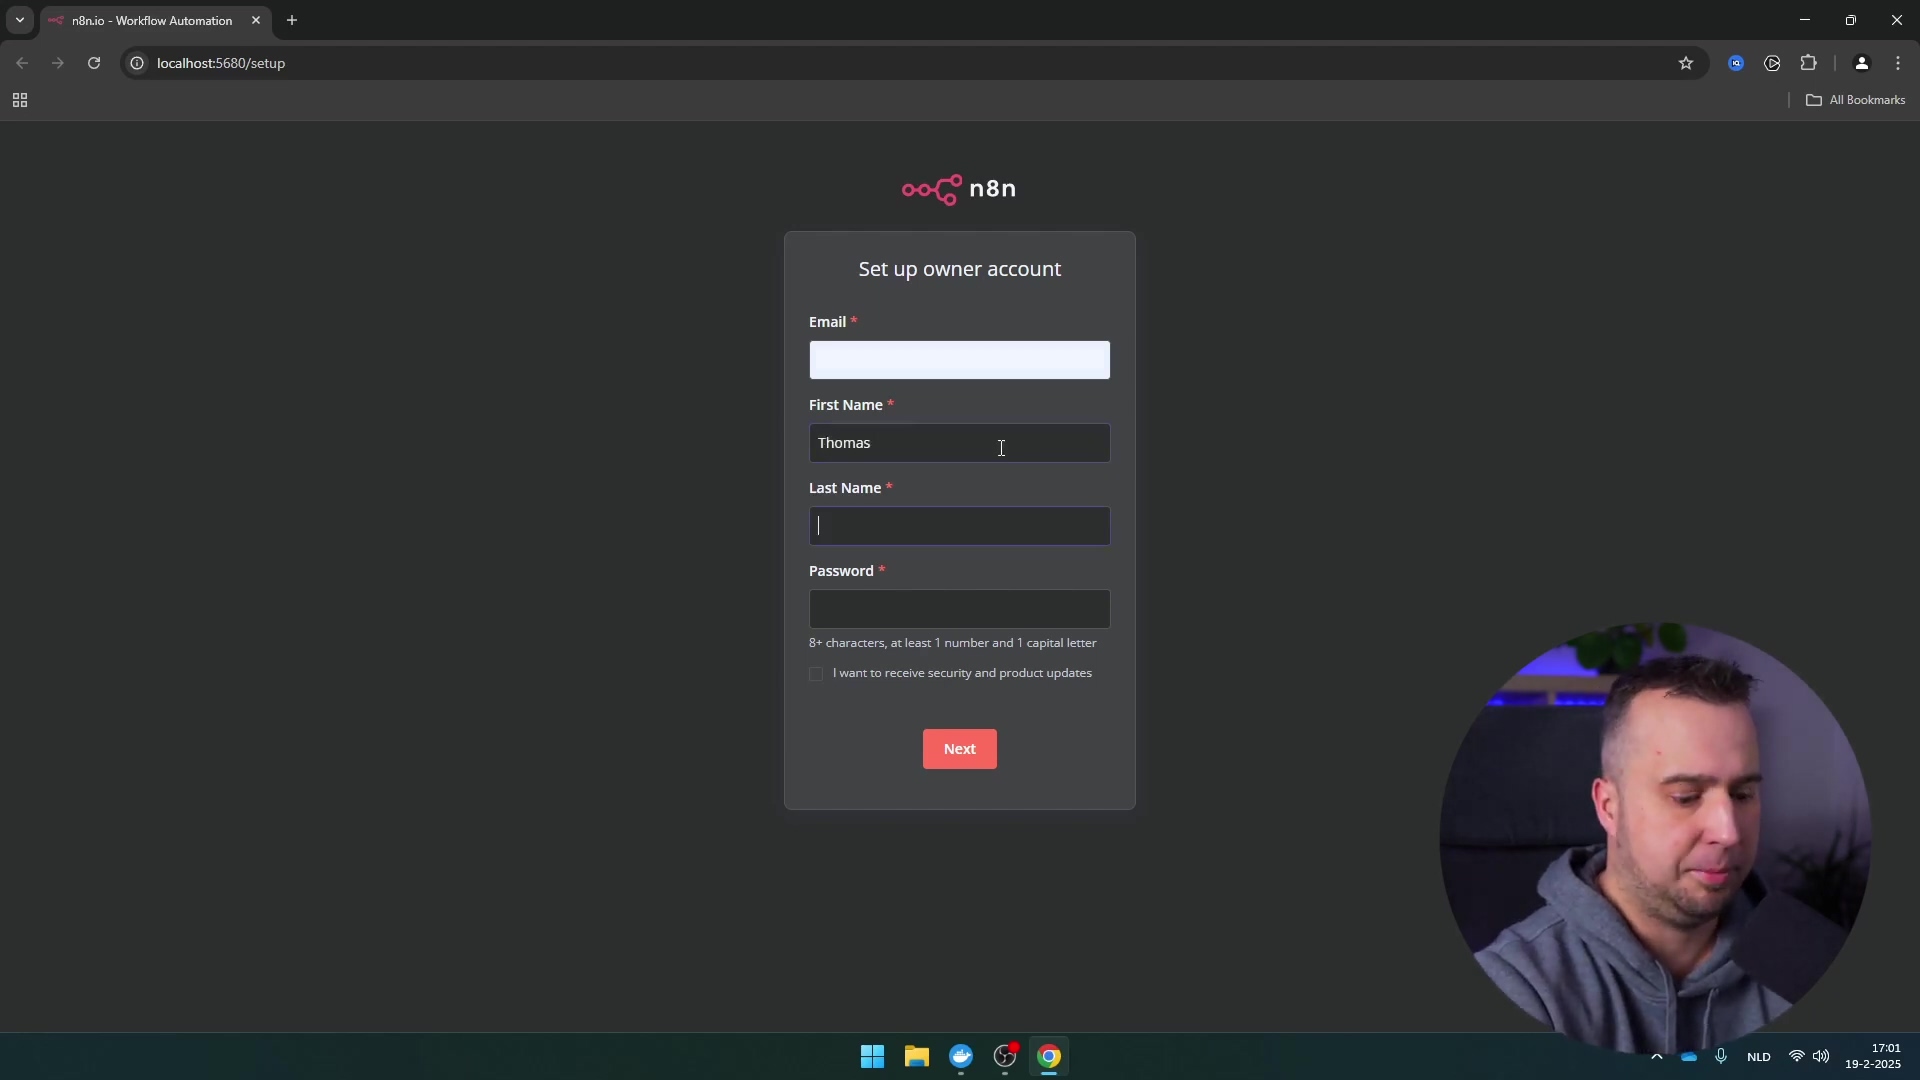
Configure Credentials in n8n: Now, jump over to your n8n instance. In the credentials section (usually found in the left sidebar or when you add a new node), create new WhatsApp credentials. You’ll paste in the App ID, App Secret, and that temporary access token you just got from Meta.
-
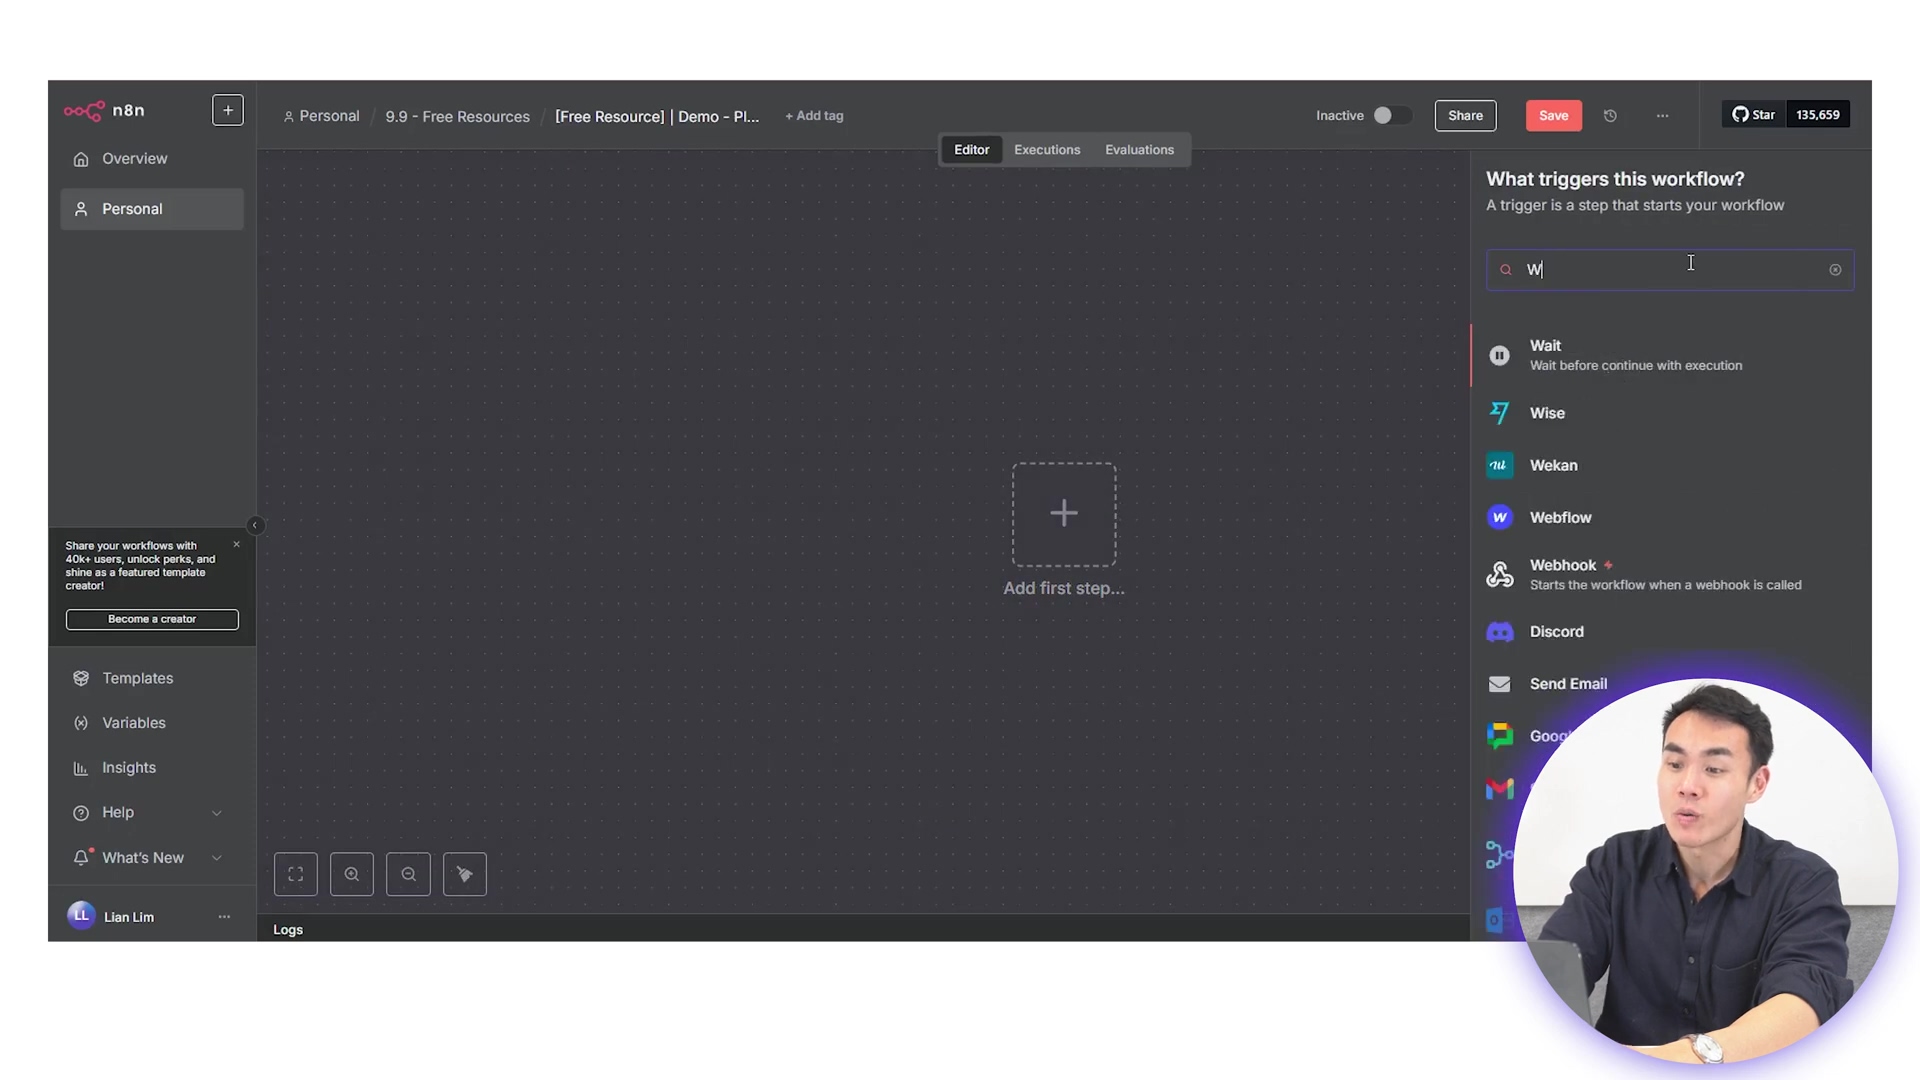
Add and Configure the WhatsApp Trigger Node: Drag and drop a “WhatsApp Trigger” node onto your n8n canvas. In its settings, select the new WhatsApp credentials you just created. You’ll also need to configure the Webhook URL from n8n into your Meta for Developers setup. Meta will send messages to this URL.
-
Test Your Setup: This is the moment of truth! Send a test message from your personal WhatsApp to the designated WhatsApp number you’ve linked to your Meta Business App. If everything is set up correctly, you should see the incoming message data pop up in your n8n workflow’s WhatsApp Trigger node. This confirms that the connection is active and ready for our AI magic!
This initial setup is absolutely critical, my friends. It’s the backbone of all our subsequent AI interactions. If this isn’t humming along, nothing else will. So, take your time, double-check everything, and make sure that trigger is firing!
Chapter 2: Intelligent Message Routing with the Switch Node
Alright, you’ve got messages flowing into n8n from WhatsApp – nailed it! Now, what if someone sends you a text message, but then five minutes later, they send an audio note? We need our AI assistant to be smart enough to handle both, right? That’s where the Switch node comes in, and let me tell you, it’s super handy. Think of the Switch node as a traffic controller for your workflow.
It lets you create different paths, or “branches,” in your workflow. We’ll use it to direct messages to specific processing routes based on what kind of message they are. For example, plain old text messages can go down one path for direct AI processing, while audio messages can be routed down a different path. Why? Because audio needs to be transcribed first, and we don’t want to waste resources trying to transcribe text!
How to Configure the Switch Node:
-
Identify the Message Type: First, you need to know where n8n tells you the message type. After your WhatsApp trigger fires with a test message, look at its output (the JSON data). You’ll typically find this information nested under the
messagesobject and then thetypefield. It might look something like{{ $json.messages[0].type }}. This little piece of data is our golden ticket! -
Drag and Drop the Switch Node: Pull a “Switch” node onto your n8n canvas and connect it to the output of your WhatsApp Trigger node.
-
Set Up Routing Rules: In the Switch node’s parameters, you’ll define your rules. You’ll drag and drop that
{{ $json.messages[0].type }}expression into the expression bar. Then, you’ll set up conditions. For instance:- Rule 1: If
{{ $json.messages[0].type }}is equal to'text', send it down path 1. - Rule 2: If
{{ $json.messages[0].type }}is equal to'audio', send it down path 2.
- Rule 1: If
This segregation of messages early on is a game-changer. It means your AI agent can respond consistently and appropriately, no matter if the input is typed or spoken. By sending messages down the right path, we optimize our resource usage. An audio message needs to be downloaded and transcribed, but doing that for a text message would be totally unnecessary and inefficient. The Switch node provides this essential logic, making our AI assistant versatile and robust enough to handle all sorts of user inputs. Pretty clever, right?
Chapter 3: Integrating AI for Dynamic Responses (HTTP Request & AI Agent Nodes)
Alright, this is where the real magic happens! Integrating artificial intelligence is the absolute core of turning your WhatsApp into a truly smart assistant. This chapter is all about hooking up to AI services for those dynamic, intelligent responses, whether you’re dealing with audio or good old text.
Handling Audio Messages: From Voice to Text
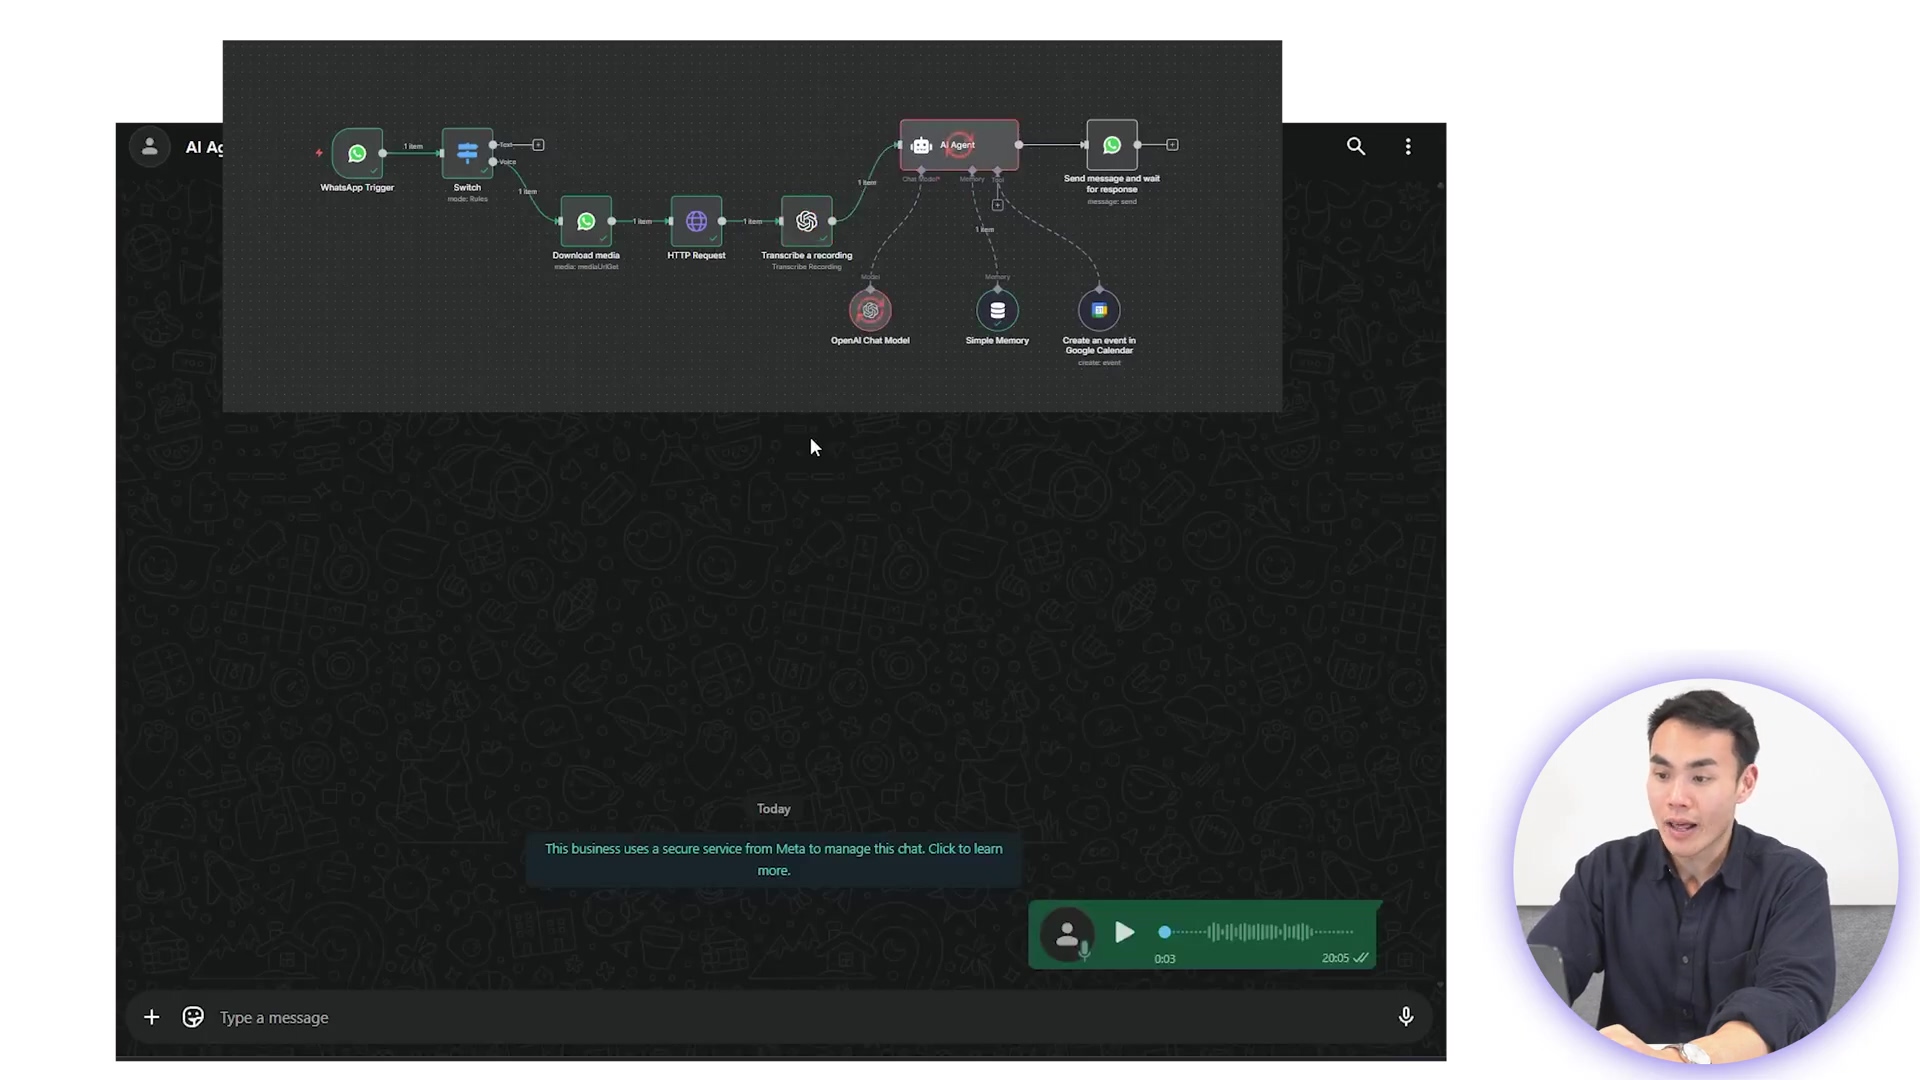
If your message came down the ‘audio’ path from our Switch node, here’s the journey it takes:
-
Download the Audio File: First, you’ll need a ‘Download Media’ node. This node’s job is to grab the actual audio file from WhatsApp’s servers. You’ll map the
audio IDfrom the WhatsApp trigger’s output to this node. This tells it which audio file to fetch. -
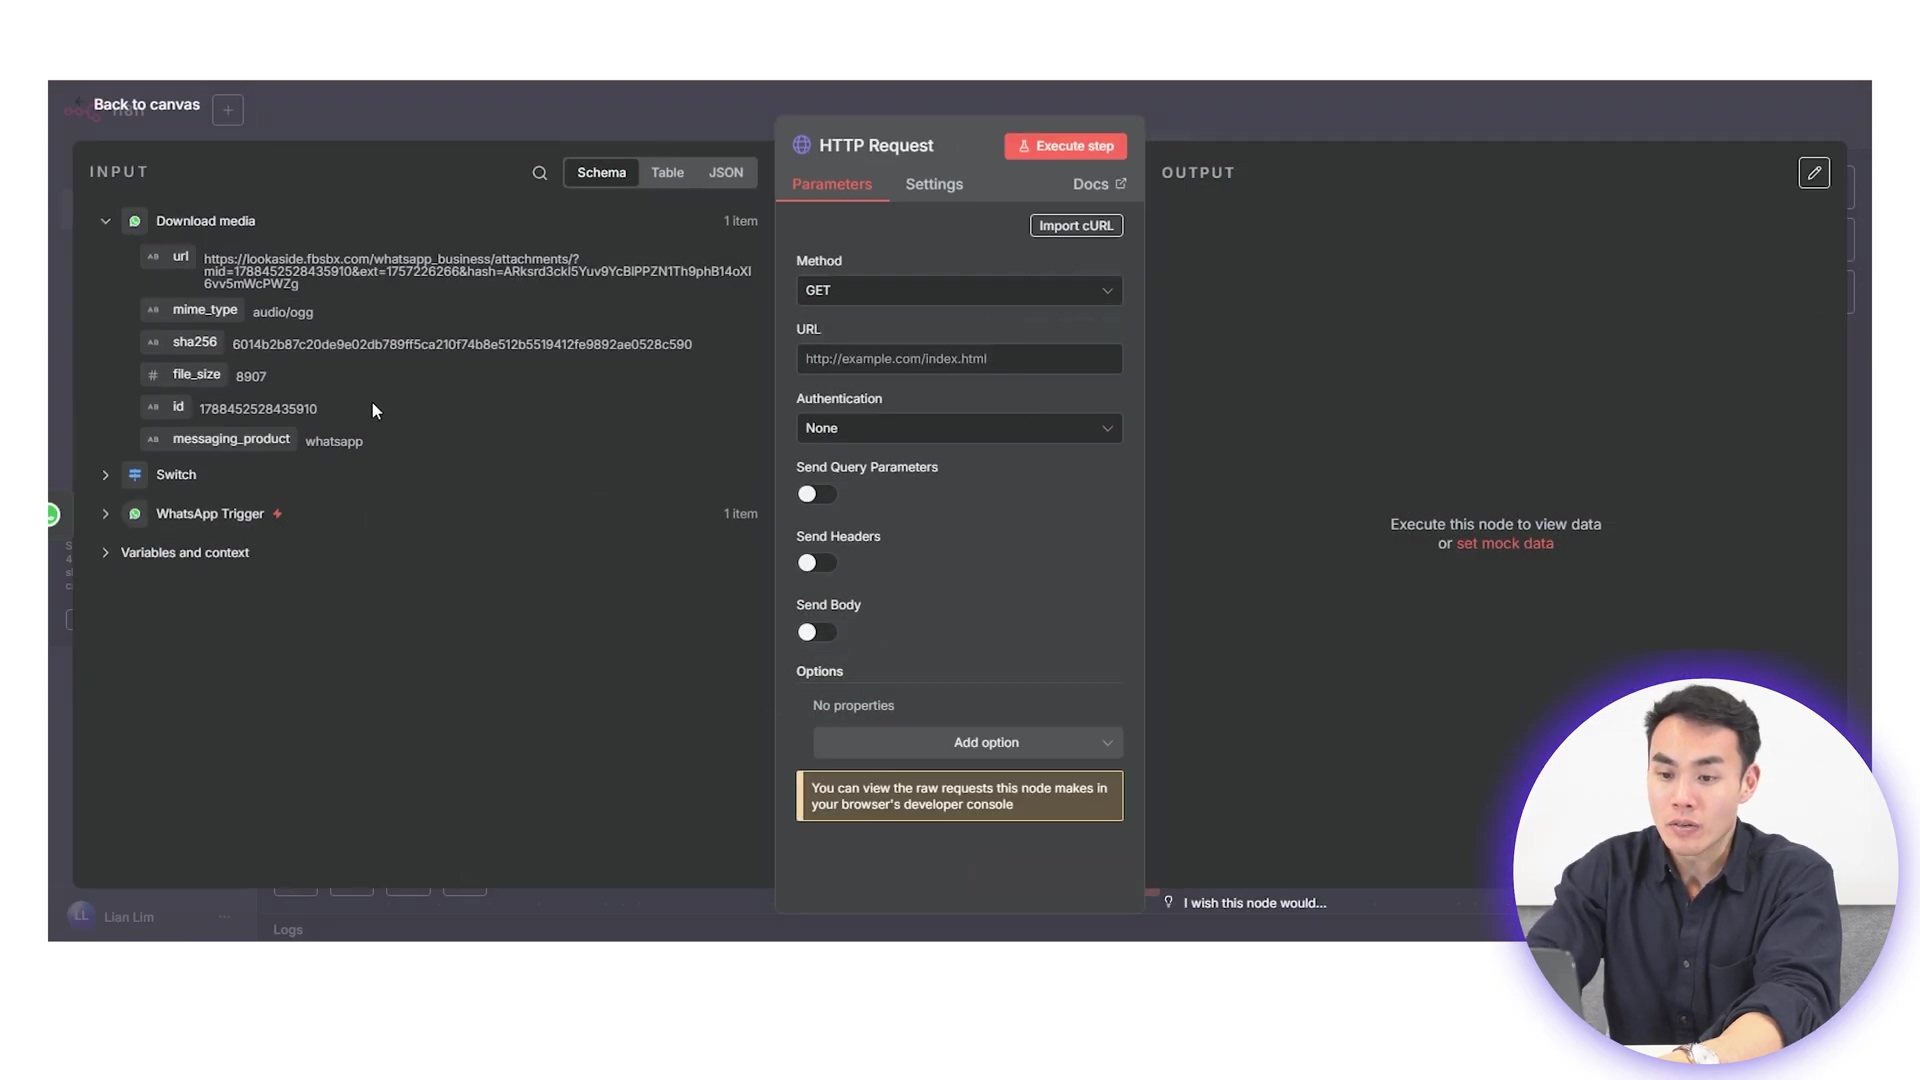
Fetch the Media with HTTP Request: Next up, an HTTP Request node is crucial for actually pulling the media file into your workflow. Configure this node with a
GETmethod. You’ll map themedia URLthat comes out of the ‘Download Media’ node into the URL field of this HTTP Request node.🚨 Super Important Security Step! 🚨 You must add an authorization header here. It should be
'Bearer'followed by your Meta access token (yep, the same one you generated way back in Chapter 1!). This is how WhatsApp knows you’re allowed to download that file. Without it, no audio for you!This step delivers the raw audio file directly into your n8n workflow, ready for the next stage.
-
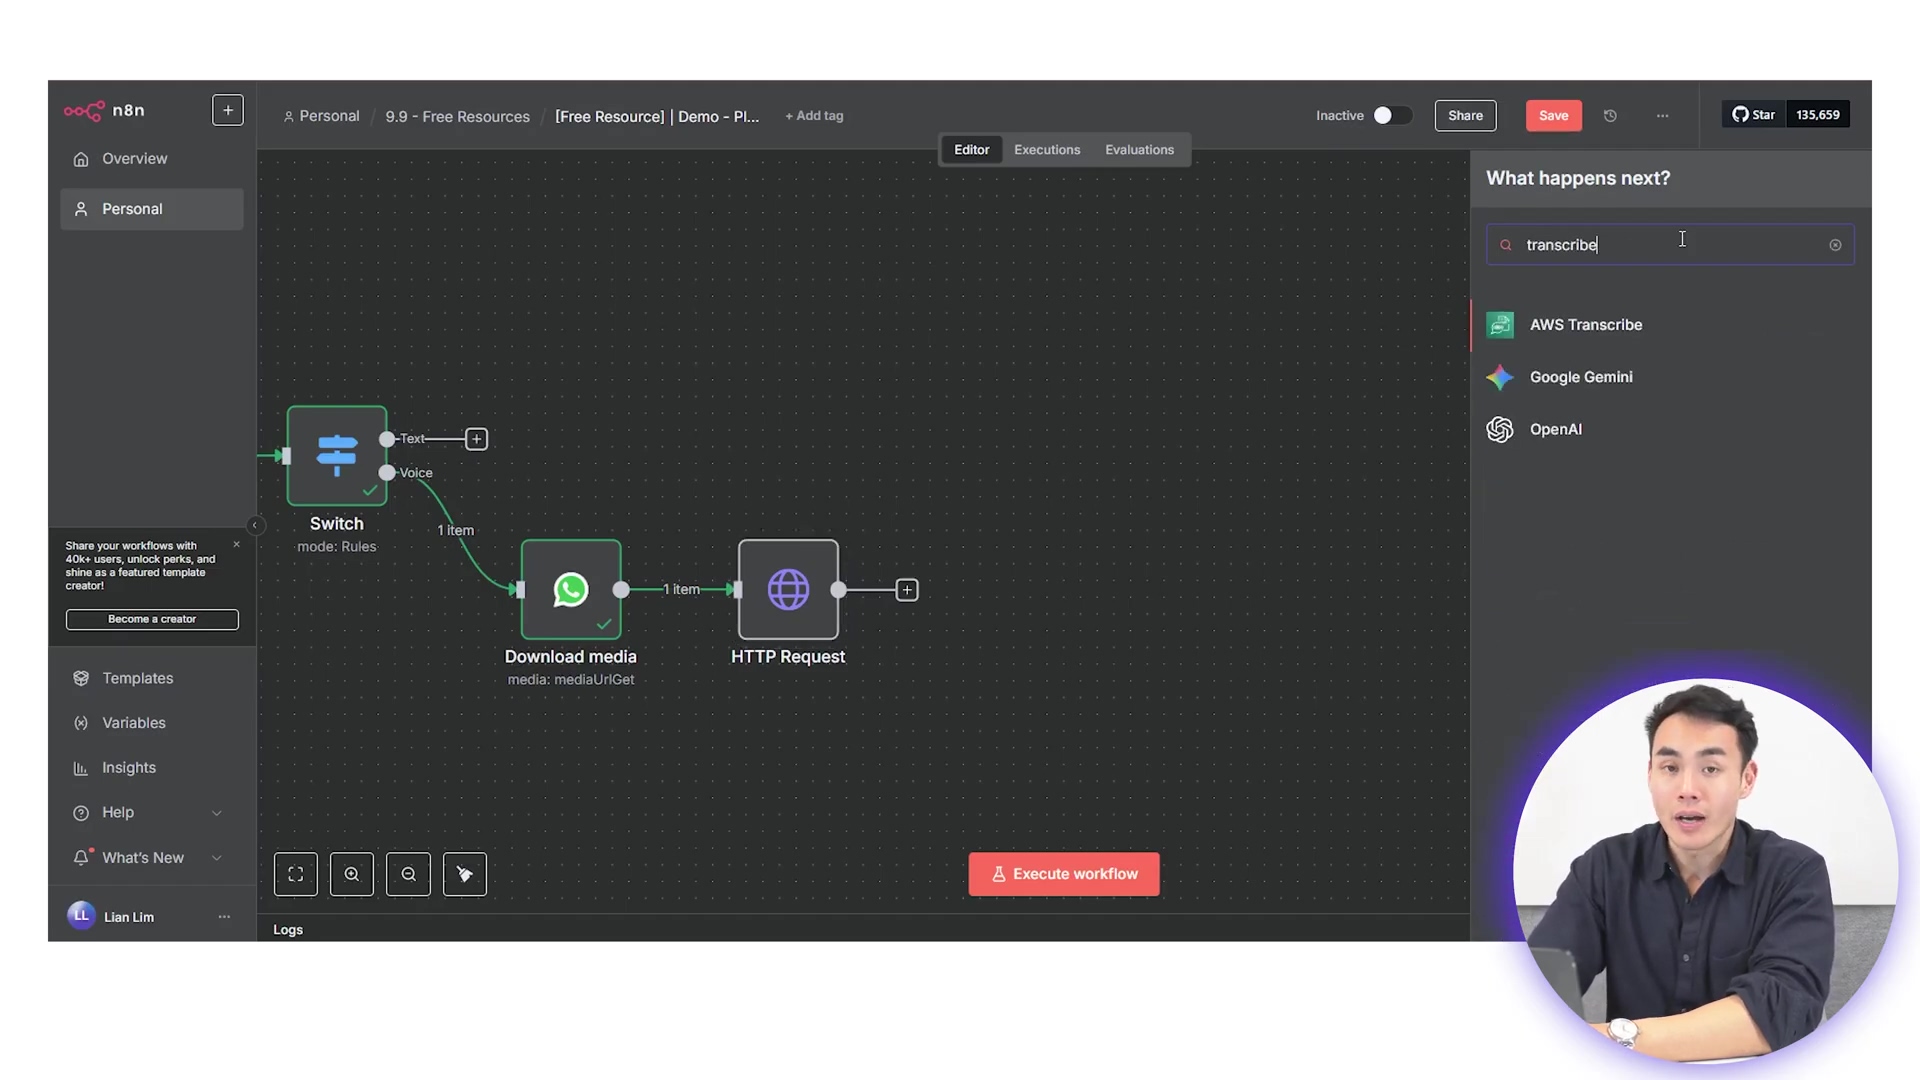
Transcribe with OpenAI’s Whisper: The final step for audio is to feed this raw audio into an ‘OpenAI Transcribe Audio’ node. This node uses OpenAI’s Whisper model, which is seriously impressive at converting spoken words into clean, readable text. This transcription is absolutely vital because our AI agent works best with text.
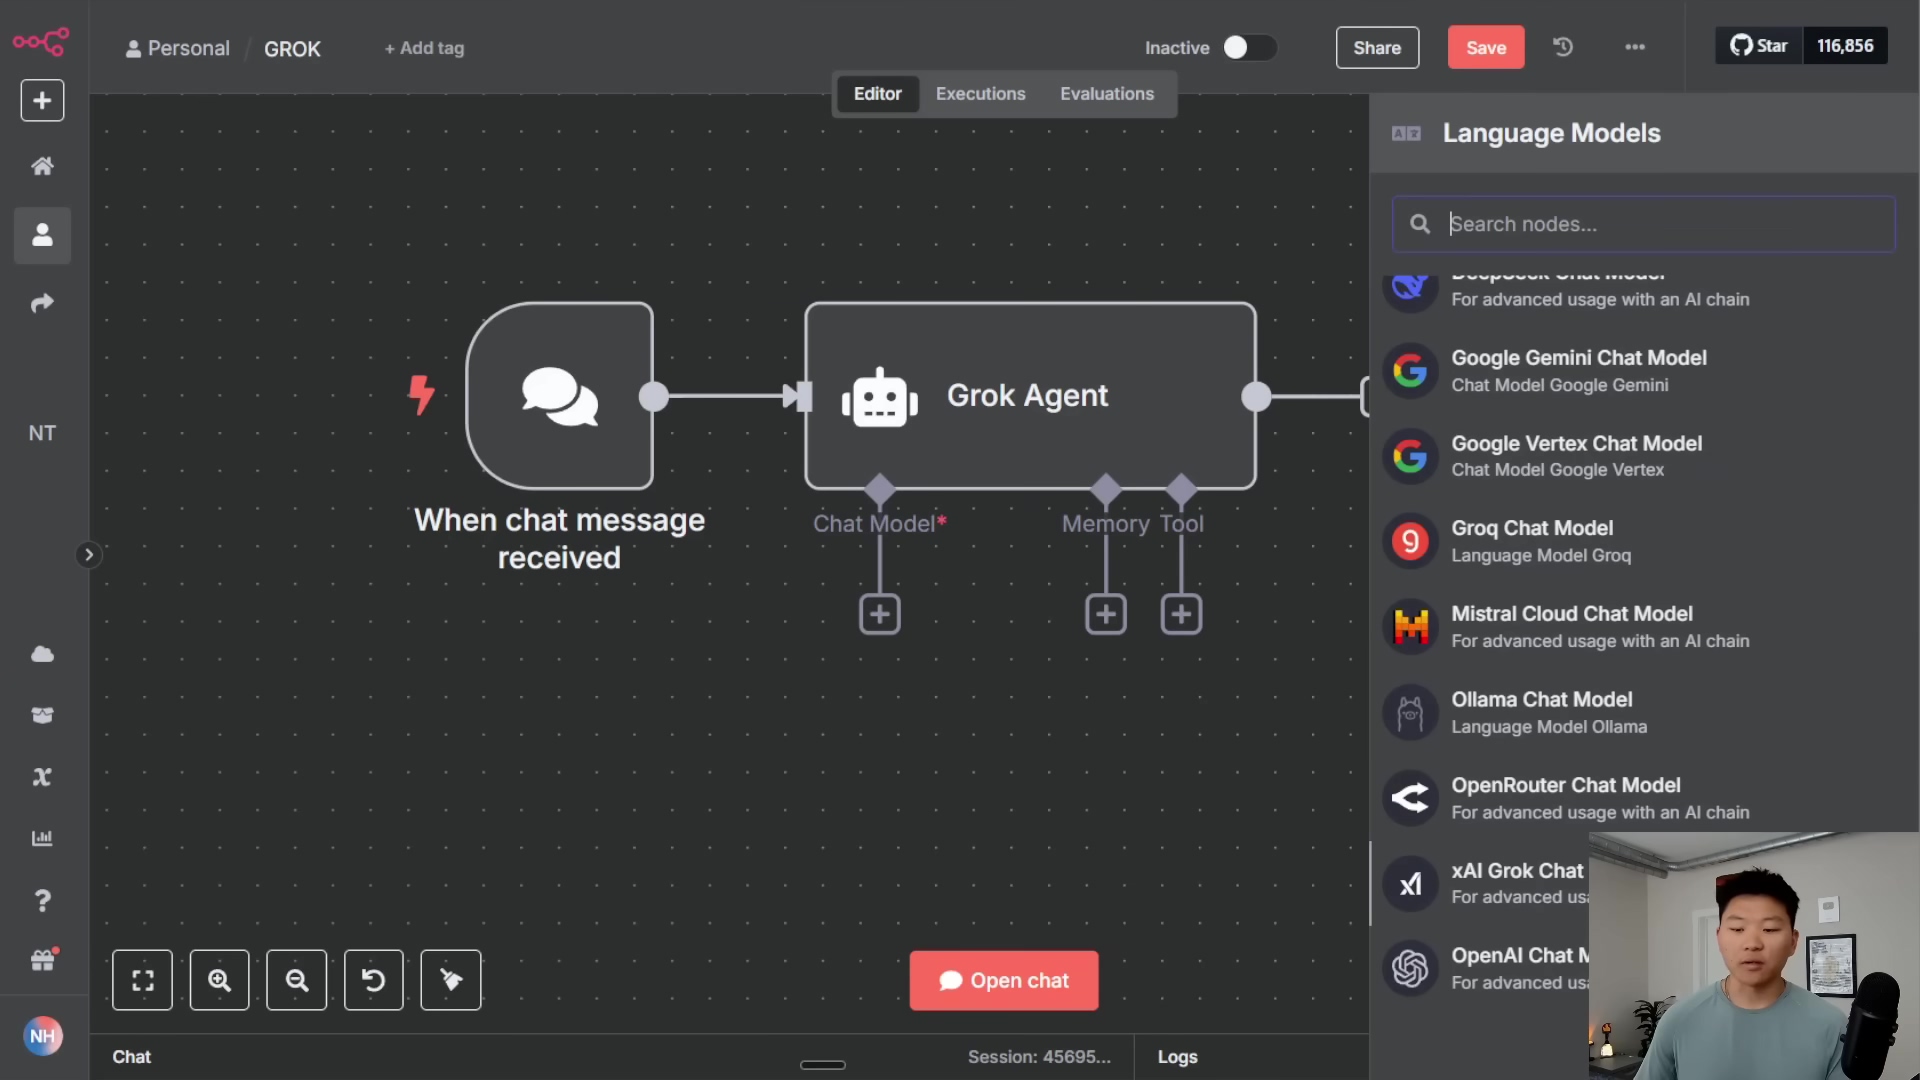
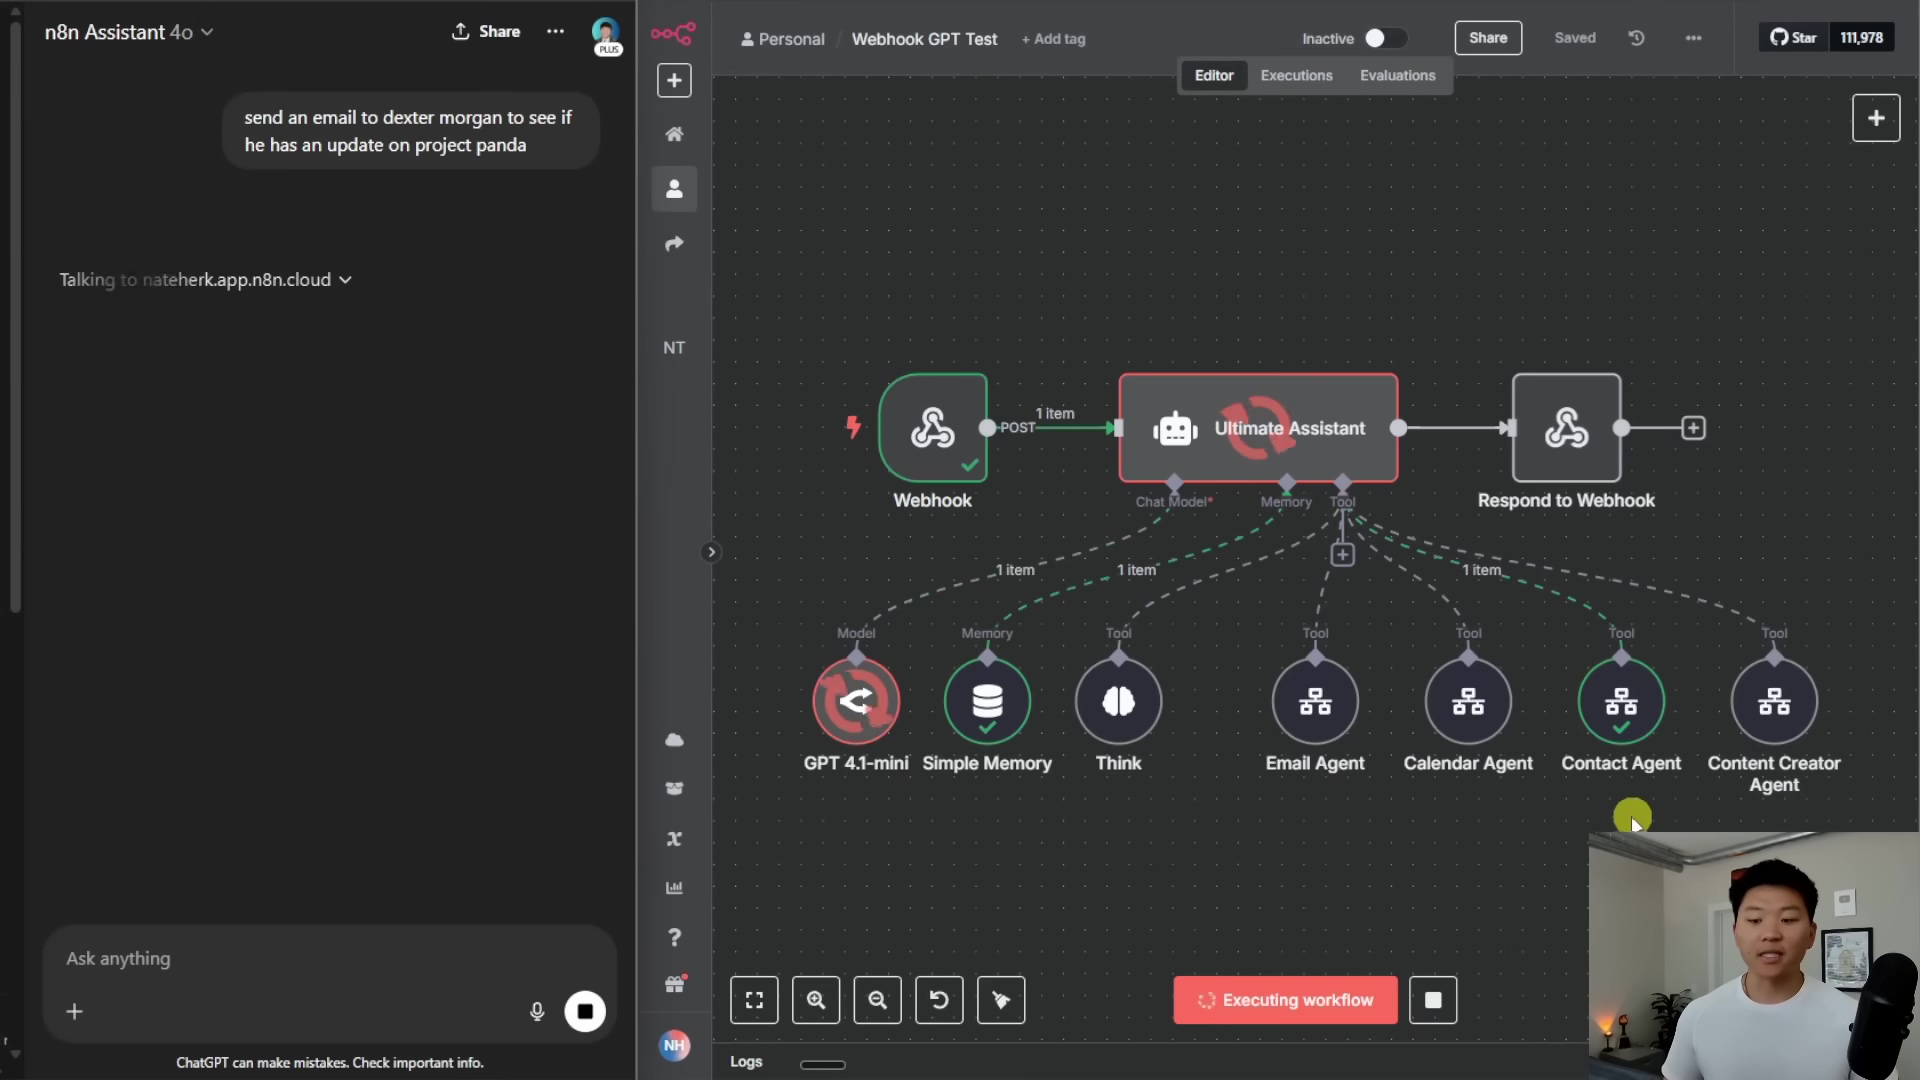
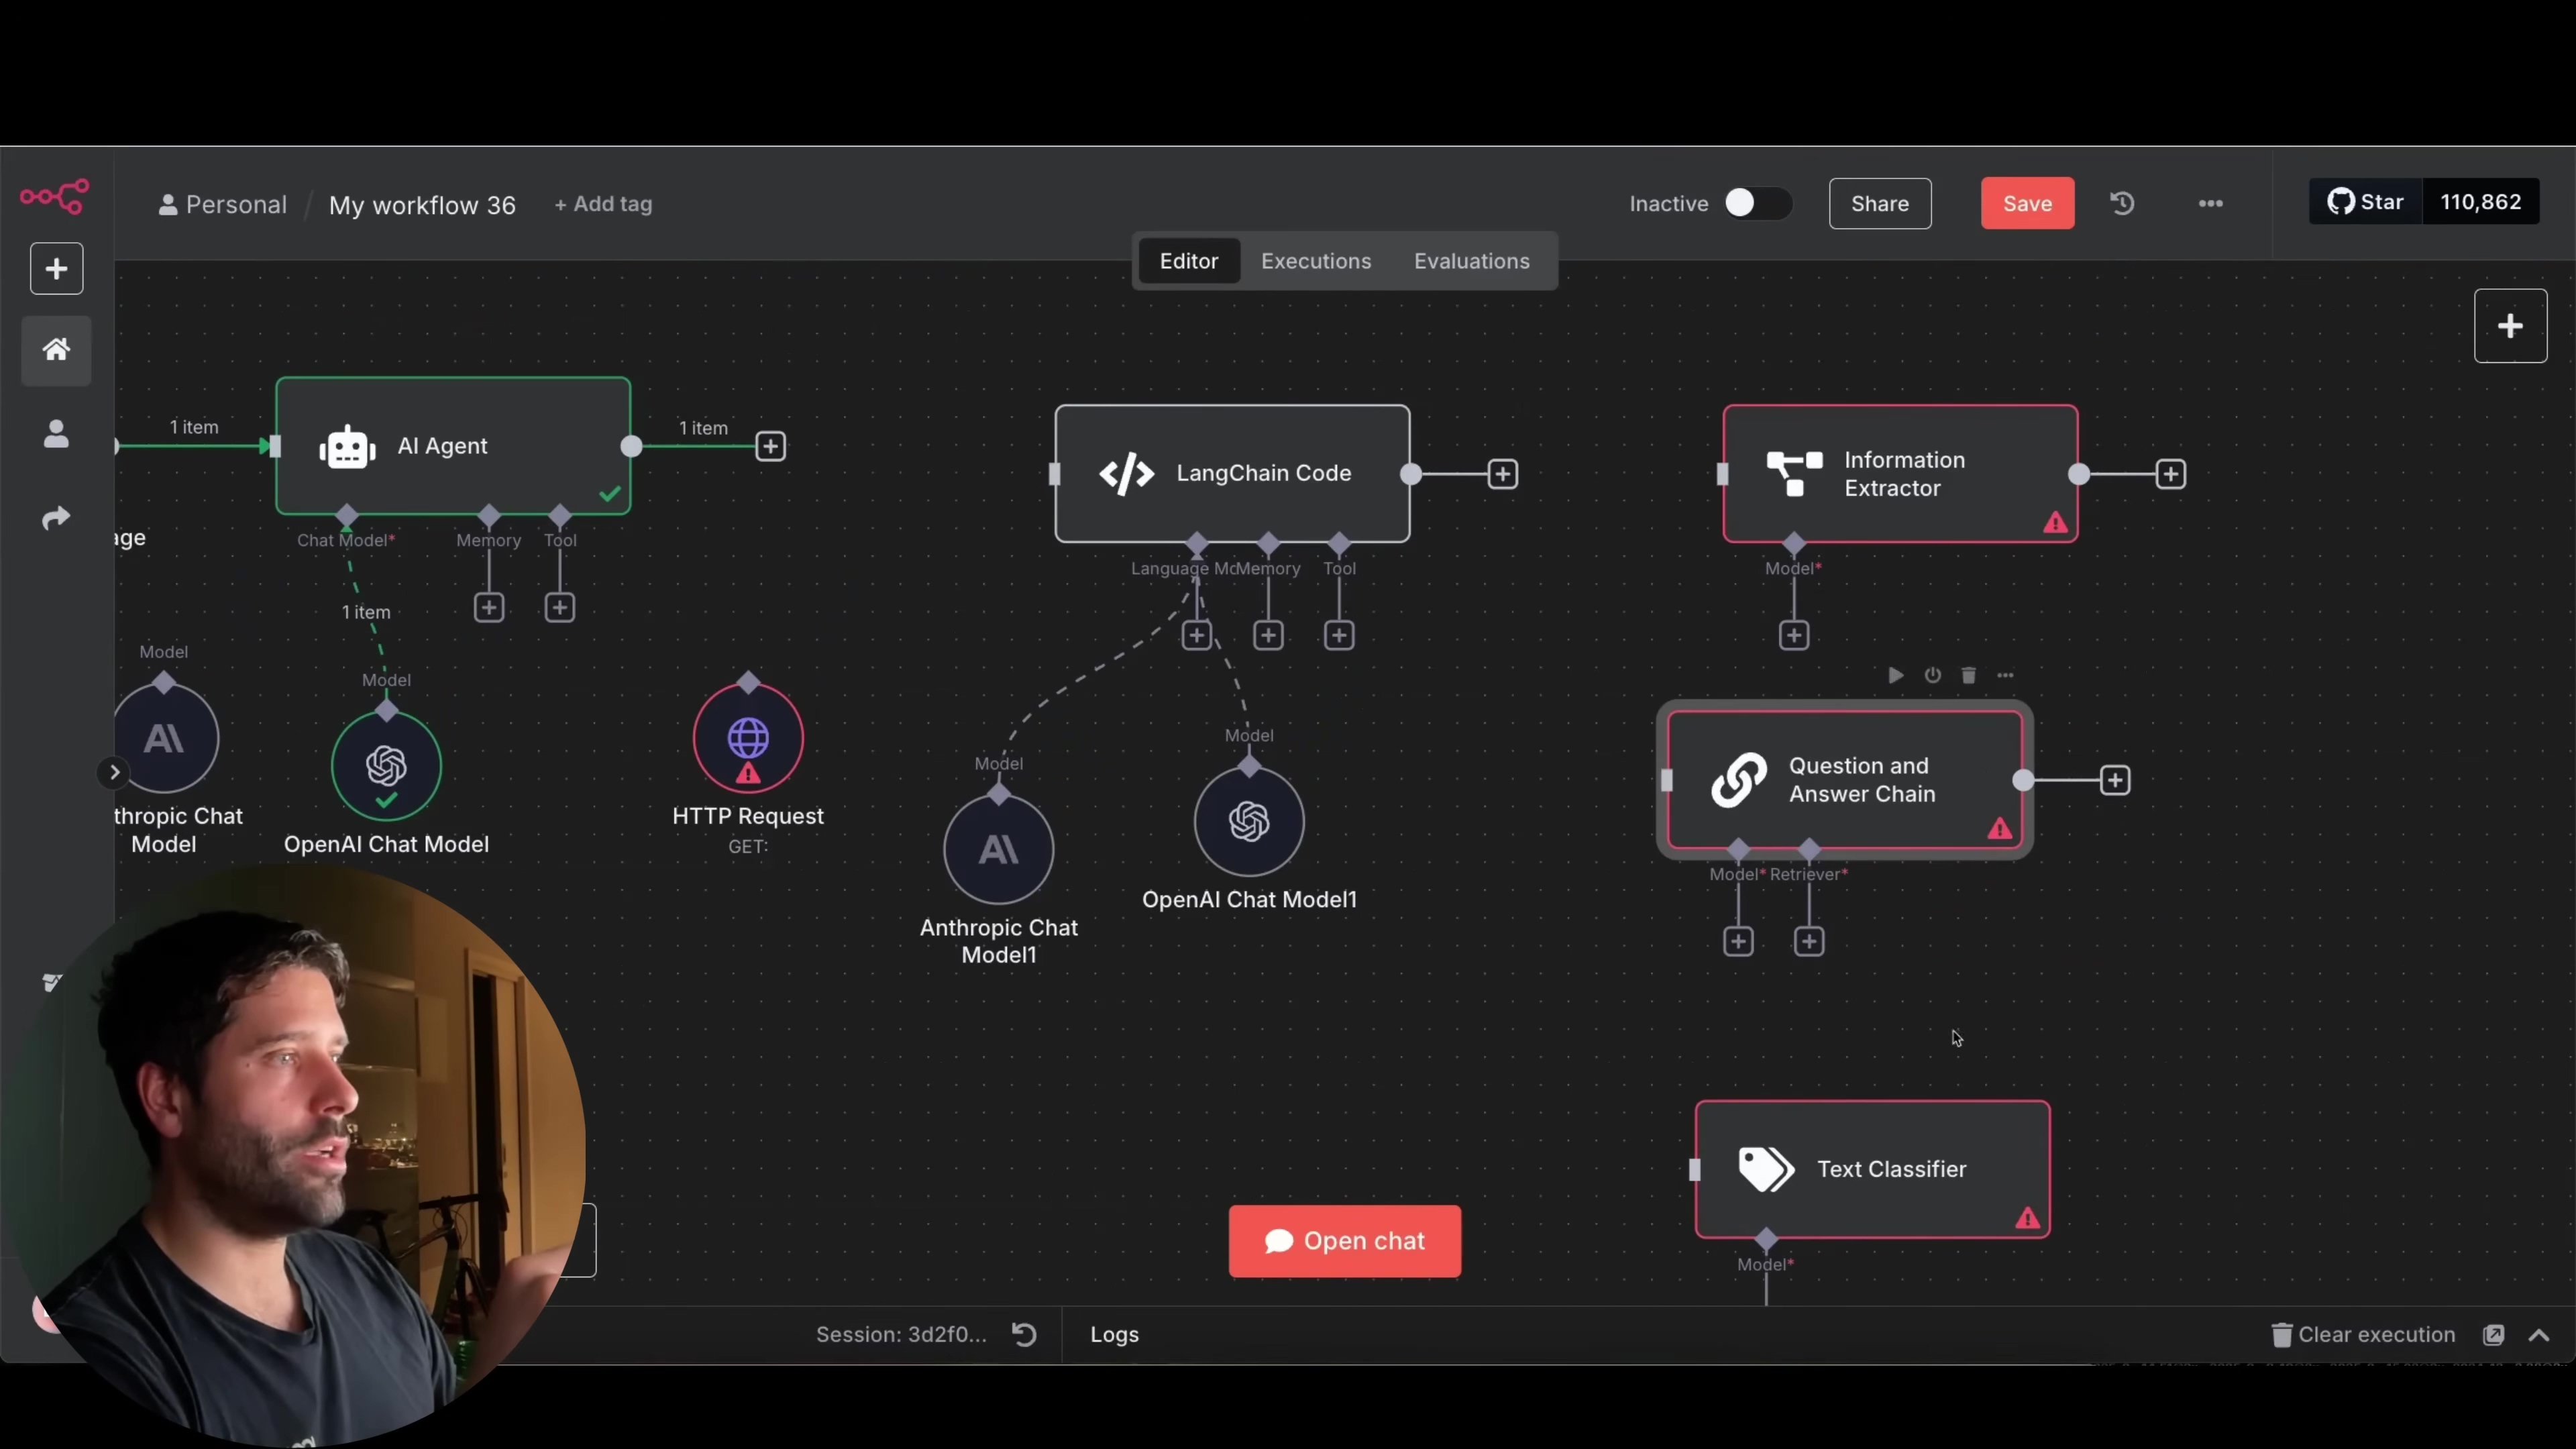
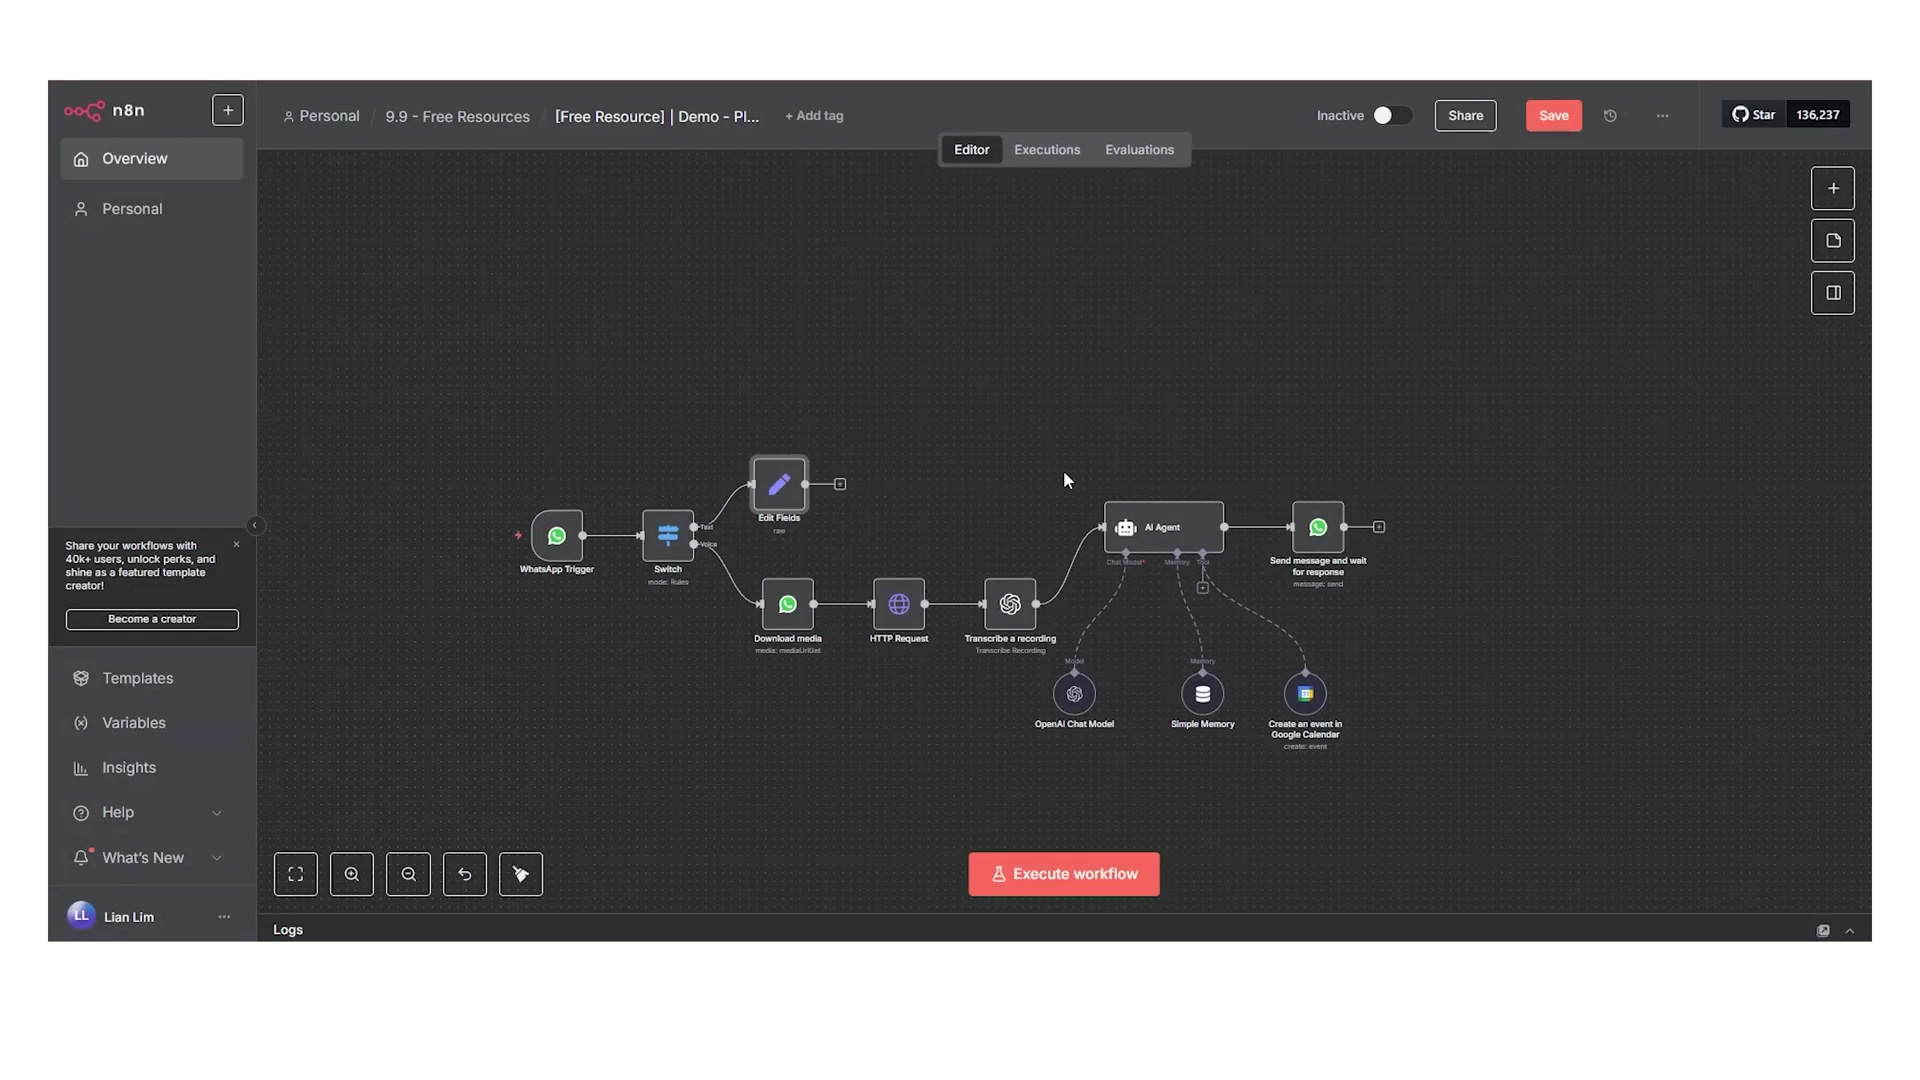
The Brains of the Operation: The AI Agent Node
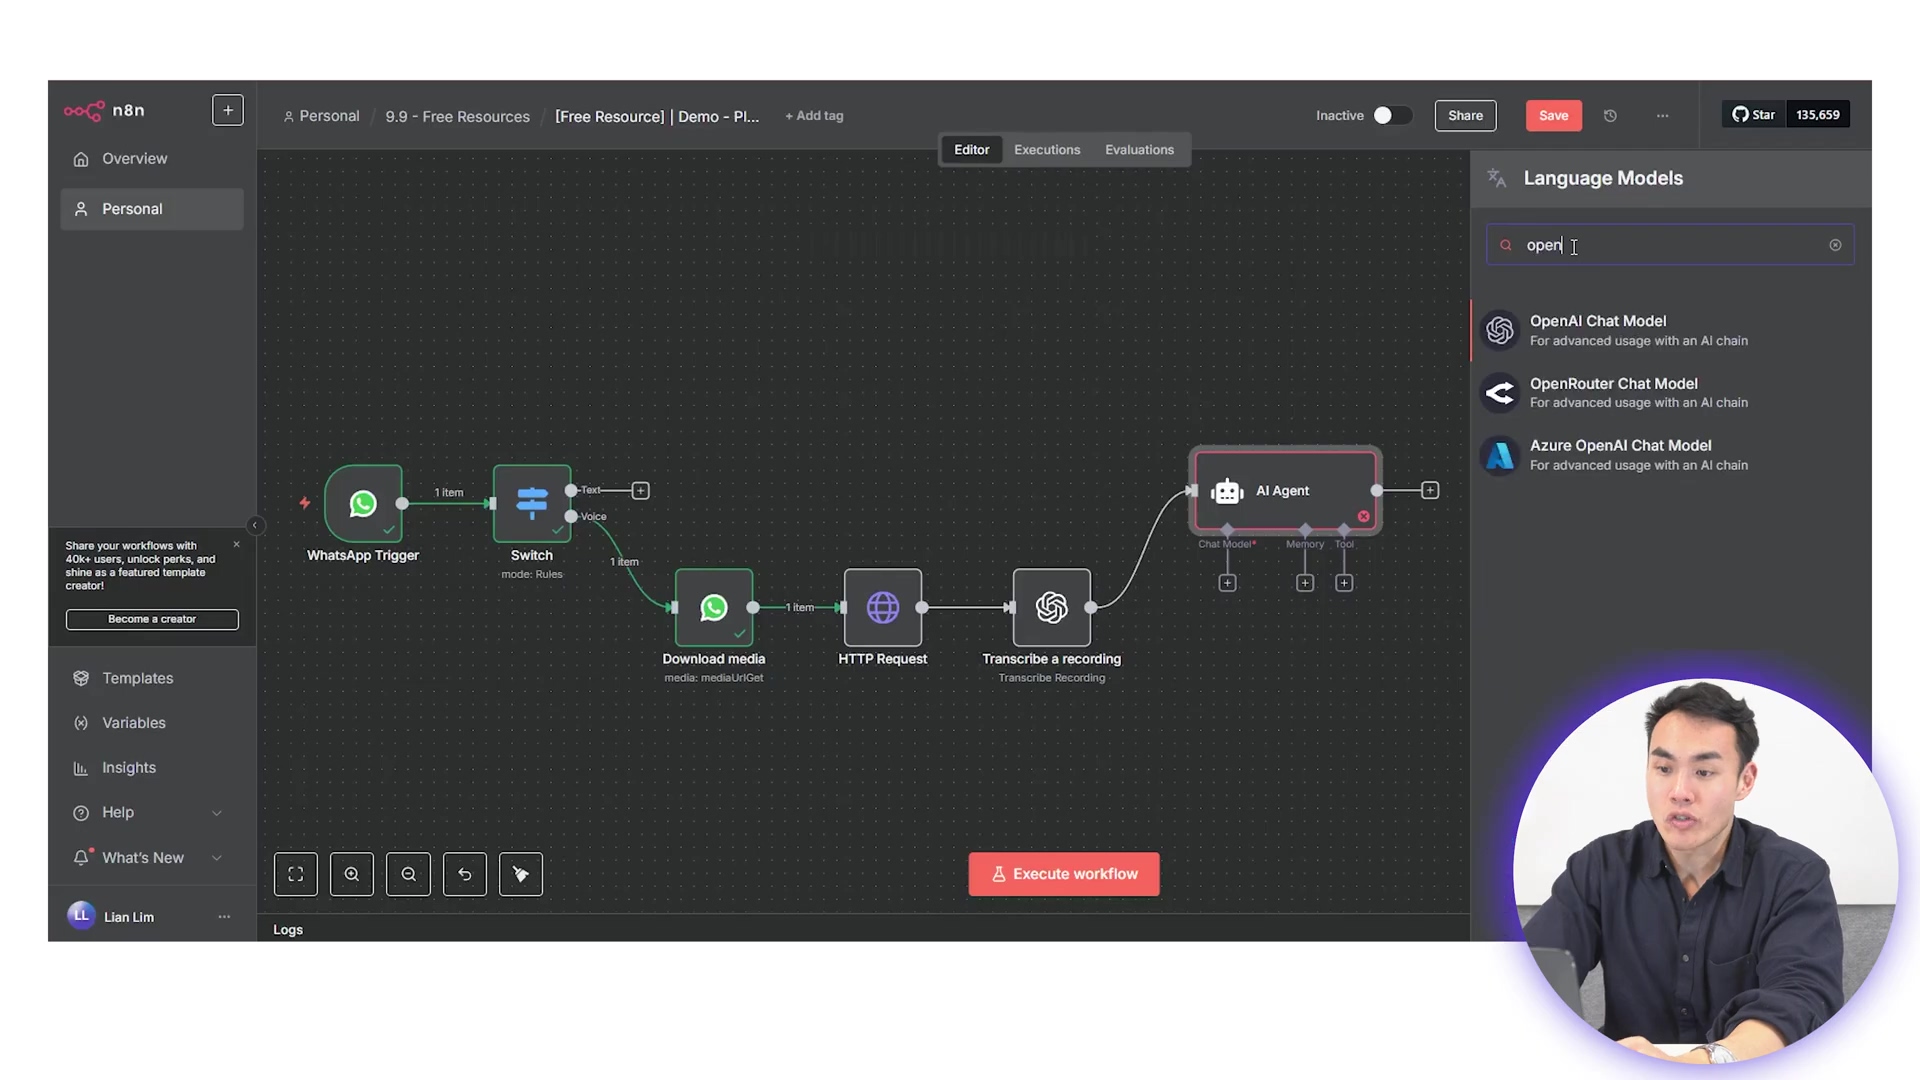
Now, whether you’ve got transcribed audio or direct text input, the ‘AI Agent’ node is where our assistant’s intelligence truly lives. This is its brain!
-
Choose Your AI Model: When setting this up, I highly recommend using a model like GPT-4.1 mini. It’s a fantastic choice because it strikes a great balance between speed and cost-efficiency for conversational AI. You get smart responses without breaking the bank.
-
Enable Memory (Crucial for Conversations!): This is a big one! It’s paramount to enable memory with a session key. What does this mean? It allows your AI agent to remember what you’ve talked about before. Instead of treating every message as a brand new, isolated question, it sees your conversation as a continuous chat. This is absolutely critical for natural, effective dialogue. Without memory, your AI would forget your name after every message, which would be pretty annoying!
-
Crafting the Perfect Prompt (System Message): The prompt for your AI agent is equally, if not more, important. Think of the system message as giving your AI its core personality and instructions. It’s like telling a new employee their job description. Use a well-structured template for this. A carefully framed prompt, often combined with a simple fallback role (e.g., “If you don’t know, say ‘I don’t know’”), ensures consistent results. It keeps the agent focused on its primary tasks (like planning or scheduling) while still being able to handle casual or unexpected questions gracefully.
Such a prompt structure guides the AI to deliver precise and relevant responses, making the whole experience much better for the user. You can often find optimized prompt templates in the video description or community forums – they’re designed to squeeze the most utility and responsiveness out of your agent.
This is where your WhatsApp truly becomes an assistant. It’s not just echoing back what you say; it’s understanding, processing, and responding intelligently. Pretty cool, right?
Chapter 4: Advanced Features - Calendar Integration & Google Cloud Setup
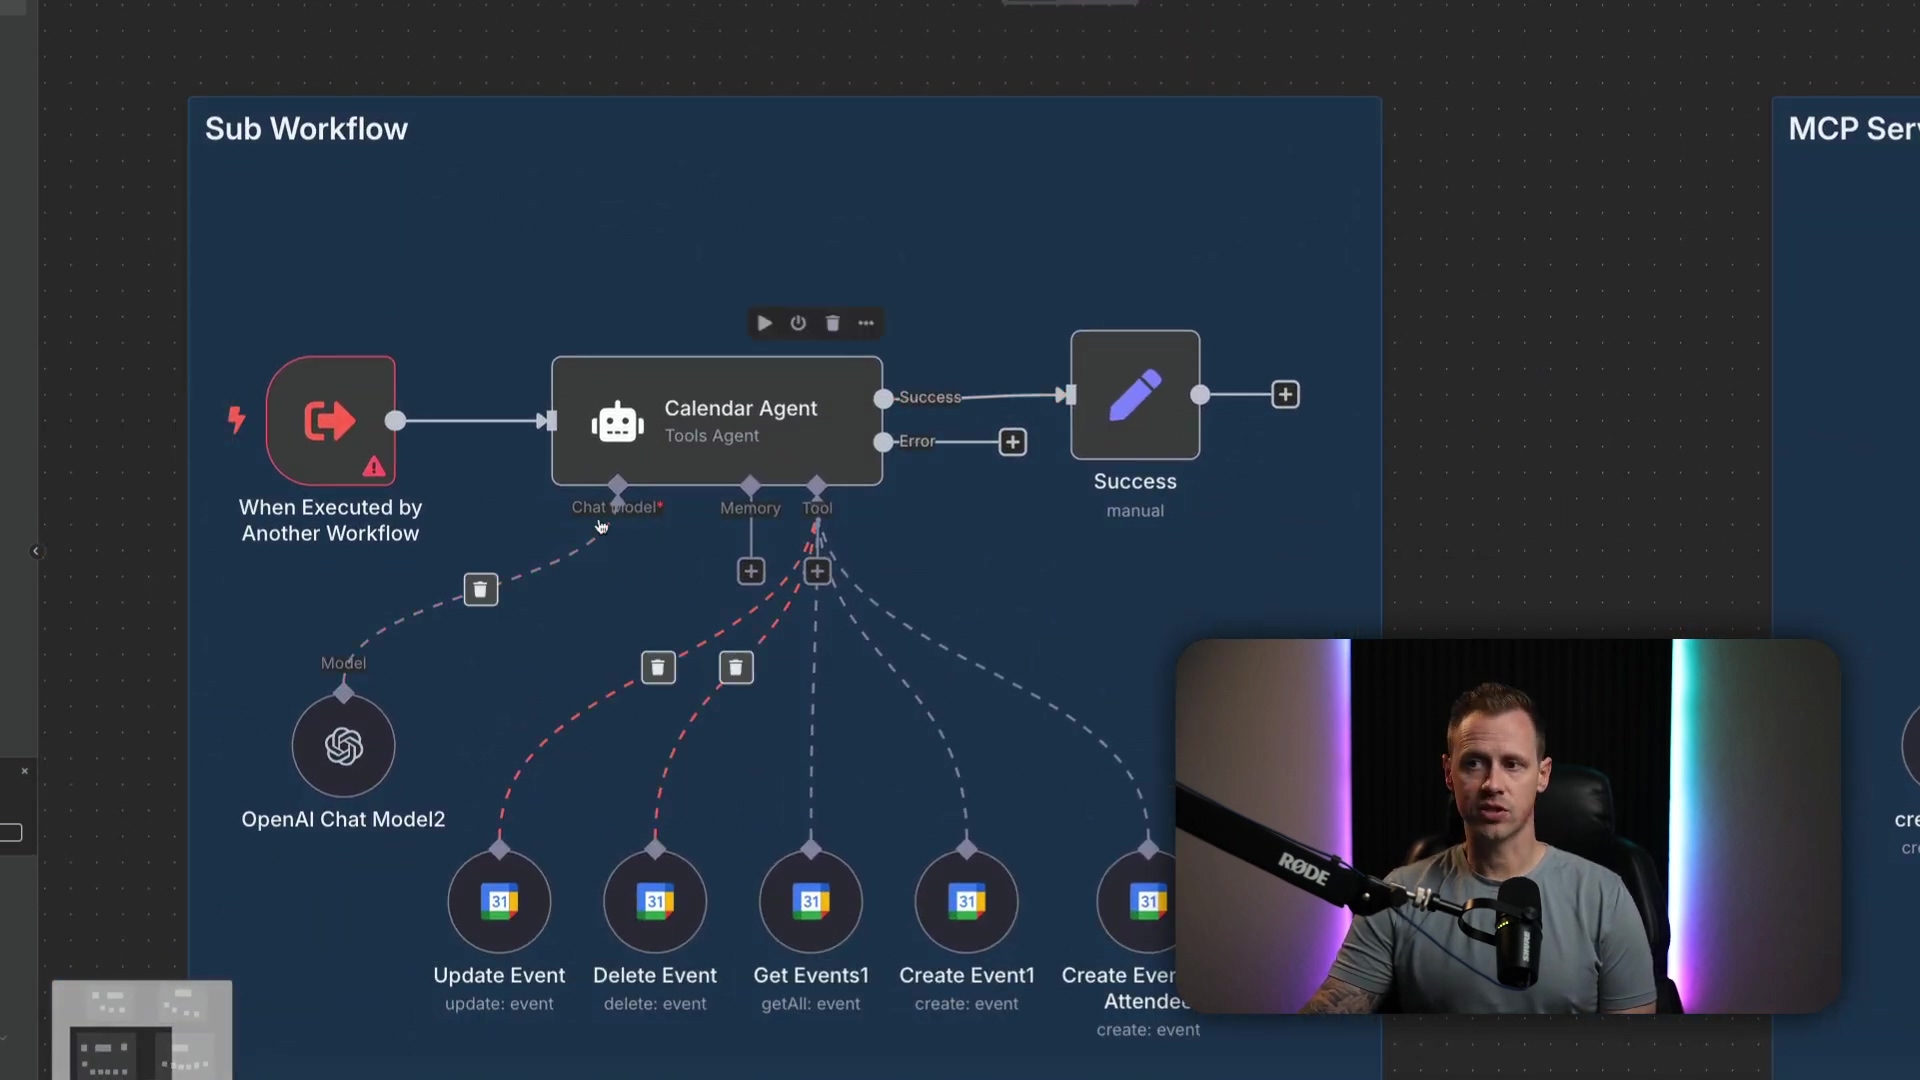
Okay, so we’ve got our AI assistant chatting away, understanding text and audio. But what if we want it to do more? To really elevate our WhatsApp AI assistant beyond just basic conversations, integrating with external services like Google Calendar is absolutely essential. This is how your AI gets superpowers – it can look up upcoming events, create new meetings, or even update your schedule, all directly from your WhatsApp commands!
Connecting Google Calendar to n8n:
-
Add a Google Calendar Node in n8n: First, drag a “Google Calendar” node onto your n8n canvas. Just like with WhatsApp, this needs proper authentication with Google.
-
Head to Google Cloud Console: Open your browser and go to the Google Cloud Console. If you don’t have an account, you’ll need to create one. This is Google’s central hub for managing all its cloud services and APIs.
-
Create a New Project: Inside the Google Cloud Console, create a new project specifically for this integration. Why a new project? It helps keep things organized and secure, isolating your API access for this specific use case.
-
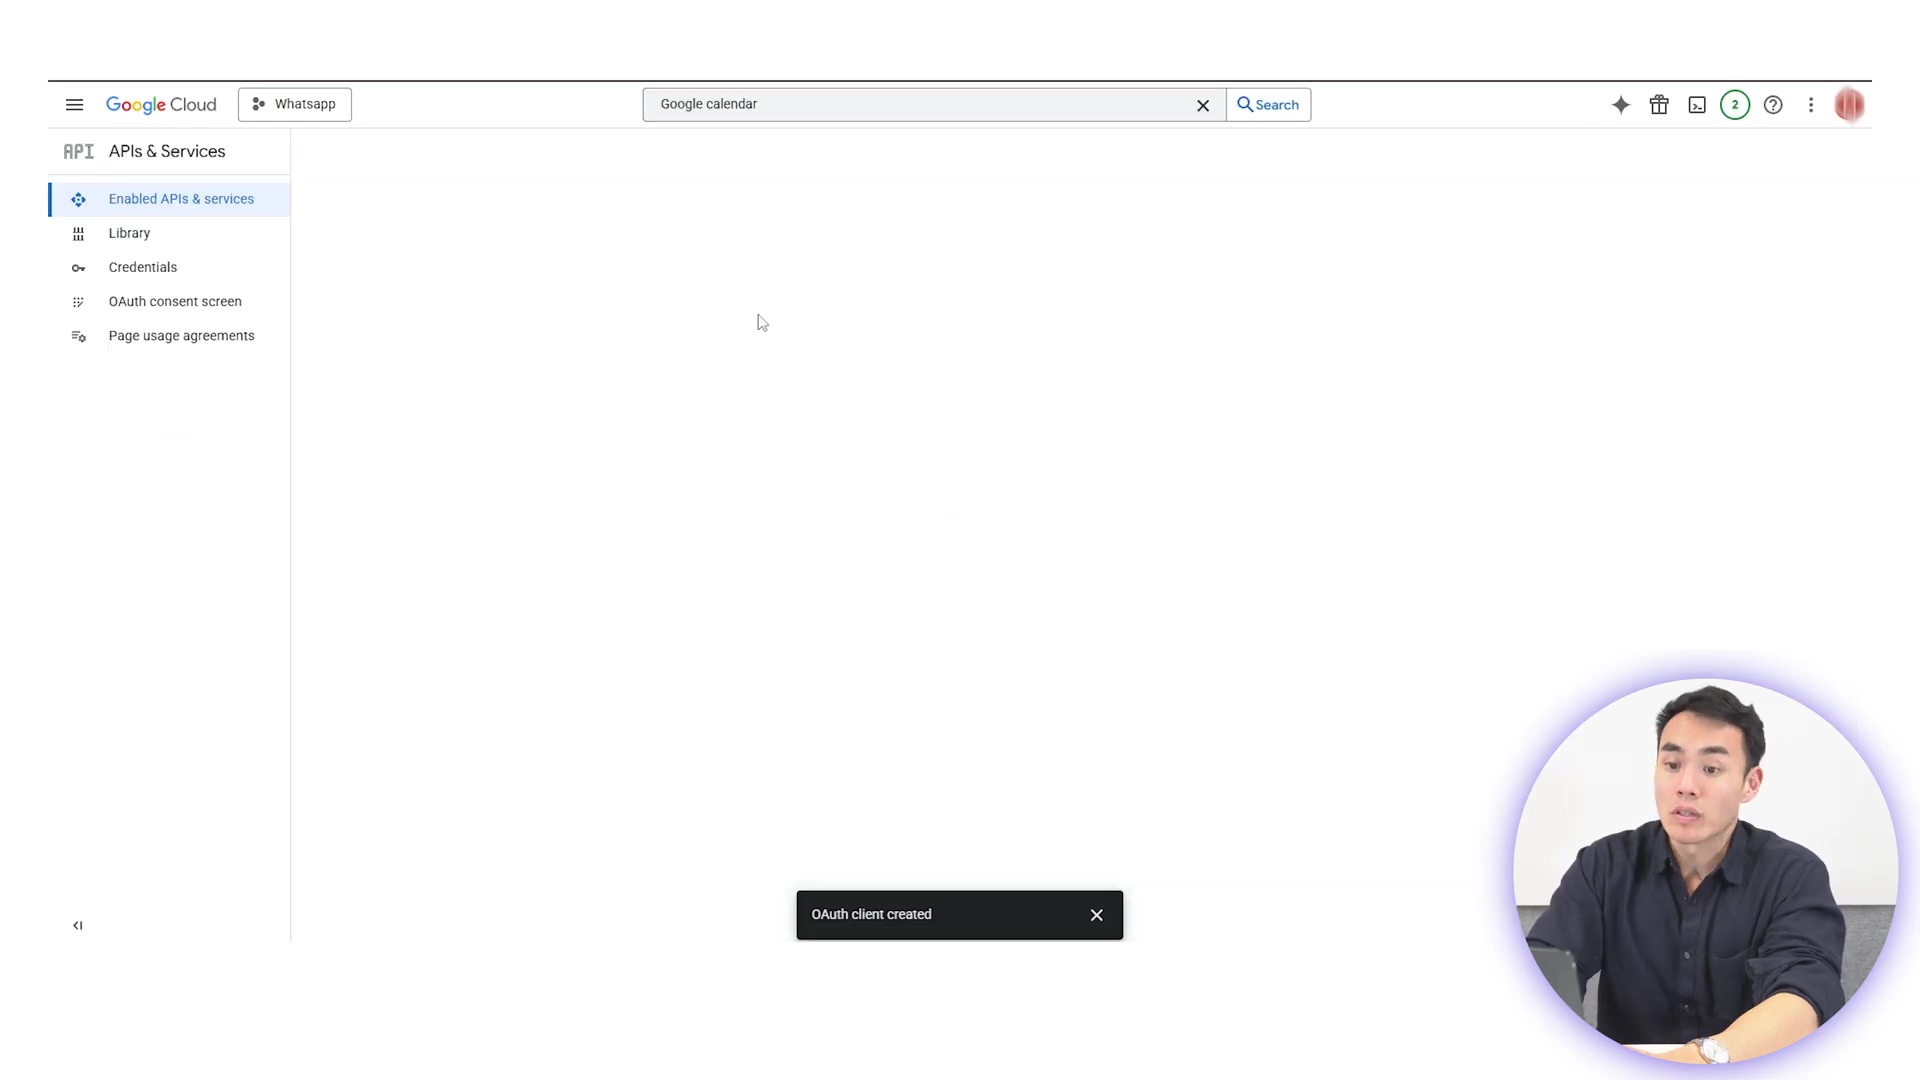
Enable the Google Calendar API: Within your new Google Cloud project, navigate to the ‘APIs & Services’ section. Search for and enable the Google Calendar API. This step is like giving your project permission to actually talk to Google Calendar. Without this, it’s a no-go!
-
Generate OAuth Client ID and Client Secret: Now, go to the ‘Credentials’ section within your Google Cloud project. Here, you’ll need to create OAuth client ID credentials. Choose “Web application” as the application type. This will generate two critical keys: an OAuth client ID and a client secret. These are like the secure handshake n8n needs to authenticate with your Google account. Make sure to set up authorized redirect URIs for your n8n instance (e.g.,
https://your-n8n-url.com/rest/oauth2-credential/callback). -
Configure Credentials in n8n: Copy these client ID and client secret keys and paste them into the Google Calendar credentials setup within n8n. Once n8n successfully authenticates, your AI agent will suddenly gain the power to interact with your Google Calendar!
What Can Your AI Do Now?
This means users can simply ask their WhatsApp AI things like:
- “What’s on my calendar for tomorrow?”
- “Schedule a meeting with John next Tuesday at 10 AM.”
- “Remind me about my dentist appointment on Friday.”
And guess what? The AI will execute these commands, providing instant updates and confirmations directly within WhatsApp. This integration seriously expands the practical utility of your AI assistant, turning it into a truly indispensable tool for managing your personal life. It’s like having a digital personal assistant who’s always just a WhatsApp message away. Pretty awesome, right?
Value-Added Module: DIY vs. Commercial AI Assistants – A Cost-Benefit Analysis
Alright, let’s talk brass tacks. When you’re thinking about getting an AI assistant to boost your personal productivity, you usually hit a fork in the road: do you build your own (the DIY route, like we’re doing!) or do you just subscribe to a commercial service? I’ve been down both roads, and a detailed look at the costs and benefits really shows why our DIY approach with tools like n8n often gives you way more bang for your buck.
The Commercial Side (The “Easy” Button?)
Commercial AI assistants, sure, they’re convenient. You sign up, you pay, and poof, you’ve got something. But they almost always come with recurring subscription fees that, let’s be honest, add up faster than you think. These fees often jump up with how much you use them or what fancy features you want, quickly becoming a pretty significant expense. Plus, commercial solutions often put limits on how much you can customize things, how well they play with your other niche tools, and even your data privacy. Your precious data is usually processed on their servers, and you’re often stuck in their ecosystem with very little say over the AI models or specific features. It’s like buying a pre-built LEGO set – fun, but you can’t really make it yours.
The DIY Side (Our Awesome Project!)
Now, building your own WhatsApp AI assistant with n8n? That’s where the real advantages shine. Financially, the running costs can be incredibly low – we’re talking less than a few dollars a month, mostly for API usage (like OpenAI tokens or if you’re using n8n Cloud instead of self-hosting). This seriously undercuts most commercial offerings. It’s like cooking your own gourmet meal for a fraction of the restaurant price.
But it’s not just about saving money. The DIY route gives you unparalleled customization. You’re the boss! You have total control over:
- The AI model: Want to try a different one? Go for it!
- Specific prompts: You can fine-tune exactly how your AI thinks and responds.
- Integrations: Hook it up to Google Calendar, your task managers, custom databases – anything you can imagine!
- Workflow logic: Design the exact steps your AI takes.
This means your AI assistant can be perfectly tailored to your unique needs and preferences, evolving right alongside you. And data privacy? That’s another huge win. By self-hosting n8n or using a trusted cloud provider, you keep much tighter control over your data, relying less on third-party data policies. While the initial setup does require a bit of a learning curve and some technical elbow grease, the long-term benefits of saving money, getting bespoke functionality, and having enhanced data control make our DIY WhatsApp AI assistant a compelling and, frankly, superior choice for anyone who wants a truly personal, intelligent companion.
Value-Added Module: Essential Tips & Best Practices for Your WhatsApp AI
So, you’ve built a functional WhatsApp AI assistant – awesome! But getting it working is just the beginning. To make sure it’s efficient, reliable, and secure, we need to follow some best practices. Think of these as the golden rules for keeping your AI assistant happy and healthy.
-
API Key Management (Keep Those Keys Safe!): This is paramount. Never, ever hardcode API keys directly into your workflow. That’s like leaving your house keys under the doormat. Instead, use n8n’s built-in credential storage feature or environment variables. This protects your sensitive information and makes it super easy to change keys if you ever need to.
-
Error Handling (Don’t Let It Crash!): Things go wrong sometimes – that’s just life, and tech is no different. Implement ‘Error Workflow’ nodes in n8n. These are like safety nets that gracefully catch unexpected issues, such as API timeouts or bad responses. This prevents your entire workflow from crashing and can even send you notifications about problems, so you’re always in the loop.
-
Rate Limiting (Avoid Getting Blocked!): External APIs (like OpenAI or Google Calendar) often have limits on how many requests you can make in a certain time. If you hit those limits too often, you might get temporarily blocked or incur unexpected costs. Implement delays or queue mechanisms in your workflow if you anticipate a lot of messages. It’s like pacing yourself in a race!
-
Prompt Engineering (Teach Your AI Well!): This is an ongoing art! Continuously refine your AI agent’s system message and prompts. Experiment with different phrasings to get more accurate and consistent responses. A well-crafted prompt can seriously boost your AI’s usefulness. Think of it as being a really good teacher for your AI.
-
Data Privacy (Be Mindful!): Always, always be mindful of what personal information your AI is processing. Ensure you’re complying with relevant data protection regulations (like GDPR or CCPA). Avoid sending highly sensitive data through third-party APIs unless it’s absolutely necessary and you have proper encryption and agreements in place.
-
Regular Monitoring and Maintenance (Keep It Running Smooth!): Finally, don’t just set it and forget it! Periodically review your workflow logs, update n8n to the latest version, and test your AI assistant’s functionality. This ensures it stays robust and performs exactly as you expect. A little regular TLC goes a long way!
Following these practices will help you maintain a powerful, secure, and efficient WhatsApp AI assistant that truly serves you.
Conclusion: Your Personalized AI Assistant Awaits
Wow, you’ve made it! You’ve just embarked on an incredible journey, transforming your WhatsApp experience from simple messaging into embracing a powerful, truly personalized AI assistant. We’ve covered all the essential steps, from setting up that foundational WhatsApp trigger (our AI’s doorbell!) and intelligently routing messages with the Switch node, to integrating advanced AI capabilities and hooking into external services like Google Calendar. You’re basically a digital architect now!
This guide has shown you firsthand how n8n empowers you to build a sophisticated AI agent that not only understands your commands but also takes proactive steps to manage your personal and professional life, all within the familiar, comfy interface of WhatsApp. The value proposition here is crystal clear: unparalleled customization, significant cost savings compared to those pricey commercial alternatives, and enhanced control over your own data. How cool is that?
The future of personal productivity isn’t just coming; it’s here, and it’s powered by intelligent automation. By building your own WhatsApp AI assistant, you are truly at the forefront of this revolution. Imagine your AI seamlessly scheduling meetings, setting reminders, and even digging up information for you, freeing up your precious mental bandwidth for the stuff that really matters. This isn’t just about saving a few minutes here and there; it’s about gaining a strategic advantage in navigating the complexities of modern life. And guess what? The skills you’ve picked up setting up this workflow are totally transferable, opening doors to countless other automation possibilities with n8n and AI. The world is your oyster!
Now, it’s your turn to act. Don’t just read about it; do it! Take that first step by logging into your n8n console and starting the setup of your WhatsApp trigger. Play around with different AI prompts, explore even more integrations, and really tailor your assistant to perfectly fit your unique needs. The power to create a truly personalized, intelligent companion is now firmly in your hands. So, go forth! Don’t just consume technology; shape it to serve you. Your personalized AI assistant is ready to be built, offering you a sneak peek into a more efficient, organized, and frankly, more awesome future.


Frequently Asked Questions (FAQ)
Q: Why should I build my own WhatsApp AI assistant instead of using a commercial one?
A: Building your own offers unparalleled customization, allowing you to tailor the AI’s behavior, integrations, and responses precisely to your needs. It’s also significantly more cost-effective in the long run, often costing just a few dollars a month for API usage compared to recurring subscription fees for commercial services. Plus, you maintain greater control over your data privacy.
Q: Is n8n difficult to learn for a beginner?
A: n8n is designed to be user-friendly, especially with its visual workflow builder. While there’s a learning curve, this guide breaks down the process step-by-step, making it accessible for tech-savvy individuals and automation enthusiasts. Many resources, including the n8n community, are available to help you along the way.
Q: What are the main costs involved in running this WhatsApp AI assistant?
A: The primary costs will be for API usage, mainly from OpenAI (for the AI model and transcription) and potentially n8n Cloud hosting if you don’t self-host. These costs are typically usage-based and can be very low, often less than a few dollars per month for personal use, making it much cheaper than most commercial alternatives.
Q: Can I integrate other services besides Google Calendar?
A: Absolutely! That’s one of the biggest advantages of using n8n. It has hundreds of integrations for various services like task managers (e.g., Todoist, Trello), databases, email services, and more. Once you understand the core concepts from this guide, you can easily expand your AI assistant’s capabilities to interact with almost any other tool you use.
Q: How do I ensure my API keys and personal data are secure?
A: Always use n8n’s built-in credential storage or environment variables for API keys; never hardcode them. For data, be mindful of what information you’re sending to third-party APIs. Self-hosting n8n or using a trusted cloud provider gives you more control over your data. Always follow best practices for data privacy and security, as outlined in the “Essential Tips & Best Practices” section.