Watch the Video Tutorial
💡 Pro Tip: After watching the video, continue reading below for detailed step-by-step instructions, code examples, and additional tips that will help you implement this successfully.
TL;DR
- Scale AI Agents with External Stores: Avoid in-memory solutions for chat memory and vector stores; opt for production-ready alternatives like Supabase with PostgreSQL and PGVector for scalable AI agents.
- Optimize LLM Selection: Choose Large Language Models (LLMs) based on your specific use case, with Anthropic’s Claude 3.5 Sonnet recommended for top performance, Groq for speed, and OpenAI’s GPT-4o mini for affordability.
- Implement Robust Error Handling: Utilize n8n’s error workflows and ‘Continue On Error’/‘Retry’ nodes to build resilient automations that can gracefully handle unexpected issues and notify you promptly.
- Structure Workflows for Maintainability: Organize your n8n workflows with clear naming, modularity, and sub-workflows to enhance clarity, reusability, and long-term manageability.
- Leverage Advanced n8n Features: Master webhooks for real-time triggers, use code nodes for complex data manipulation, and explore the n8n workflow library to accelerate development and build sophisticated AI automations.
Table of Contents
Open Table of Contents
- Introduction: Unlocking n8n’s Full Potential for AI Automation
- Tip 1: Building Production-Ready AI Agents – Beyond In-Memory Solutions
- Tip 2: Choosing the Right LLM for Your n8n Workflows
- Tip 3: Structuring Your Workflows for Clarity and Reusability
- Tip 4: Implementing Robust Error Handling and Retries
- Tip 5: Mastering Webhooks and Triggers for Real-time Data Processing
- Tip 6: Leveraging n8n’s Workflow Library for Quick Starts
- Tip 7: Advanced Data Manipulation with Code Nodes
- Tip 8: Monitoring and Debugging Your n8n Automations
- Tip 9: Advanced Workflow Design – Handling Multiple Items in Outputs
- Tip 10: Optimizing Performance for Production Environments
- Conclusion: Elevating Your n8n Skills for Future-Proof AI Automations
- Frequently Asked Questions (FAQ)
- Q: Why are in-memory solutions not suitable for production AI agents in n8n?
- Q: How do I choose the best LLM for my n8n workflow?
- Q: What are the key benefits of using sub-workflows and modular design in n8n?
- Q: How can n8n’s error workflows help me build more resilient automations?
- Q: When should I use a Code node instead of standard n8n nodes?
- Challenges with Multiple Item Outputs
- Strategies for Handling Multiple Items
- Tip 10: Optimizing Performance for Production Environments
- Conclusion: Elevating Your n8n Skills for Future-Proof AI Automations
- Frequently Asked Questions (FAQ)
- Q: Why are in-memory solutions not suitable for production AI agents in n8n?
- Q: How do I choose the best LLM for my n8n workflow?
- Q: What are the key benefits of using sub-workflows and modular design in n8n?
- Q: How can n8n’s error workflows help me build more resilient automations?
- Q: When should I use a Code node instead of standard n8n nodes?
Introduction: Unlocking n8n’s Full Potential for AI Automation
Hey there, fellow automation enthusiast! Boyce here, and I’m super excited to dive into the world of n8n with you. If you’re anything like me, you’ve probably heard the buzz about n8n being a game-changer for AI automation. It’s like having a universal adapter for over 500 applications, letting you build some seriously smart AI agents without writing tons of code. Pretty neat, right?
But let’s be real, building these things isn’t always a walk in the park. Many of us, myself included, hit some common roadblocks that stop our automations from truly shining, especially when we try to scale them up for real-world use. Think about it: you build an awesome AI agent, but then it chokes when more than a handful of users try to use it. That’s usually because we’re relying on quick-and-dirty memory solutions that just aren’t built for the big leagues. It’s frustrating, I know!
That’s why I’m here. I’ve been in the trenches, learned a few hard lessons, and now I want to share 10 indispensable tips that will transform your n8n workflows from cool prototypes into robust, production-ready AI agents. We’re going to dig into some underutilized features and best practices that will make your automations not just functional, but also scalable, maintainable, and resilient. Get ready to level up your n8n game and build AI solutions that can truly stand the test of time. Let’s make some magic happen!
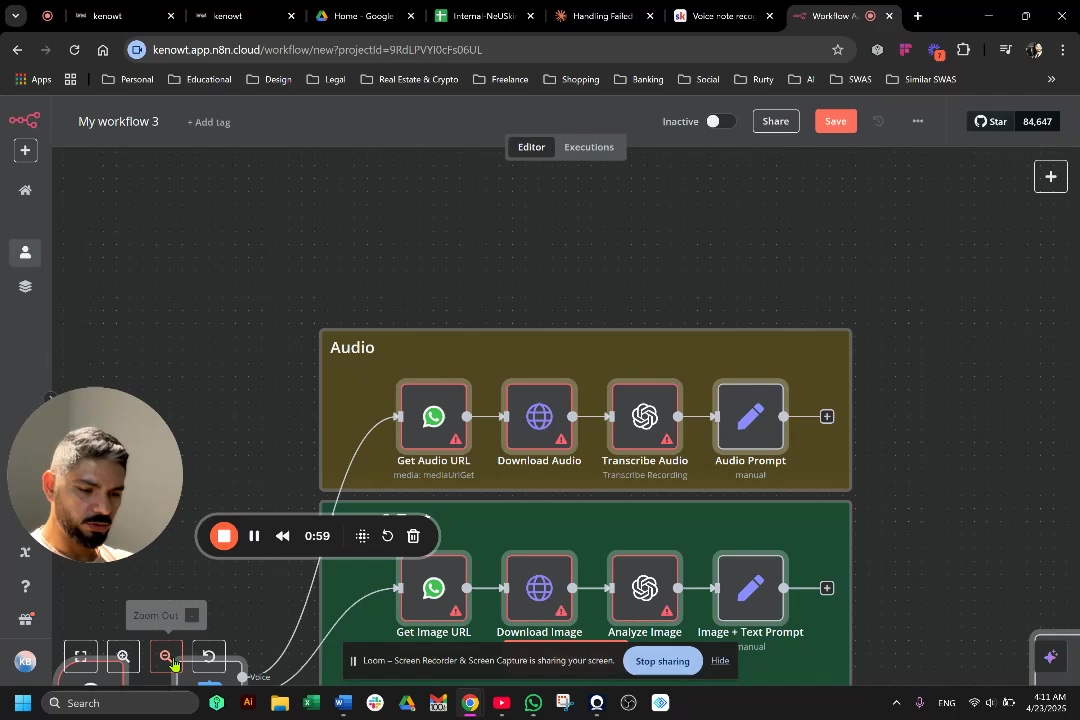
To set the stage and introduce our expert, observe the presenter in the image below, ready to share these crucial insights.

This visual introduction highlights the focus of the article: a concise yet comprehensive guide to mastering n8n for AI automation.
Tip 1: Building Production-Ready AI Agents – Beyond In-Memory Solutions
The Limitations of In-Memory Stores
Alright, let’s kick things off with a big one. When you first start building AI agents in n8n, it’s super tempting to use what’s readily available, like windowed buffer memory for chat history or in-memory vector stores for your Retrieval Augmented Generation (RAG) embeddings. And honestly, for quick prototypes or just messing around, they’re perfectly fine! They get the job done for a proof-of-concept.
But here’s the catch: these in-memory solutions are like a tiny, temporary notepad. They store all your data directly in your n8n instance’s RAM. The moment your AI agent needs to handle more than a couple of users, or process a decent chunk of data, that notepad gets full, fast. It becomes a huge bottleneck, slowing everything down, gobbling up memory, and worst of all, if your n8n instance restarts or scales down (which happens!), poof! All your data is gone. It’s a critical point of failure for any serious AI application, and trust me, you don’t want to learn this the hard way.
Why External Persistence is Crucial
So, what’s the solution? For any AI agent you plan to use in the real world, persistent and scalable external storage isn’t just a nice-to-have; it’s a non-negotiable must-have. Think of it like moving your important notes from that temporary notepad to a sturdy, locked filing cabinet. External databases and vector stores separate your data from your n8n instance. This means they can scale independently, offer much better reliability, and keep your data safe and sound. This architectural shift is absolutely essential for keeping chat history across different sessions, making sure your RAG embeddings are always there when you need them, and supporting a growing user base without your system grinding to a halt.
Supabase: A Scalable Alternative
Now, for a recommendation that I’ve found super handy: Supabase. It’s an excellent, production-ready alternative for both your chat memory and RAG embeddings. Imagine having a Swiss Army knife for your data needs! Supabase gives you a powerful PostgreSQL database, which is fantastic for storing chat history. PostgreSQL is an open-source relational database that’s known for being incredibly reliable and scalable – it’s used by big companies for a reason!
What’s even cooler is that Supabase integrates seamlessly with the PGVector extension. This basically turns your PostgreSQL database into a super-efficient vector store for RAG. So, you can manage both your structured data (like chat history) and your unstructured data embeddings (for RAG) all within one unified, scalable platform. It’s easy to set up, packed with features, and honestly, an ideal choice for building robust AI agents with n8n.
- Scalability: It can handle tons of users and massive datasets without breaking a sweat.
- Persistence: Your data is stored reliably and won’t vanish if your n8n instance decides to take a nap.
- Unified Platform: Manages both chat memory (PostgreSQL) and vector embeddings (PGVector) in one convenient place.
- Ease of Integration: Connecting it with n8n workflows is usually a breeze, often needing minimal configuration.
| Feature | In-Memory Solutions (e.g., Windowed Buffer, In-Memory Vector Store) | Supabase (PostgreSQL + PGVector) |
|---|---|---|
| Scalability | Poor (limited by n8n instance memory) | Excellent (designed for high loads and large datasets) |
| Persistence | None (data lost on restart/scale-down) | Full (data stored reliably in external database) |
| Production Ready | No (for prototyping only) | Yes (robust and enterprise-grade) |
| Complexity | Very Low (simple for quick tests) | Low-Medium (easy setup, powerful features) |
| Use Case | Local testing, simple demos | Production AI agents, RAG, persistent chat history |
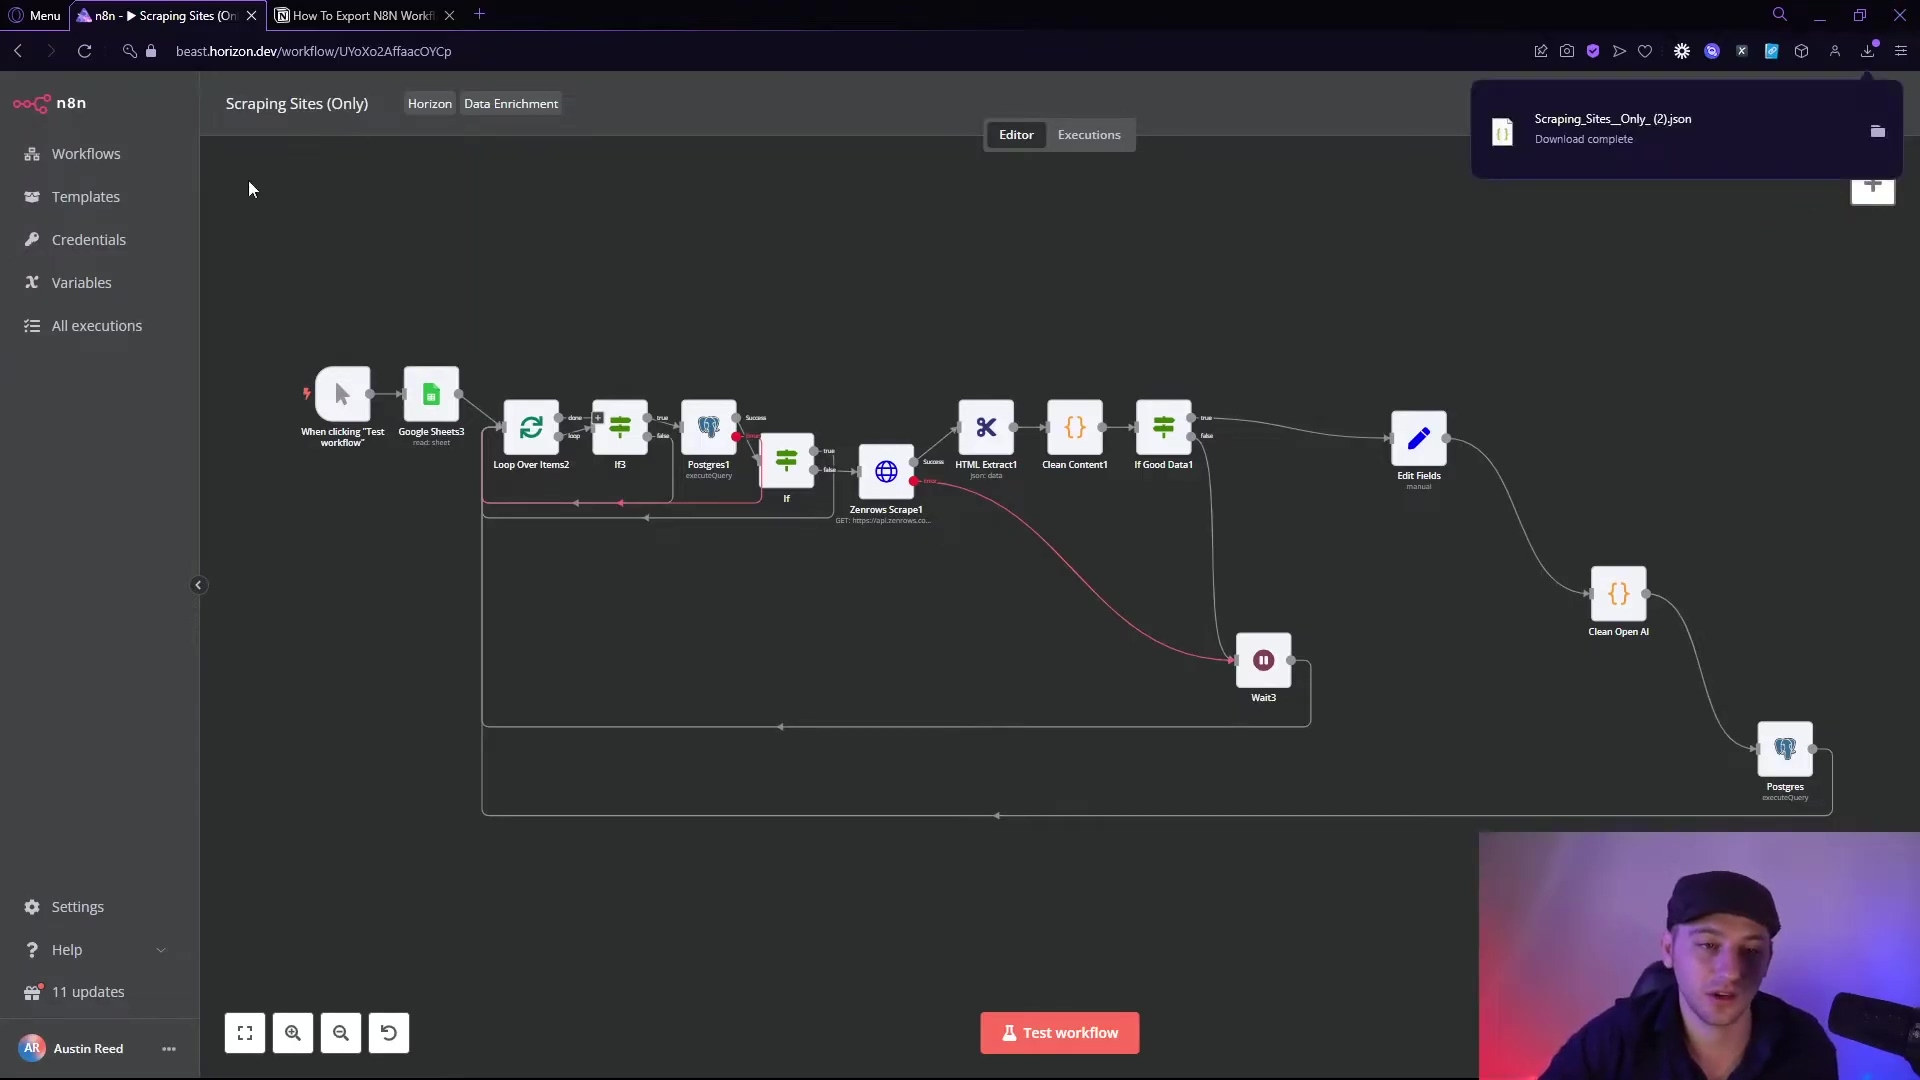
The following image illustrates a typical n8n workflow for an AI agent, showcasing how components like ‘Postgres Chat Memory’ and ‘Supabase Vector Store’ are integrated for persistent storage, moving beyond in-memory solutions.
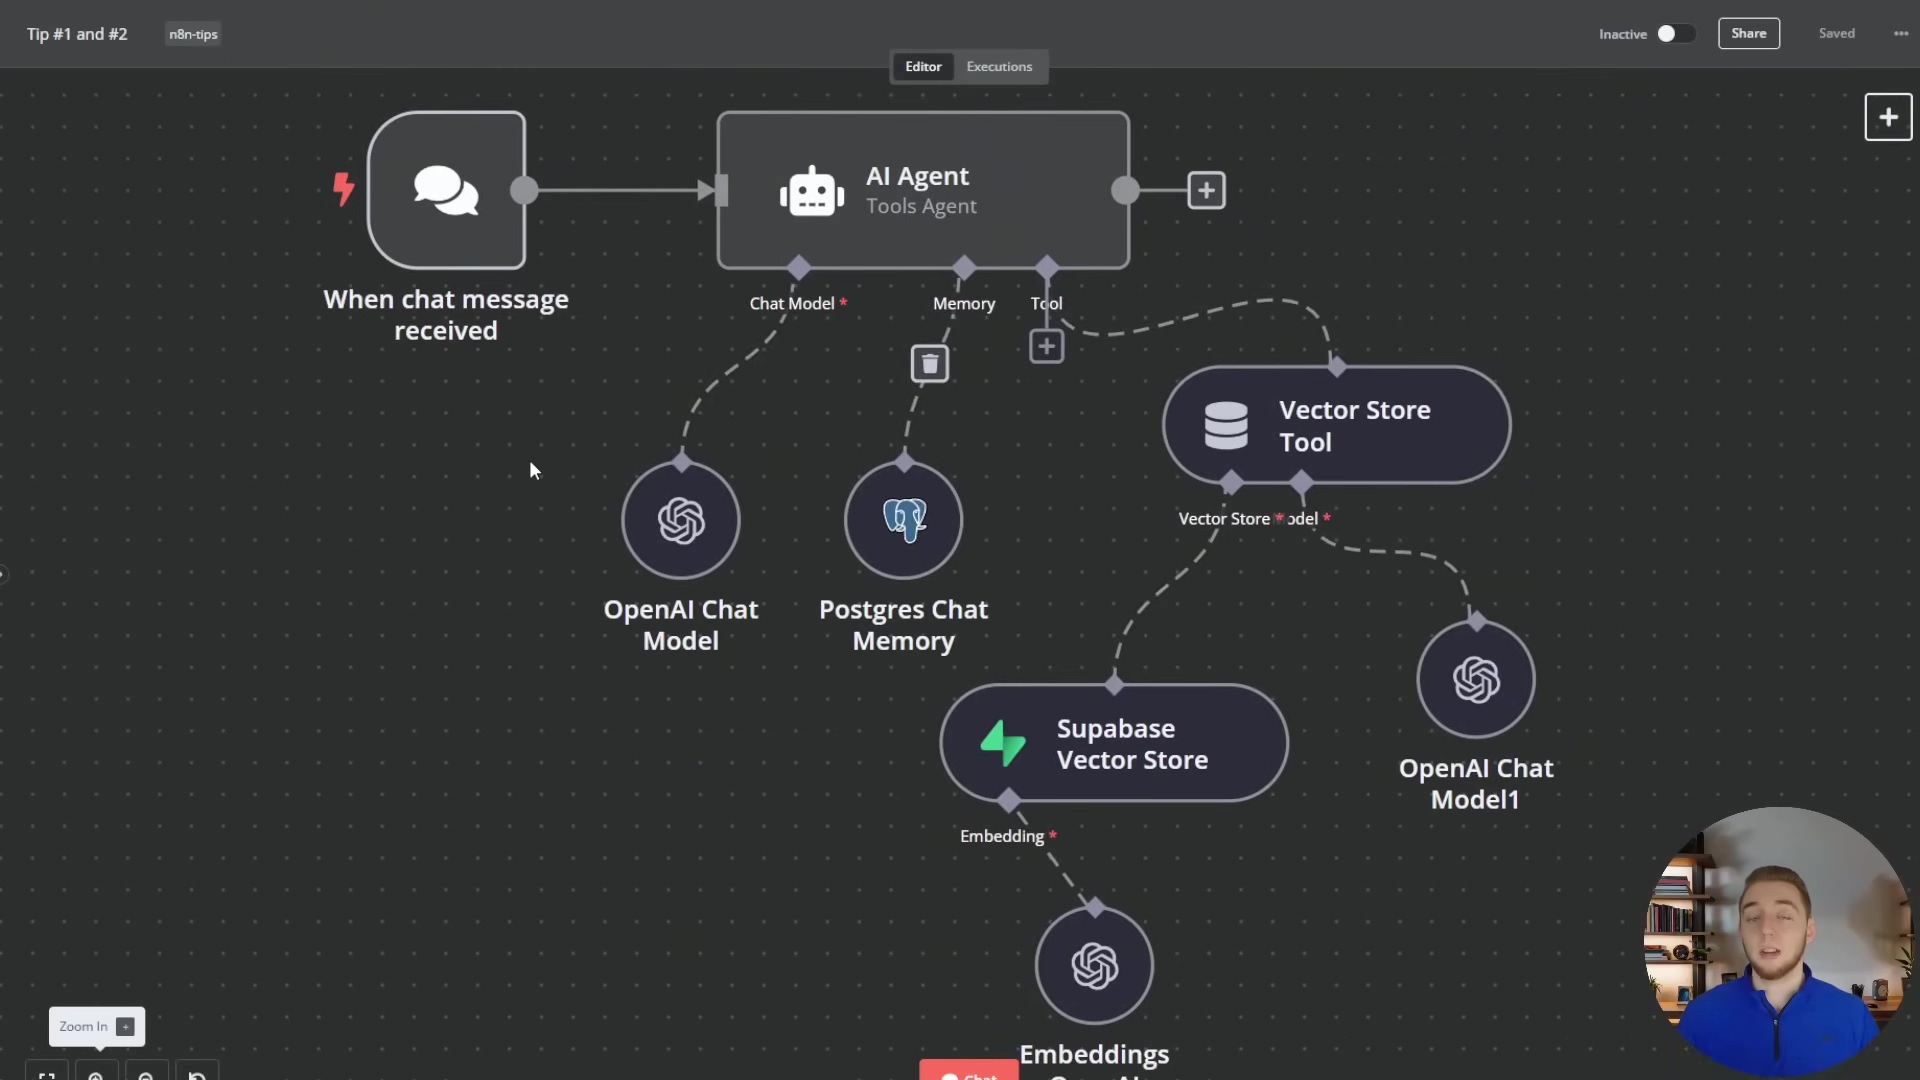
This visual representation clearly shows the architectural shift towards external, production-ready solutions, with ‘Supabase Vector Store’ and ‘Postgres Chat Memory’ nodes playing central roles in ensuring data persistence and scalability for the AI agent.
Tip 2: Choosing the Right LLM for Your n8n Workflows
Understanding LLM Selection Criteria
Alright, let’s talk about the brains of your AI operation: the Large Language Model (LLM). Picking the right one for your n8n workflows is a huge decision. It impacts everything – how well your agent performs, how much it costs, and ultimately, how effective it is. There’s no single “best” LLM; it’s all about finding the perfect fit for your specific use case. Think of it like choosing the right tool for a job. You wouldn’t use a sledgehammer to hang a picture, right?
When you’re making your choice, consider these factors:
- Intelligence & Reasoning: How smart does it need to be? Does it need to understand complex ideas or just follow simple instructions?
- Processing Speed: Do you need instant replies (like for a chatbot) or can it take a few seconds (like for a detailed report)?
- Cost per Token: LLMs charge by the “token” (think of it as a word or part of a word). This can add up, so budget matters!
- Complexity of Prompts/Creativity: Is it generating creative content or just summarizing facts?
A model that’s super fast might be perfect for a real-time chat, but a more powerful (and usually slower) model could be ideal for deep data analysis or generating creative content.
Top LLM Recommendations for n8n
Based on my experience, here are some general recommendations that cover a wide range of scenarios:
- Anthropic’s Claude 3.5 Sonnet: If you need the absolute top-tier performance and cutting-edge reasoning, Claude 3.5 Sonnet is currently a powerhouse. It’s like the super-computer of LLMs, excelling in complex tasks, understanding subtle nuances, and generating incredibly high-quality, coherent responses. It might be a bit pricier, but for critical applications, its superior output often makes it worth every penny. You can learn more about Anthropic’s models here.
- Groq (Llama models): When speed is your absolute priority – think real-time conversational AI or anything needing instant responses – Groq’s optimized Llama models are an amazing choice. Groq is specifically engineered for lightning-fast inference, meaning it generates tokens at incredible speeds and often at a competitive cost. It’s like the drag racer of LLMs!
- OpenAI’s GPT-4o mini: If you’re watching your budget but still need solid performance, GPT-4o mini offers a fantastic balance. It provides robust capabilities for a wide variety of tasks at a significantly lower cost compared to its bigger siblings. This makes it ideal for projects where cost is a primary concern or for high-volume automations that aren’t super critical.
Embedding Models and RAG Integration
Beyond the chat model itself, don’t forget about the embedding model, which is crucial for your Retrieval Augmented Generation (RAG) workflows. For embedding models, I highly recommend OpenAI’s text-embedding-3-small. This model gives you high-quality embeddings efficiently and cost-effectively, making it perfect for most RAG applications. It’s great at capturing the true meaning of text, which is essential for effective information retrieval.
And here’s a pro tip for consistency and optimal performance in RAG workflows: try to use the same LLM that processes your chat messages to also process the chunks retrieved from your vector database. This ensures that your AI agent has a unified understanding and generation process throughout its entire operation. It’s like making sure all parts of your team are speaking the same language!
text-embedding-3-small: My go-to for efficient and high-quality RAG embeddings.- Consistency: Use the same LLM for both chat and RAG chunk processing. It keeps things smooth and makes sure your AI isn’t getting confused.
To illustrate the variety of LLM options available within n8n, the image below shows a dropdown menu for selecting different language models, including those from Anthropic, Google Vertex, Groq, Mistral, Ollama, and OpenAI.

This visual guide helps users understand where and how to select the appropriate LLM for their specific n8n automation needs, emphasizing the importance of matching the model to the task for optimal performance and cost efficiency.
Tip 3: Structuring Your Workflows for Clarity and Reusability
The Importance of Workflow Organization
As your n8n automations start to grow – and trust me, they will! – a well-structured workflow becomes absolutely essential. Think of it like building with LEGOs. If all your bricks are just dumped in a pile, it’s a nightmare to find what you need. But if they’re sorted and organized, building something complex is much easier. The same goes for your n8n workflows. Disorganized workflows, with tangled connections and vague node names, can quickly become unmanageable. It’s a recipe for headaches!
Adopting good organization practices from the very beginning will save you a ton of time and frustration down the road. A clear structure means new team members can quickly grasp the logic, updates are a breeze, and you’re much less likely to introduce errors. It’s all about working smarter, not harder.
Best Practices for Workflow Modularity
To keep things clear and make your workflows reusable, consider these principles:
- Clear Naming Conventions: This might sound basic, but it’s a game-changer. Give every single node a descriptive and consistent name. Instead of generic names like ‘Function’ or ‘HTTP Request’, use names that immediately tell you what the node does, such as ‘Extract PDF Text’, ‘Summarize Document’, or ‘Send Slack Notification’. This way, anyone looking at your workflow (including future you!) will instantly understand its purpose.
- Modular Design with Sub-workflows: For complex tasks, break down your main workflow into smaller, focused sub-workflows. Imagine you have a multi-step process for getting data in – like downloading a file, extracting text, and then creating embeddings. Instead of cramming all that into your main workflow, create a dedicated sub-workflow called ‘Data Ingestion’. This not only cleans up your main workflow but also lets you reuse that ‘Data Ingestion’ sub-workflow in other projects! n8n’s ‘Execute Workflow’ node is perfect for calling these sub-workflows like functions.
- Logical Grouping: Use n8n’s ‘Group’ feature to visually bundle related nodes together. This is like putting your LEGO bricks into specific containers. It helps segment your workflow into logical blocks, making it super easy to follow the flow of data and logic at a glance. For example, group all your error handling nodes or data transformation nodes into distinct visual blocks. It makes your workflow much more readable.
Enhancing Readability and Maintainability
Beyond just modularity, let’s focus on making your workflows easy on the eyes and easy to maintain:
- Consistent Layout: Arrange your nodes in a logical flow, usually left-to-right or top-to-bottom. Avoid those messy, crisscrossing connections that make your workflow look like a plate of spaghetti! Use n8n’s auto-layout feature periodically – it’s like a magic wand for tidying up your canvas.
- Comments and Annotations: Don’t be shy about using the ‘Note’ node or adding descriptions to individual nodes. Explain complex logic, any assumptions you’ve made, or external dependencies. This is especially useful for documenting custom code snippets or those tricky data transformations. Future you (and your teammates) will thank you!
- Version Control: While n8n does offer workflow versioning, for critical workflows, especially in team environments, consider using external version control systems like Git. This is if you’re treating your workflows like code and need more granular change tracking. It ensures you can always revert to previous states and track every modification effectively.
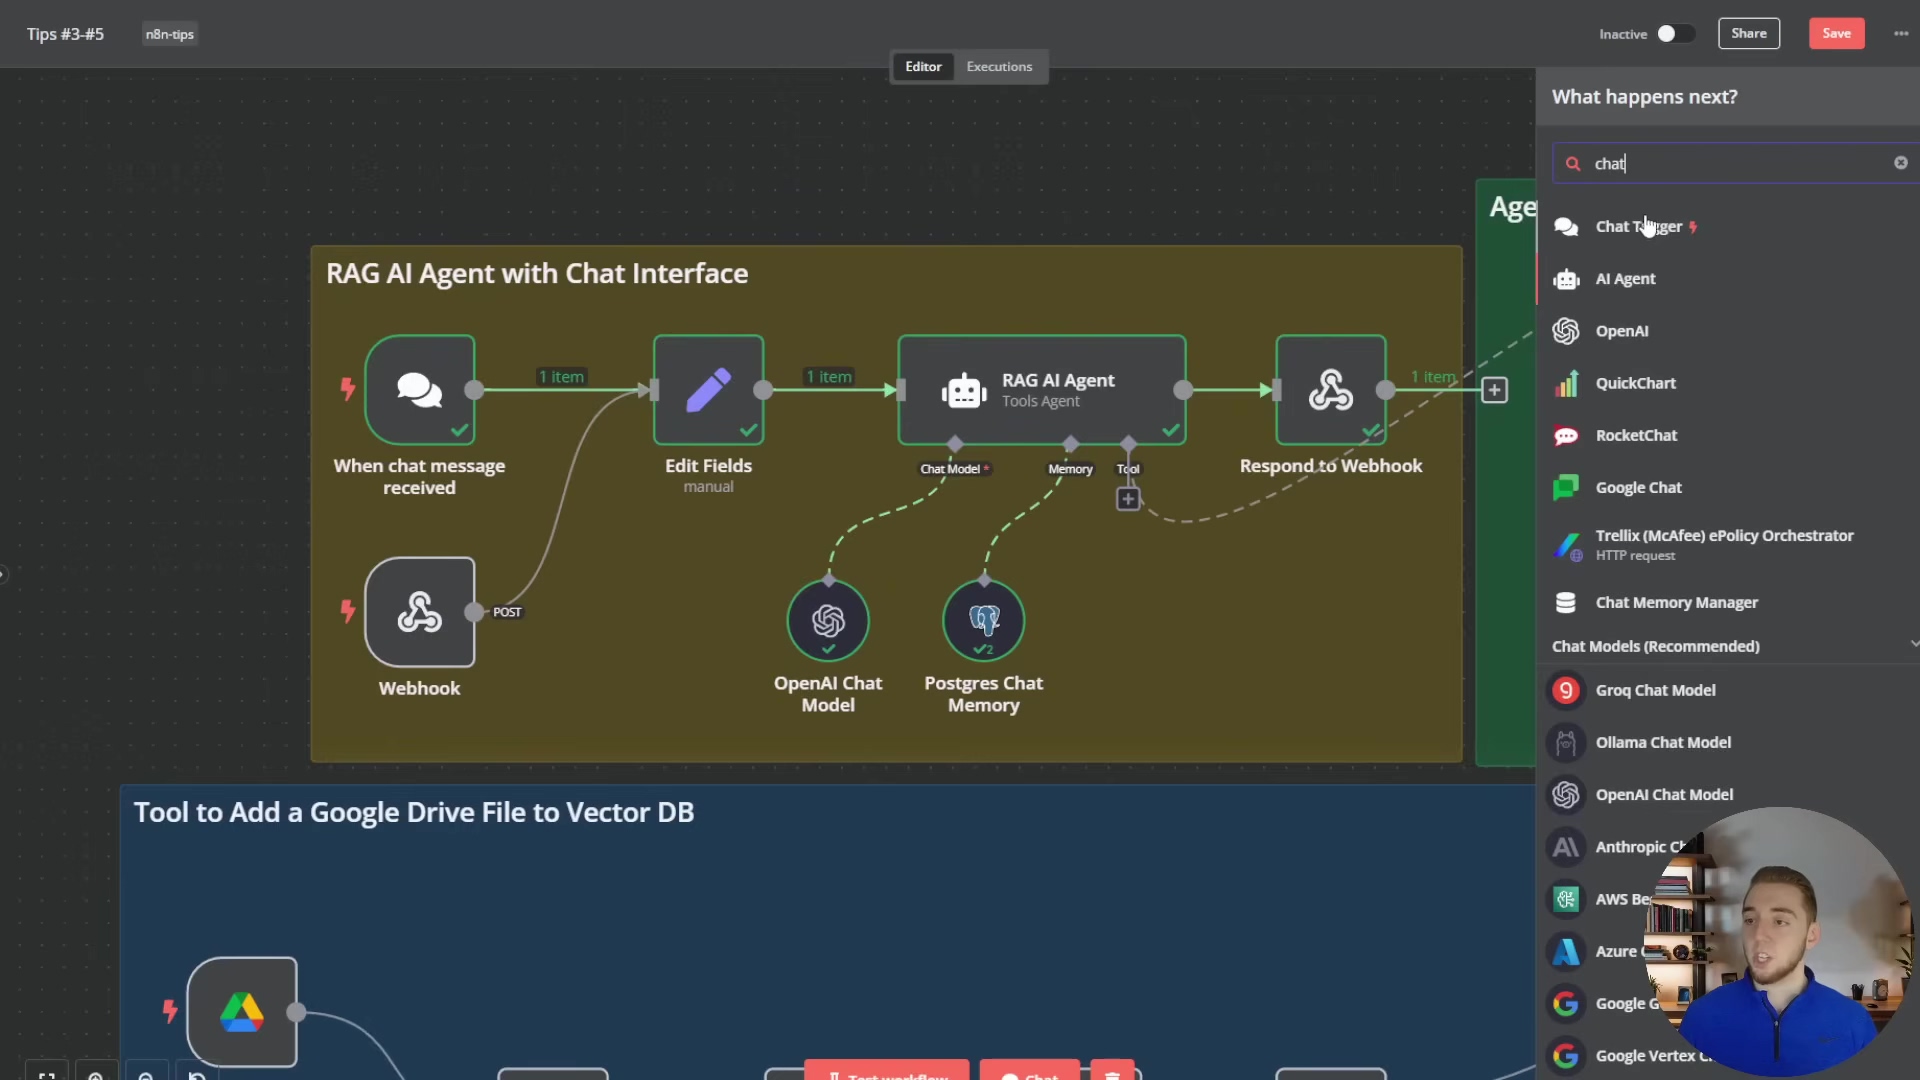
The image below provides a visual example of a well-structured n8n workflow, demonstrating how different functionalities like ‘RAG AI Agent with Chat Interface’ and ‘Tool to Add a Google Drive File to Vector DB’ are organized into distinct, logical sections with clear node names and connections.
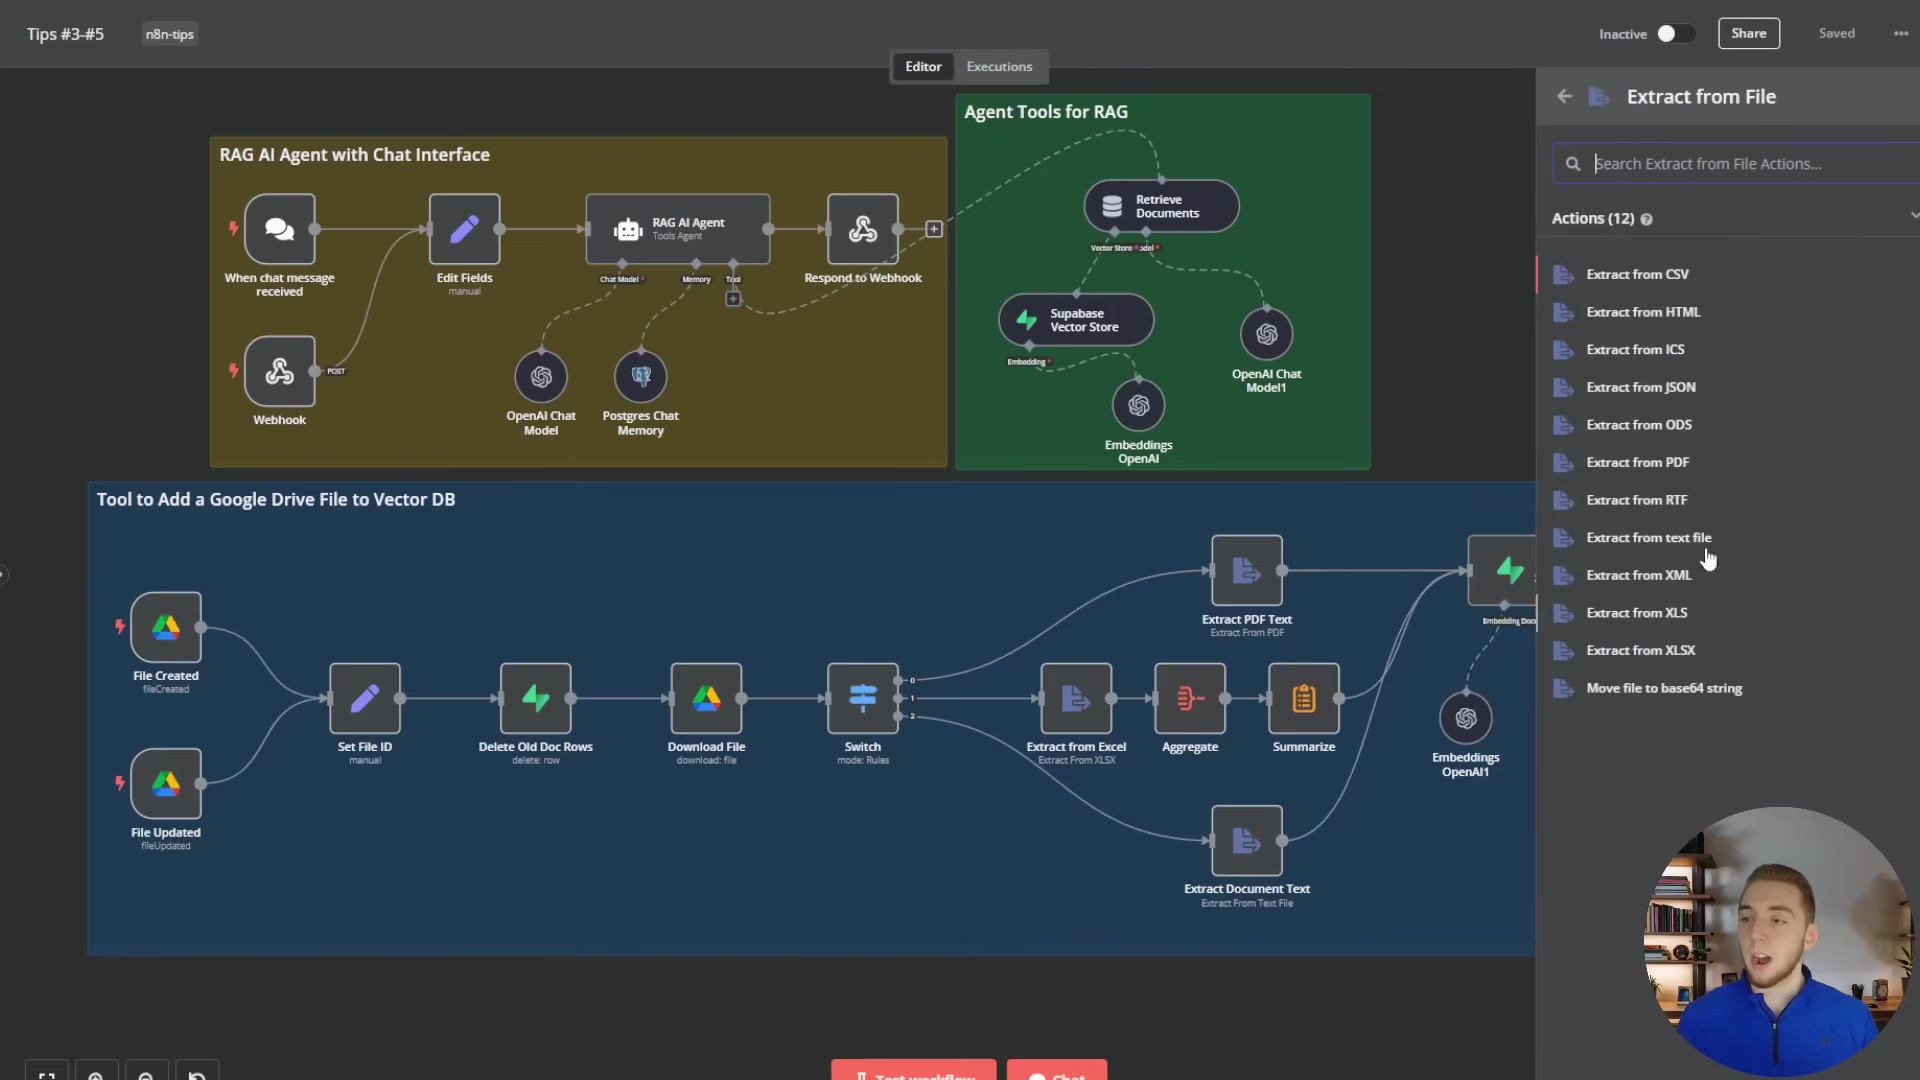
This example highlights the benefits of modular design, where complex tasks are broken down into manageable sub-workflows, improving readability and reusability. The ‘Tool to Add a Google Drive File to Vector DB’ section, for instance, shows a detailed flow for data ingestion, including various file extraction options listed in the sidebar.
Tip 4: Implementing Robust Error Handling and Retries
The Imperative of Resilient Automations
Let’s face it: in the real world, things break. APIs go down, networks hiccup, data formats change unexpectedly. For our AI automations, this could mean hitting an API rate limit, an external service being temporarily unavailable, or getting some weird data. If you don’t have solid error handling in place, a single hiccup can bring your entire workflow to a screeching halt. That means lost data, missed tasks, and unhappy users. Nobody wants that!
Implementing effective error handling and retry mechanisms isn’t just a good idea; it’s absolutely crucial for building resilient and reliable n8n automations. It’s how your workflows can gracefully recover from those annoying, temporary issues and, just as importantly, alert you when something truly critical goes wrong.
Leveraging n8n’s Built-in Error Handling
n8n gives us some powerful tools right out of the box to manage errors:
- ‘Continue On Error’ Node Setting: For individual nodes that might fail due to external factors (like an HTTP request to an API that’s a bit flaky), you can enable the ‘Continue On Error’ setting. This is a lifesaver! It tells your workflow, “Hey, if this node fails, don’t stop the whole show. Just keep going!” You can then add subsequent nodes to process that error output, log it somewhere, or even try an alternative action. It prevents one small problem from derailing everything.
- ‘Retry’ Node: For those pesky transient errors – the ones that usually fix themselves if you just try again – the ‘Retry’ node is your best friend. It automatically re-executes a preceding node (or a whole sequence of them) if they fail. You can configure how many times it should retry, how long it should wait between retries (I often use exponential backoff here, meaning it waits longer each time), and under what conditions it should retry. Super useful for API calls that might just be experiencing a temporary network glitch or server overload.
Implementing Global Error Workflows
For truly comprehensive error management, n8n lets you define global error workflows. These are separate, dedicated workflows that get triggered whenever an error occurs in any other designated workflow. This centralized approach is a game-changer and offers several big advantages:
- Centralized Alerting: Your error workflow can be set up to send instant notifications – think Slack messages, emails, or even PagerDuty alerts – with all the juicy details about the error (like the workflow ID, the node name, and the error message). This means your team gets notified immediately, so critical issues can be addressed pronto.
- Logging and Analysis: Error workflows can log detailed error payloads to a database or a logging service. This creates a historical record, which is invaluable for post-mortem analysis and for spotting recurring issues that you might need to fix at the source.
- Automated Remediation: For certain types of errors, your error workflow can even try to fix things automatically! This could involve restarting a service, clearing a cache, or notifying affected users. It’s like having a little robot assistant that tries to put out fires for you.
Steps to Set Up an Error Workflow:
- Create a New Workflow: Start a brand new n8n workflow. The very first node you’ll add is an ‘Error Trigger’ node – this is its entry point.
- Define Error Actions: Now, add nodes to perform actions when an error hits. For example, you could add a ‘Slack’ node to send a message. You can pull in error details using expressions like
{{ $json.error.message }}(for the error text) and{{ $json.workflow.name }}(to know which workflow failed). You might also add nodes for logging the error or kicking off other recovery processes. - Link to Main Workflow: Go to your main workflow (the one you want to protect). Click the three dots in the top right corner of the canvas, go to ‘Settings’, and then select your newly created error workflow under the ‘Error Workflow’ option. Don’t forget to save the settings! Now, any unhandled error in that main workflow will automatically trigger your dedicated error workflow. How cool is that?
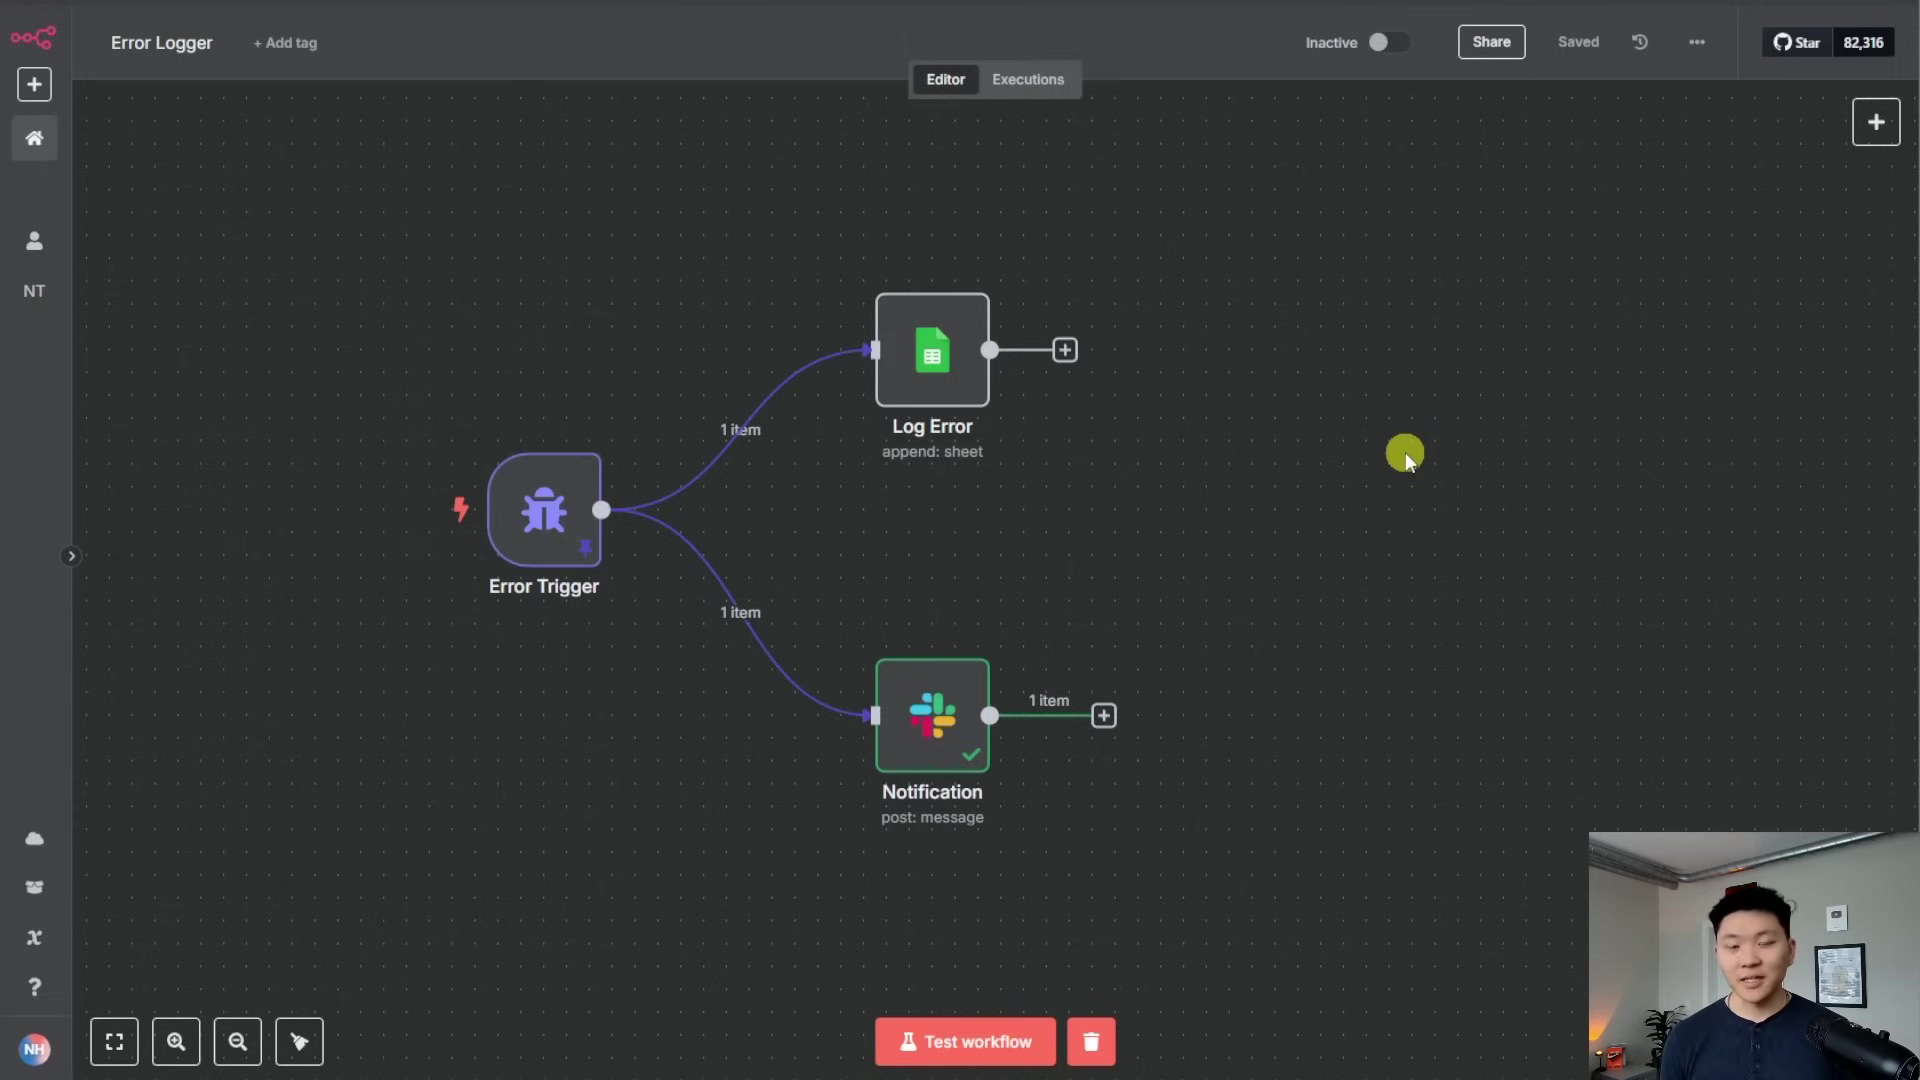
To visualize how a dedicated error workflow is structured, the image below shows a simple yet effective setup. It features an ‘Error Trigger’ node connected to a ‘Slack’ node for immediate notifications.
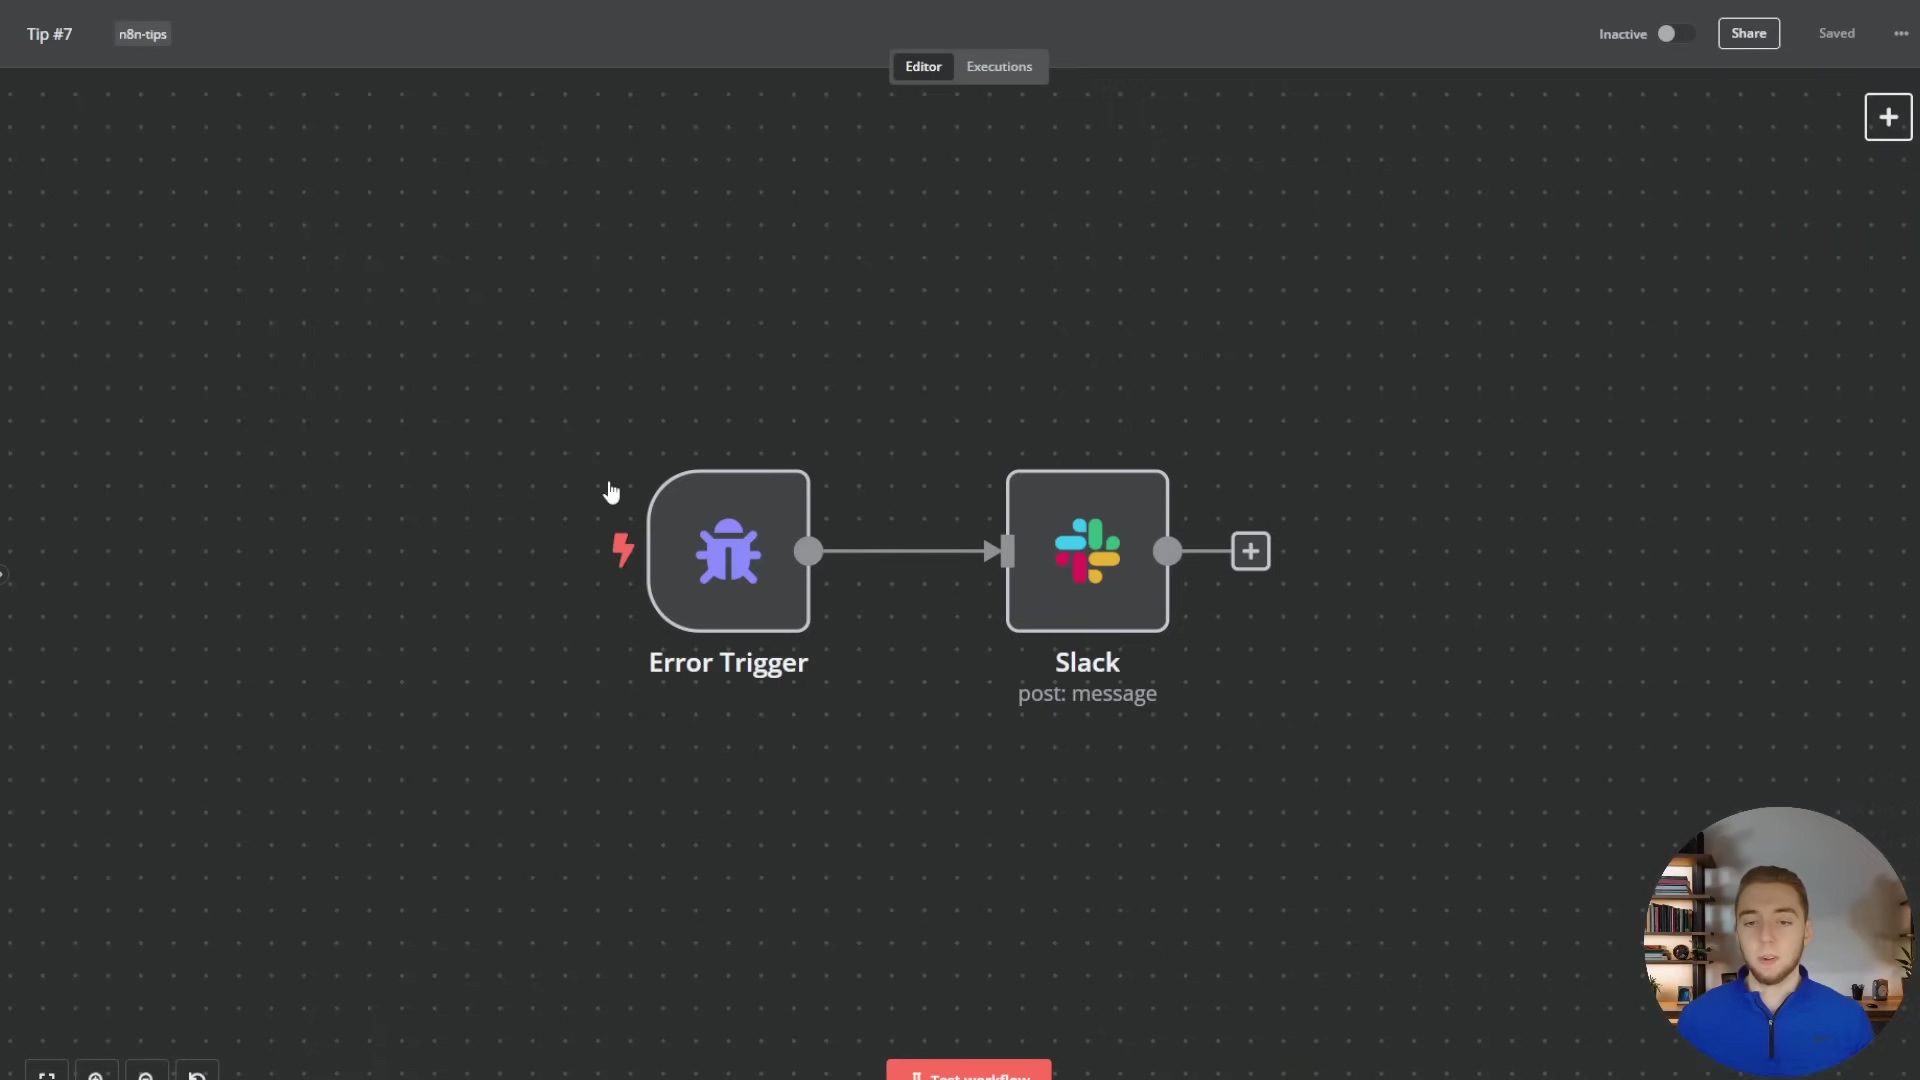
This visual example demonstrates the core components of an error workflow, where an ‘Error Trigger’ initiates a ‘Slack’ message, ensuring that any unhandled errors in other workflows are promptly communicated to the team. This setup is crucial for maintaining the reliability and resilience of your n8n automations.
Tip 5: Mastering Webhooks and Triggers for Real-time Data Processing
The Power of Event-Driven Automations
Okay, let’s talk about making your automations react instantly. While scheduled automations are great for tasks that happen regularly (like sending a daily report), many modern AI applications need to be super responsive – we’re talking real-time! This is where webhooks and n8n’s various trigger nodes become absolutely indispensable. Think of a webhook as a doorbell for your workflow. When an external service rings that doorbell, your automation instantly springs into action.
This “event-driven” approach is fundamental for building interactive AI agents, seamlessly integrating with other platforms, and processing data the very moment it becomes available, rather than waiting for a scheduled interval. It’s like having a super-fast reflex for your digital processes!
Utilizing Webhooks for External Integrations
- Webhook Node as an Entry Point: The ‘Webhook’ node is your primary gateway for external systems to talk to your n8n workflows. When an external service – maybe a custom Python script, a chatbot platform like Open WebUI, or even another n8n instance – sends an HTTP POST request to your webhook’s unique URL, your workflow is triggered instantly. This is how you build AI agents that can be embedded into almost any application or called as an API.
- Combining Webhooks with Chat Triggers: What if you want your AI agent to be both an API endpoint and testable within n8n’s chat widget? No problem! You can combine a ‘Webhook’ node with a ‘When Chat Message Received’ trigger. To handle inputs from both sources smoothly, use an ‘Edit Fields’ node with a clever JavaScript expression like this:
{{ ($json.chatInput) ? $json.chatInput : $json.body.message }}Let me break that down: This expression intelligently checks if chatInput (which comes from the n8n chat widget) is defined. If it is, it uses that value. If not, it falls back to body.message from the webhook request. This setup gives you maximum flexibility for both development and deployment – you can test easily in n8n’s UI and then deploy it as an API endpoint!
Exploring Other Powerful Trigger Nodes
n8n offers a fantastic variety of trigger nodes beyond just webhooks, allowing your automations to react to all sorts of events:
- Schedule Trigger: As I mentioned, this node lets you run workflows at fixed intervals (e.g., every hour, daily, weekly). It’s perfect for generating reports, performing regular data cleanups, or sending out scheduled notifications. Think of it as your workflow’s alarm clock.
- Google Drive Trigger: This one kicks off a workflow when specific events happen in Google Drive – like a new file being created, an existing file being updated, or a folder being modified. This is ideal for automating document processing workflows, such as extracting text from new PDFs or updating a vector database with fresh content.
- Email Trigger: Triggers a workflow when an email lands in a specified mailbox. Super useful for automating responses to inquiries, processing email attachments, or extracting data from incoming communications. It’s like having an email assistant!
- RSS Feed Trigger: This node monitors an RSS feed and triggers a workflow when new items are published. Excellent for content aggregation, news monitoring, or automatically posting social media updates.
By strategically combining these trigger nodes, you can create incredibly responsive and intelligent AI automations that react to events across your entire digital ecosystem. You’ll move beyond static, scheduled tasks to truly dynamic, event-driven processes. Now that’s what I call automation!
Below, we see the configuration panel for a ‘Google Drive Trigger’ node, set to watch for ‘File Created’ events in a specific folder named ‘Meeting Notes’. This demonstrates how real-time triggers can initiate workflows based on external events.
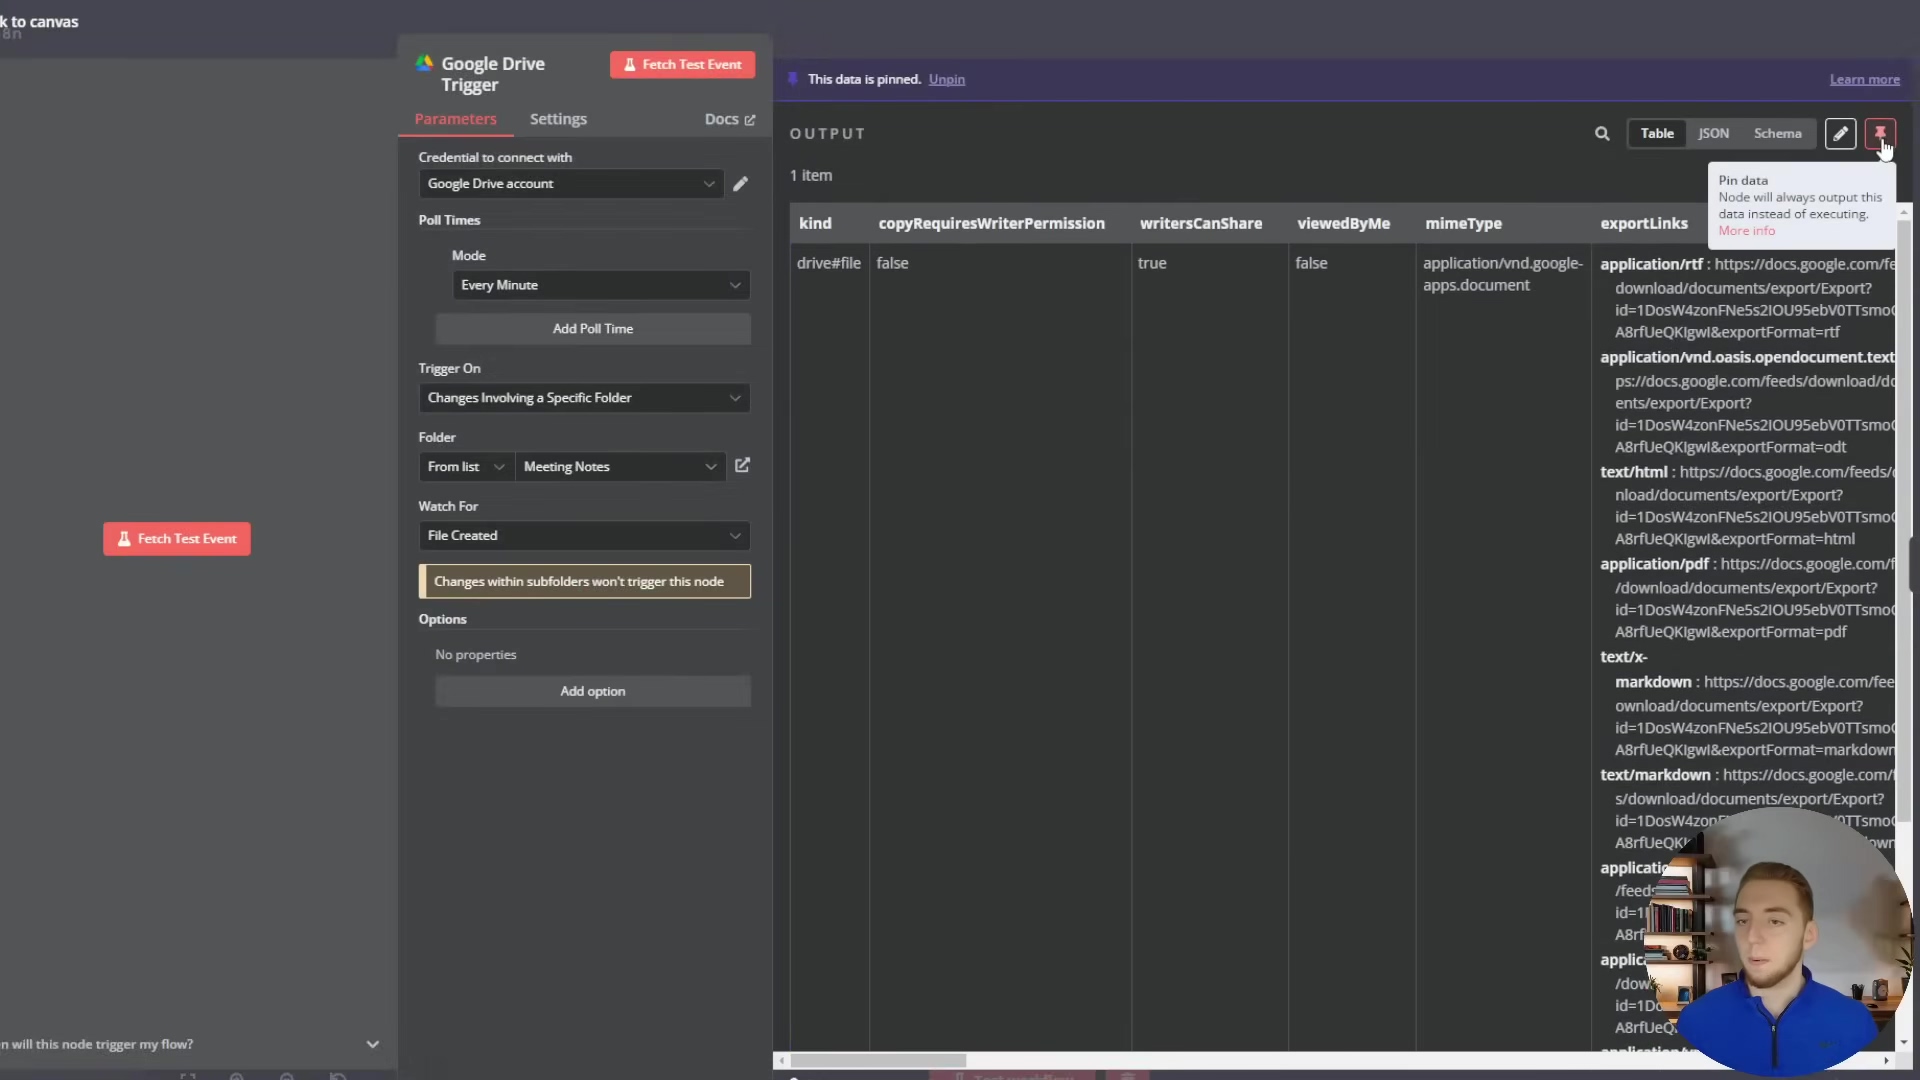
This configuration ensures that any new file created in the designated Google Drive folder will instantly trigger the workflow, making it ideal for document processing automations. Another common trigger is the ‘Schedule Trigger’, as shown below, which allows for workflows to run at fixed intervals, such as daily at midnight.
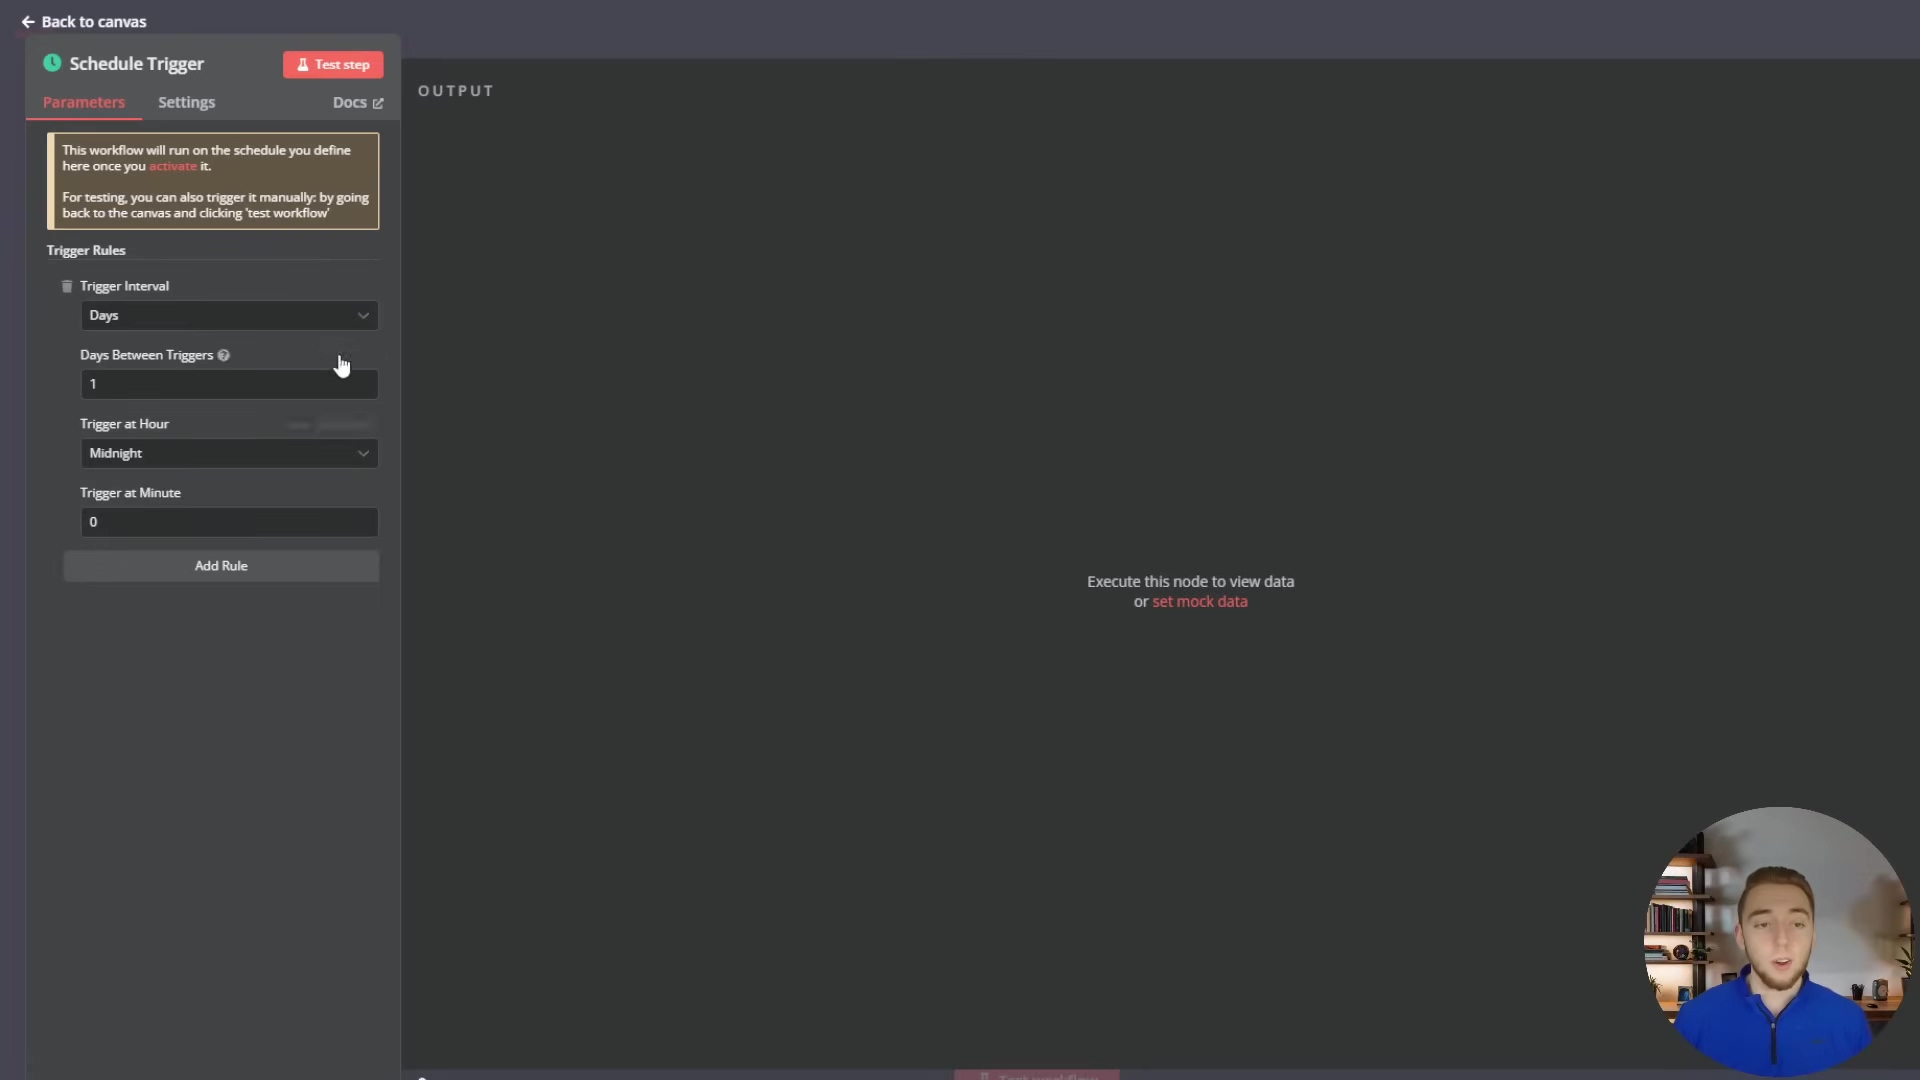
This ‘Schedule Trigger’ configuration, set to run daily at midnight, is perfect for periodic tasks like generating daily reports or performing routine data cleanups, complementing the real-time capabilities of webhooks and other event-driven triggers.
Tip 6: Leveraging n8n’s Workflow Library for Quick Starts
Accelerating Development with Pre-built Templates
Alright, let’s talk about a secret weapon for both n8n newbies and seasoned pros: the n8n workflow library. This thing is an absolute treasure trove! It’s packed with a massive collection of pre-built workflow templates, and it’s a powerful accelerator. Instead of staring at a blank canvas, wondering where to start, you can often find a template that already does a big chunk of what you need. This saves you a ton of development time and effort, letting you learn from existing implementations and kickstart your own projects without reinventing the wheel.
Navigating the n8n Workflow Library
- Extensive Collection: We’re talking over a thousand workflow templates here! They cover everything from simple data transfers to super complex AI integrations. This huge variety means you’re very likely to find something relevant, no matter how big or small your project is. It’s like having a giant cookbook of automation recipes!
- Smart Search and Filtering: The library has a really smart search function that lets you find exactly what you need:
- Apps: You can filter workflows by specific applications (like Google Drive, Slack, or OpenAI). This helps you find integrations relevant to your specific tech stack.
- Keywords: Use general keywords to search for specific functionalities (e.g., ‘PDF extraction’, ‘email parsing’, ‘sentiment analysis’).
- Nodes: You can even search by specific n8n nodes (like ‘Supabase Vector Store node’) to see real-world examples of how particular nodes are used. This is incredibly helpful for learning advanced node configurations and seeing best practices in action.
- In-depth Previews: Each template comes with a detailed overview. This usually includes a description, a list of all the nodes used, and a visual representation of the workflow. Many templates even have an interactive ‘n8n workflow viewer widget’ right on the website. This lets you explore the workflow structure directly before you even import it into your n8n instance, helping you quickly decide if it’s the right fit.
Benefits for Learning and Efficiency
- Learning Best Practices: By poking around well-designed templates, you can pick up on how experienced n8n users structure their workflows, handle data, and integrate various services. It’s an amazing way to absorb best practices and really improve your own workflow design skills.
- Rapid Prototyping: Got a new project? A template can be a robust starting point, letting you get a functional prototype up and running super fast. Then you can customize and expand upon it to meet your exact requirements.
- Troubleshooting and Inspiration: If you’re stuck on a particular problem, browsing the library might just reveal an existing solution or spark an idea for a completely new approach. It’s a community-driven resource where users share their creations, fostering a collaborative learning environment. So go ahead, explore, and get inspired!
To illustrate the wealth of resources available, the image below shows the n8n workflow library interface, with a search in progress for ‘Supabase’ related templates. This demonstrates how users can quickly find and leverage pre-built solutions.

This visual guide to the n8n workflow library emphasizes its role in accelerating development and fostering learning by providing access to over a thousand templates, searchable by apps, keywords, and nodes, with detailed previews for quick assessment.
Tip 7: Advanced Data Manipulation with Code Nodes
When Standard Nodes Aren’t Enough
n8n’s got a fantastic library of pre-built nodes, right? It covers a huge range of functionalities, making it a super powerful no-code/low-code platform. But let’s be honest, sometimes you hit a wall. There are those tricky situations where the standard nodes just don’t offer the exact logic or data transformation capabilities you need for a really custom or complex scenario. This is where Code nodes (specifically, JavaScript code nodes) come to the rescue! They’re your flexible escape hatch, letting you inject custom JavaScript logic directly into your workflow. This basically extends n8n’s capabilities to meet virtually any data manipulation or conditional logic requirement you can dream up.
Unleashing Custom Logic with JavaScript Code Nodes
- Complex Data Transformations: Code nodes are absolutely perfect for performing intricate data transformations that go way beyond simple mapping or filtering. Think about things like:
- Parsing irregular data formats: Extracting specific bits of information from messy, unstructured text or really complex JSON objects. Standard nodes might struggle here, but JavaScript can handle it.
- Aggregating data: Combining data from multiple items or nodes in a custom way. For example, concatenating text from several documents into one big string, or calculating custom metrics that aren’t built into other nodes.
- Conditional logic: Implementing super specific branching logic based on multiple conditions or external factors that would be a nightmare to express with just standard ‘If’ nodes.
- Accessing Previous Node Outputs: This is a huge one! Inside a Code node, you have full access to all the data outputs from previous nodes in your workflow. This is critical for building dynamic logic. You can reference data using expressions like
{{ $json.propertyName }}for the immediate previous node, or{{ $('NodeName').item.json.propertyName }}for nodes further back in the workflow. This allows you to build sophisticated data pipelines where your custom logic can process information from various stages of your workflow. - Custom API Calls and Integrations: While n8n has great HTTP Request nodes, a Code node can be used to construct highly dynamic API requests, handle complex authentication flows (like OAuth, if you’re feeling adventurous!), or process API responses in a custom way before passing them to subsequent nodes. This is especially useful for interacting with niche APIs or implementing your own custom retry logic.
Best Practices for Using Code Nodes
- Keep it Focused: Yes, Code nodes are powerful, but try not to cram too much logic into a single one. Break down complex tasks into smaller, more manageable Code nodes, or combine them with standard nodes for better clarity. Think modularity, even within your code!
- Error Handling within Code: Always, always, always implement
try-catchblocks within your JavaScript code. This helps you gracefully handle potential errors and prevents your entire workflow from crashing. You can then output custom error messages that n8n’s own error handling mechanisms can pick up and process. - Testing and Debugging: Thoroughly test your Code nodes with various inputs to make sure they behave exactly as you expect. Use
console.log()statements inside your Code node and then inspect the output in the n8n execution log to debug any issues. It’s your best friend for finding those pesky bugs! - Documentation: Add comments within your JavaScript code itself, and also use the Code node’s description field to explain its purpose, what inputs it expects, and what outputs it produces. This is absolutely vital for maintainability, especially when you’re working with a team or revisiting your own work months later.
To demonstrate the flexibility of Code nodes, the image below shows a simple example of a ‘Code’ node in an n8n workflow. This node allows for custom JavaScript logic to be injected, enabling advanced data manipulation and conditional processing that might not be possible with standard nodes alone.
This image, while showing a Google Drive Trigger, conceptually represents how a Code node could be inserted into such a workflow to perform custom logic on the data output from the trigger, for example, to parse specific metadata from the Google Drive file event before further processing. The ability to access and manipulate data from previous nodes is a key strength of Code nodes.
Tip 8: Monitoring and Debugging Your n8n Automations
The Criticality of Observability
So, you’ve built your n8n automations, and they’re humming along, especially those production-ready AI agents. But here’s the thing: once they’re out in the wild, you absolutely must keep an eye on them. This is where effective monitoring and debugging come in. Without proper “observability” – basically, being able to see what’s going on inside your workflows – figuring out why something broke, where the slowdowns are, or even just confirming that everything worked as planned can be a nightmare. Proactive monitoring helps you catch problems before they even affect your users, and efficient debugging tools let you fix issues super fast, ensuring your AI workflows run smoothly and reliably, 24/7.
Utilizing the Execution Log for Insights
n8n’s Execution Log is your mission control, your primary tool for monitoring and debugging. It’s like a detailed flight recorder for every single workflow execution, giving you invaluable insights into what happened, when, and why.
- Detailed Execution History: The execution log shows you a list of all your past workflow runs. You’ll see their status (did it succeed, fail, or is it still running?), when it started, and how long it took. You can filter and search through these logs to quickly find specific executions – super handy when you’re trying to track down a particular event.
- Node-Level Inspection: This is where the magic happens! For each execution, you can drill down into individual nodes to inspect their inputs and outputs. This is absolutely crucial for understanding how data flows through your workflow and pinpointing exactly where an issue might have started. You can see the exact data payload that went into and came out of each node, which is incredibly useful for debugging any data transformation problems.
- Error Messages and Stack Traces: When an error inevitably occurs, the execution log provides detailed error messages and, if applicable, stack traces. These messages will tell you the exact node and often the specific line of code or configuration that caused the failure. This dramatically speeds up the debugging process – no more guessing games!
Advanced Debugging Techniques
Beyond just looking at the basic logs, consider these advanced strategies to become a debugging wizard:
- Test Step Feature: When you’re building a workflow, use the ‘Test Step’ button on individual nodes. This lets you execute only that node and immediately inspect its output in real-time. It’s fantastic for iterative development and debugging complex logic without having to run the entire workflow every time.
- Pinning Data: Remember how I mentioned this in a previous tip? The ‘Pin Data’ feature lets you save the output of a specific node’s test execution. This means that even if you refresh n8n or close and reopen the workflow, that test data remains available for configuring subsequent nodes. It’s a huge time-saver during development and debugging.
- Set Node for Mock Data: For debugging specific branches or complex calculations, use a ‘Set’ node to inject mock data at various points in your workflow. This allows you to test different scenarios and edge cases without relying on live data or external triggers, which can be slow or unreliable during testing.
- Conditional Logging: Implement ‘If’ nodes to trigger special logging or notification workflows only when certain conditions are met. For example, if a specific value is null, or if an API response contains an error code. This provides targeted alerts for critical issues without flooding you with unnecessary notifications.
By mastering these monitoring and debugging techniques, you’ll ensure your n8n automations run like a well-oiled machine, quickly resolve any issues, and maintain high reliability for your production AI agents. You’ll be the hero of your automation team!
To visually understand the execution log, the image below displays the n8n workflow editor with the ‘Executions’ sidebar open. It shows a list of past workflow runs, their statuses (Succeeded or Error), and the data flow between nodes, including ‘2 items’ labels on connections, which is crucial for identifying issues in multi-item processing.
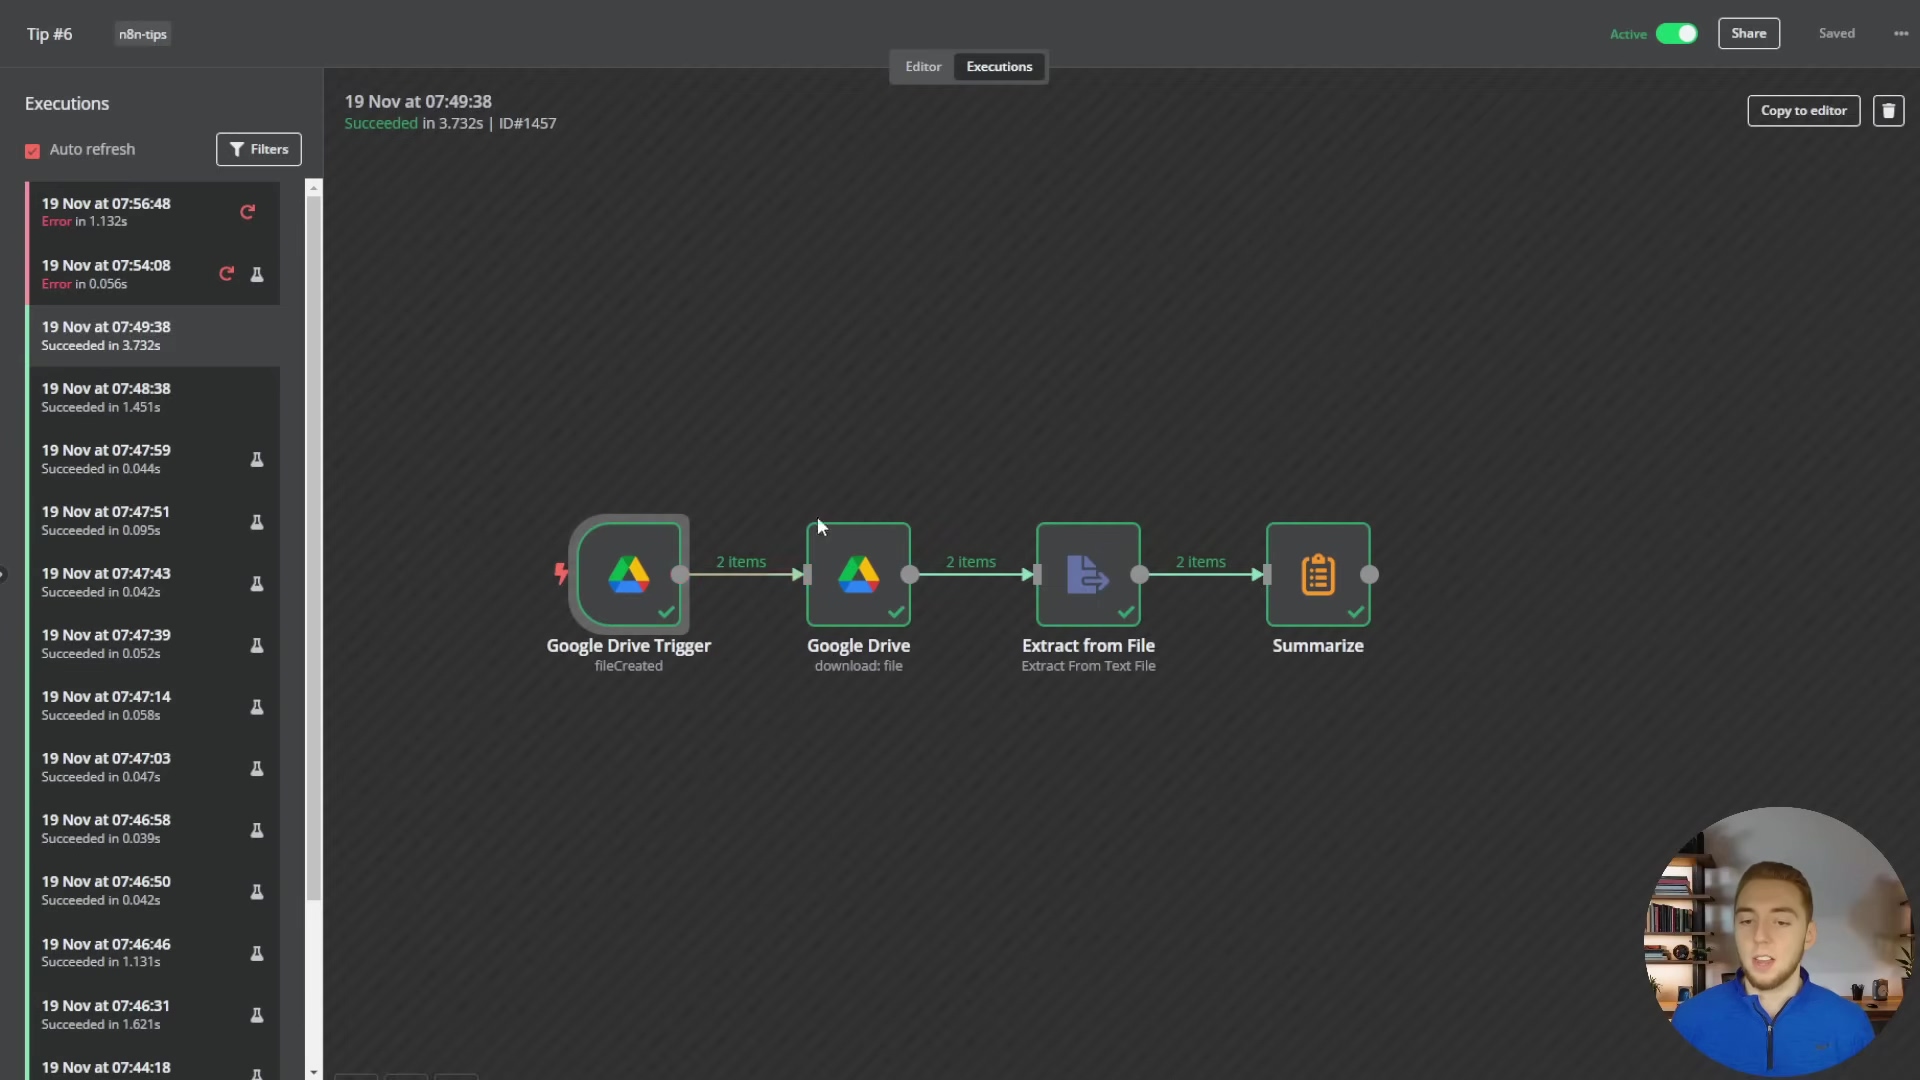
This execution log provides a comprehensive overview of workflow activity, allowing users to quickly identify successful runs, pinpoint errors, and inspect the data at each step, which is invaluable for debugging and ensuring the reliability of complex automations.
Tip 9: Advanced Workflow Design – Handling Multiple Items in Outputs
Understanding n8n’s Automatic Looping Behavior
n8n is designed to make automation easy, and one of its coolest features is how it automatically handles multiple items in a single node output. Imagine a node, like a ‘Google Drive Trigger’ or a ‘Split In Batches’ node, spits out several pieces of data. n8n, being smart, will automatically process each of those items individually through the subsequent nodes in your workflow. This means you usually don’t need to explicitly add ‘Loop’ nodes for basic item processing – the platform does that iteration for you! For example, if your Google Drive trigger detects two new files, the next node (say, ‘Extract Text from PDF’) will receive and process each file one after the other. Pretty convenient, right?
Challenges with Multiple Item Outputs
While this automatic looping is super handy, it can get a bit tricky when you need to do something that involves all the items together, or when you need to combine the results of multiple items back into a single output. Let’s say two files get uploaded at the same time, and you need to summarize the content of both files together before sending it to an LLM. If you just pass those two items directly to an LLM, it might treat them as separate requests, or your prompt might not be set up to handle multiple distinct inputs. This is where we need to get a bit more strategic.
Strategies for Handling Multiple Items
- Concatenation and Aggregation: When you need to combine outputs from multiple items into one single payload, nodes like ‘Merge’, ‘Aggregate’, or a custom ‘Code’ node are essential. For instance, after extracting text from two separate files, you might use a ‘Code’ node to stitch together (concatenate) the extracted text from both items into one big string. This consolidated string can then be passed to an LLM for a unified summary or analysis. This ensures the LLM gets all the relevant context in a single, coherent input.
- Conditional Processing: Sometimes, you might want to process different items in different ways based on certain conditions. An ‘If’ node can be used after a node that outputs multiple items to create branching paths in your workflow. Each item will pass through the ‘If’ node individually, allowing you to apply different logic to each one – for example, processing PDFs down one branch and text files down another.
- Batch Processing: For situations with a very large number of items, you might want to process them in batches. This helps manage API rate limits or control resource consumption. The ‘Split In Batches’ node can divide a large set of items into smaller groups, and then a ‘Merge’ node can re-combine the results after each batch has been processed. It’s like sending your data through a conveyor belt in manageable chunks.
Example Scenario: Summarizing Multiple Documents
Let’s imagine a workflow that’s triggered by new files appearing in Google Drive. If two documents are uploaded simultaneously, the Google Drive trigger will output two separate items. Each of these items will then flow through an ‘Extract Text from PDF’ node (if they’re PDFs, of course). Now, to summarize both documents together, you would then use a ‘Code’ node. This ‘Code’ node would aggregate the text from both items into a single variable. This variable, now containing the combined text, is then passed to your ‘Chat Model’ node for a comprehensive summary. This ensures that your LLM has the full context of all relevant documents, giving you a much better summary than if it processed them individually.
To illustrate how multiple items are handled in a workflow, the image below shows a ‘Google Drive Trigger’ node outputting multiple items, which then flow through subsequent nodes like ‘Set File ID’, ‘Delete Old Doc Rows’, ‘Download File’, and ‘Switch’. This demonstrates the automatic looping behavior and the need for strategies to aggregate or process these items collectively.
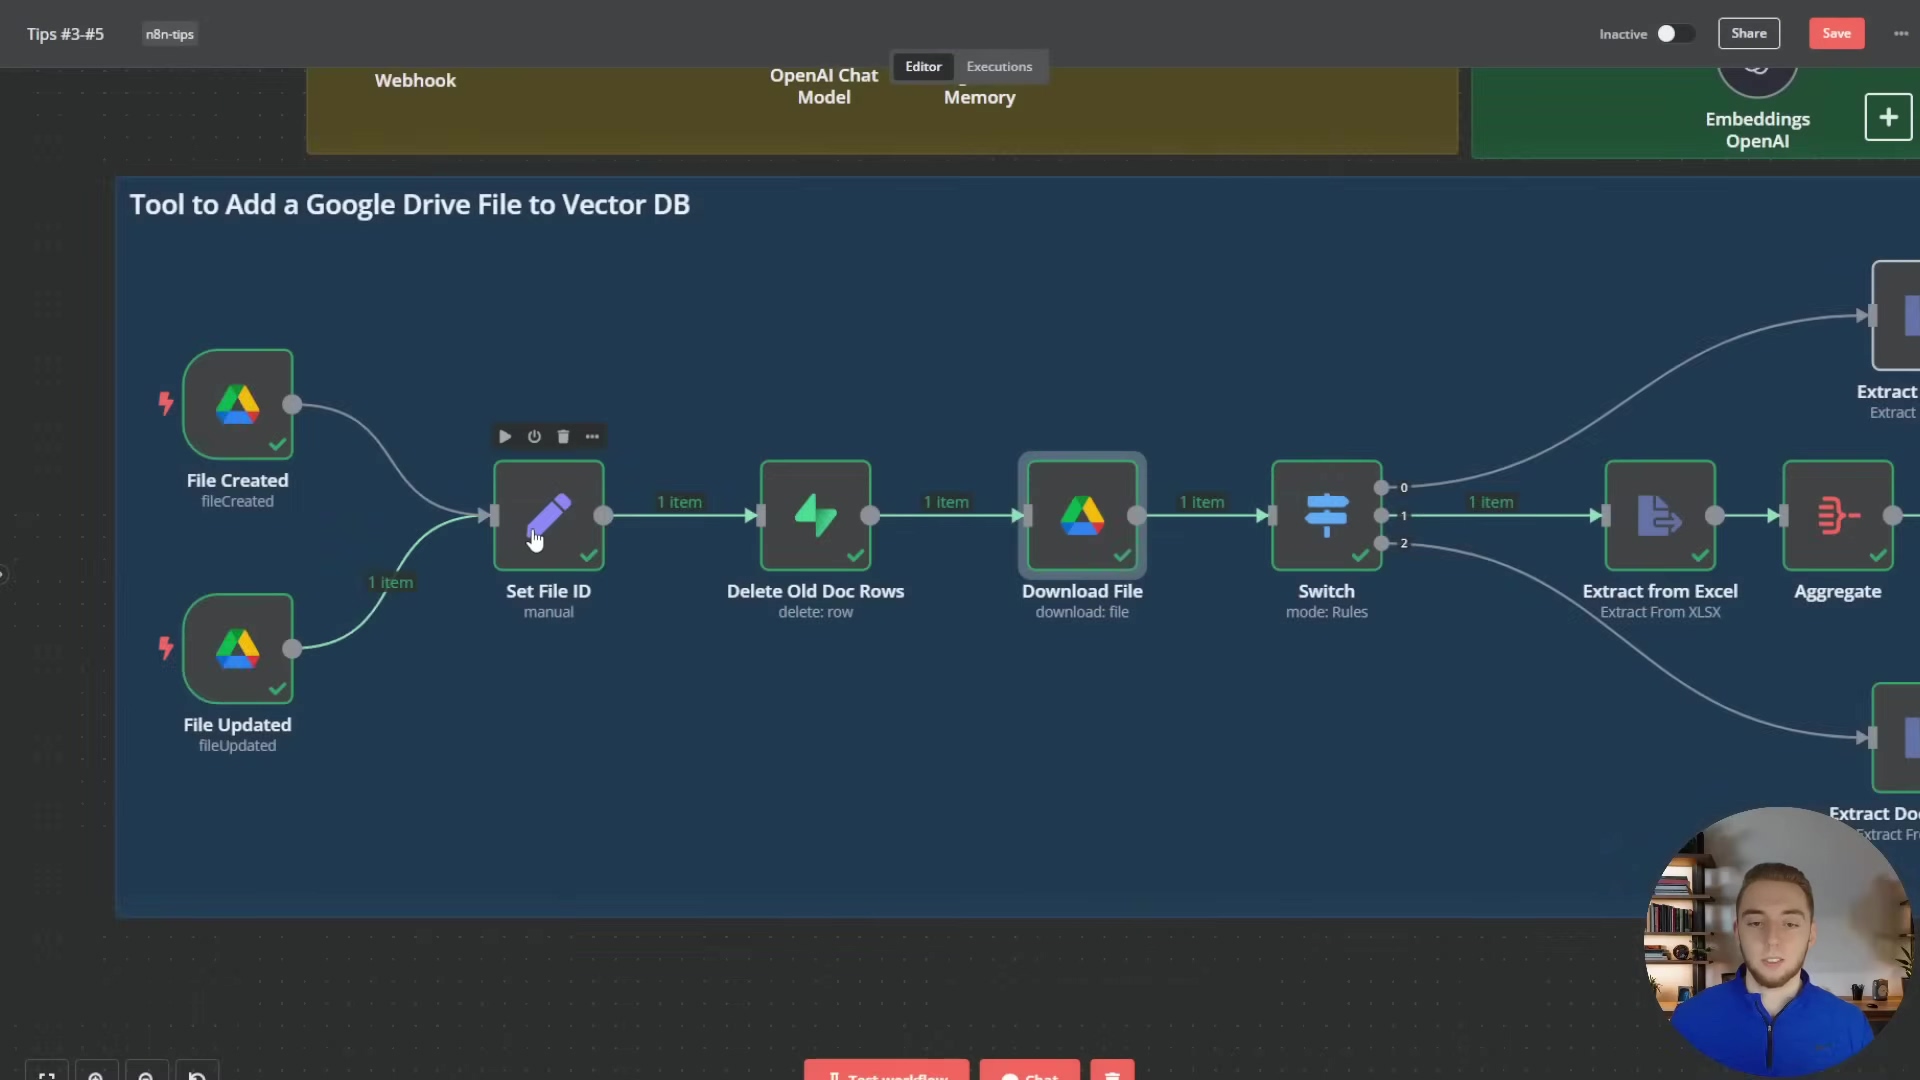
This detailed view of a Google Drive file processing workflow highlights how individual items (files) are processed sequentially, but also implicitly shows the challenge of combining information from multiple items if a unified action is required. For instance, if ‘File Created’ and ‘File Updated’ both output items, a subsequent aggregation step would be needed to treat them as a single context. Another example of handling multiple items is seen in the context of an AI agent with a chat interface, where multiple inputs might need to be processed.
This image, while focusing on chat-related nodes, implicitly shows how multiple chat messages or inputs could be handled by the ‘RAG AI Agent with Chat Interface’ section. The ‘Edit Fields’ node, for example, might be used to consolidate or transform multiple inputs before they are passed to the ‘RAG AI Agent’, demonstrating a practical application of handling multiple items in a dynamic, real-time scenario.
Tip 10: Optimizing Performance for Production Environments
The Need for Performance Optimization
Okay, we’ve built some amazing n8n workflows, maybe even some super smart AI agents. But building something functional is just the first step. Ensuring it performs optimally in a production environment is equally, if not more, crucial. Think of it like a high-performance race car. You can build it, but if it’s not tuned properly, it won’t win any races. An inefficient workflow can lead to slow response times, gobbling up too many resources, higher operational costs, and ultimately, a really bad user experience. Performance optimization is all about making smart architectural choices, tweaking node configurations, and using clever workflow design patterns to minimize delays, maximize how much work your workflow can handle, and keep everything stable even under heavy load.
Key Optimization Strategies
- Efficient LLM Usage: LLMs are powerful, but they can also be resource hogs if not managed well.
- Token Management: Be super mindful of the number of tokens you’re sending to and getting back from LLMs. Longer prompts and responses mean more tokens, which means higher costs and more latency. Try using summarization techniques or extracting only the absolutely relevant information before sending data to an LLM. Don’t send a whole book if the LLM only needs a paragraph!
- Model Selection: As we talked about in Tip 2, choose the right LLM for the job. Don’t use a super powerful, expensive model for simple tasks that a smaller, faster, and cheaper model can handle perfectly fine. For example, use a smaller model for initial classification and only bring in the big guns for complex reasoning tasks.
- Caching: For frequently asked questions or common prompts, consider implementing a caching mechanism. You could use a Redis node or a database to store LLM responses. This way, you can retrieve them instantly without re-querying the LLM, which dramatically reduces latency and cost. It’s like having a cheat sheet for common answers!
- Asynchronous Operations: This is about making sure your workflow doesn’t get stuck waiting around.
- Non-blocking Calls: Whenever possible, use non-blocking operations, especially for external API calls. While n8n handles a lot of this under the hood, always be aware of how long external services take to respond. For very long-running tasks, consider using a ‘Webhook’ node at the start and then a ‘Respond to Webhook’ node later in the workflow. This allows the initial request to complete quickly, giving the user an immediate response, while the heavy lifting continues in the background. It’s like telling someone, “I got your request, I’m working on it!” instead of making them wait.
- Batch Processing: Instead of processing items one by one in rapid succession (which can hit API rate limits or overwhelm services), use the ‘Split In Batches’ node to send requests in controlled groups. This prevents you from overwhelming external services and helps manage your resource usage more effectively.
- Database and Vector Store Optimization: If you’re using external storage (and you should be, as per Tip 1!), make sure it’s optimized.
- Indexing: Ensure your external databases (like PostgreSQL in Supabase) and vector stores (PGVector) are properly indexed. Indexes are like the index in a book – they significantly speed up data retrieval for chat history and RAG embeddings, which is absolutely critical for real-time AI agents. Without them, your database is just scanning every single entry, which is slow!
- Query Optimization: Design your database queries to be as efficient as possible. Avoid
SELECT *when you only need a few columns, and always use appropriateWHEREclauses to filter data as early as possible. Don’t pull more data than you need!
- Workflow Design and Resource Management: How you build your workflow matters.
- Minimize Nodes: While modularity is good (Tip 3!), try to avoid having an excessive number of nodes that perform really trivial operations. Each node adds a small bit of overhead. Consolidate logic where it makes sense, perhaps using a ‘Code’ node for multiple small transformations instead of many ‘Set’ nodes.
- Resource Allocation: If you’re self-hosting n8n, make sure your n8n instance has enough CPU, RAM, and network bandwidth to handle your expected load. Monitor your resource utilization to identify any bottlenecks. You wouldn’t run a marathon on a bicycle, right?
- Error Handling Overhead: While essential (Tip 4!), be mindful that overly complex error handling logic can also add overhead. It’s about balancing robustness with efficiency. Don’t over-engineer it if a simpler solution works.
By systematically applying these optimization techniques, you can ensure your n8n AI automations are not only functional but also highly performant, cost-effective, and fully capable of handling the demands of a production environment. You’ll be building automations that are ready for prime time!
To effectively monitor and optimize performance, understanding the execution flow and resource usage is key. The image below, while showing an execution log, implicitly relates to performance by allowing users to identify bottlenecks and optimize resource allocation. The ‘Executions’ sidebar with ‘Succeeded’ and ‘Error’ statuses, along with the ‘2 items’ labels on connections, provides crucial data for performance analysis.
This execution log is a vital tool for performance optimization, allowing developers to review workflow durations, identify nodes that take too long, and understand how multiple items are processed, which can inform strategies for batching or parallelization to improve overall efficiency.
Conclusion: Elevating Your n8n Skills for Future-Proof AI Automations
Wow, what a journey! We’ve covered a lot of ground today, haven’t we? Mastering n8n for scalable AI automations really means moving beyond just the basics and adopting some expert-level strategies. We dug into 10 critical tips, from leveraging external, production-ready memory and vector stores like Supabase (say goodbye to those in-memory headaches!) to intelligently picking the perfect LLM for your task, structuring your workflows for ultimate clarity, and implementing robust error handling that makes your automations truly resilient.
These practices aren’t just suggestions; they’re the fundamental building blocks for creating AI agents that are reliable, easy to maintain, and capable of scaling to meet real-world demands. By understanding n8n’s clever automatic looping, tapping into its amazing workflow library, and using code nodes for those tricky, advanced data manipulations, you can truly unlock the platform’s full potential. It’s like becoming a wizard of automation!
Looking ahead, the world of AI automation is constantly evolving, and n8n is right there at the forefront, empowering creators like us to build increasingly sophisticated solutions. The ability to integrate with hundreds of applications and seamlessly incorporate cutting-edge AI models positions n8n as a pivotal tool for future-proofing your automation strategies. As AI capabilities continue to advance, your proficiency in designing scalable and resilient n8n workflows will be a key differentiator, enabling you to adapt to new technologies and build even more intelligent agents. You’ll be ready for whatever the future throws at you!
To truly elevate your n8n skills, I encourage you to actively apply these tips in your own projects. Experiment with Supabase for persistent storage, test out different LLMs to find the optimal performers, and systematically implement those error workflows. Dive into the n8n workflow library for inspiration – it’s a goldmine! – and don’t be afraid to leverage code nodes to tackle those complex challenges. Continuous learning and practical application are the cornerstones of expertise, my friend. By embracing these principles, you’ll not only build more effective AI automations but also become a highly skilled n8n practitioner, ready to tackle the next generation of intelligent automation challenges. Go forth and automate!
Frequently Asked Questions (FAQ)
Q: Why are in-memory solutions not suitable for production AI agents in n8n?
A: In-memory solutions store data directly in the n8n instance’s RAM. While great for prototyping, they don’t scale well, consume excessive memory with high usage, lead to performance degradation, and most critically, result in data loss if the n8n instance restarts or scales down. For production, you need persistent and scalable external storage like Supabase.
Q: How do I choose the best LLM for my n8n workflow?
A: The “best” LLM depends on your specific use case. Consider factors like required intelligence/reasoning (e.g., Claude 3.5 Sonnet for top performance), processing speed (e.g., Groq for speed), and cost per token (e.g., GPT-4o mini for affordability). Also, use text-embedding-3-small for RAG embeddings and ideally the same LLM for chat and RAG chunk processing for consistency.
Q: What are the key benefits of using sub-workflows and modular design in n8n?
A: Sub-workflows and modular design significantly improve maintainability, debugging, and collaboration. They allow you to break down complex tasks into smaller, focused, and reusable components. This enhances clarity, makes workflows easier to understand and update, and reduces the likelihood of errors, saving significant time and effort in the long run.
Q: How can n8n’s error workflows help me build more resilient automations?
A: Global error workflows provide a centralized mechanism to handle errors across multiple main workflows. They can send instant notifications (e.g., Slack, email) with detailed error information, log errors for analysis, and even attempt automated remediation steps. This ensures critical issues are addressed promptly and your automations can gracefully recover from transient problems.
Q: When should I use a Code node instead of standard n8n nodes?
A: Use a Code node when standard n8n nodes don’t offer the precise logic or data manipulation capabilities you need. This includes complex data transformations (parsing irregular formats, custom aggregation), intricate conditional logic, or building highly dynamic API calls and integrations. Code nodes provide a flexible way to inject custom JavaScript logic, extending n8n’s functionality for unique scenarios.r you! For example, if your Google Drive trigger detects two new files, the next node (say, ‘Extract Text from PDF’) will receive and process each file one after the other. Pretty convenient, right?
Challenges with Multiple Item Outputs
While this automatic looping is super handy, it can get a bit tricky when you need to do something that involves all the items together, or when you need to combine the results of multiple items back into a single output. Let’s say two files get uploaded at the same time, and you need to summarize the content of both files together before sending it to an LLM. If you just pass those two items directly to an LLM, it might treat them as separate requests, or your prompt might not be set up to handle multiple distinct inputs. This is where we need to get a bit more strategic.
Strategies for Handling Multiple Items
- Concatenation and Aggregation: When you need to combine outputs from multiple items into one single payload, nodes like ‘Merge’, ‘Aggregate’, or a custom ‘Code’ node are essential. For instance, after extracting text from two separate files, you might use a ‘Code’ node to stitch together (concatenate) the extracted text from both items into one big string. This consolidated string can then be passed to an LLM for a unified summary or analysis. This ensures the LLM gets all the relevant context in a single, coherent input.
- Conditional Processing: Sometimes, you might want to process different items in different ways based on certain conditions. An ‘If’ node can be used after a node that outputs multiple items to create branching paths in your workflow. Each item will pass through the ‘If’ node individually, allowing you to apply different logic to each one – for example, processing PDFs down one branch and text files down another.
- Batch Processing: For situations with a very large number of items, you might want to process them in batches. This helps manage API rate limits or control resource consumption. The ‘Split In Batches’ node can divide a large set of items into smaller groups, and then a ‘Merge’ node can re-combine the results after each batch has been processed. It’s like sending your data through a conveyor belt in manageable chunks.
Example Scenario: Summarizing Multiple Documents
Let’s imagine a workflow that’s triggered by new files appearing in Google Drive. If two documents are uploaded simultaneously, the Google Drive trigger will output two separate items. Each of these items will then flow through an ‘Extract Text from PDF’ node (if they’re PDFs, of course). Now, to summarize both documents together, you would then use a ‘Code’ node. This ‘Code’ node would aggregate the text from both items into a single variable. This variable, now containing the combined text, is then passed to your ‘Chat Model’ node for a comprehensive summary. This ensures that your LLM has the full context of all relevant documents, giving you a much better summary than if it processed them individually.
To illustrate how multiple items are handled in a workflow, the image below shows a ‘Google Drive Trigger’ node outputting multiple items, which then flow through subsequent nodes like ‘Set File ID’, ‘Delete Old Doc Rows’, ‘Download File’, and ‘Switch’. This demonstrates the automatic looping behavior and the need for strategies to aggregate or process these items collectively.
This detailed view of a Google Drive file processing workflow highlights how individual items (files) are processed sequentially, but also implicitly shows the challenge of combining information from multiple items if a unified action is required. For instance, if ‘File Created’ and ‘File Updated’ both output items, a subsequent aggregation step would be needed to treat them as a single context. Another example of handling multiple items is seen in the context of an AI agent with a chat interface, where multiple inputs might need to be processed.
This image, while focusing on chat-related nodes, implicitly shows how multiple chat messages or inputs could be handled by the ‘RAG AI Agent with Chat Interface’ section. The ‘Edit Fields’ node, for example, might be used to consolidate or transform multiple inputs before they are passed to the ‘RAG AI Agent’, demonstrating a practical application of handling multiple items in a dynamic, real-time scenario.
Tip 10: Optimizing Performance for Production Environments
The Need for Performance Optimization
Okay, we’ve built some amazing n8n workflows, maybe even some super smart AI agents. But building something functional is just the first step. Ensuring it performs optimally in a production environment is equally, if not more, crucial. Think of it like a high-performance race car. You can build it, but if it’s not tuned properly, it won’t win any races. An inefficient workflow can lead to slow response times, gobbling up too many resources, higher operational costs, and ultimately, a really bad user experience. Performance optimization is all about making smart architectural choices, tweaking node configurations, and using clever workflow design patterns to minimize delays, maximize how much work your workflow can handle, and keep everything stable even under heavy load.
Key Optimization Strategies
- Efficient LLM Usage: LLMs are powerful, but they can also be resource hogs if not managed well.
- Token Management: Be super mindful of the number of tokens you’re sending to and getting back from LLMs. Longer prompts and responses mean more tokens, which means higher costs and more latency. Try using summarization techniques or extracting only the absolutely relevant information before sending data to an LLM. Don’t send a whole book if the LLM only needs a paragraph!
- Model Selection: As we talked about in Tip 2, choose the right LLM for the job. Don’t use a super powerful, expensive model for simple tasks that a smaller, faster, and cheaper model can handle perfectly fine. For example, use a smaller model for initial classification and only bring in the big guns for complex reasoning tasks.
- Caching: For frequently asked questions or common prompts, consider implementing a caching mechanism. You could use a Redis node or a database to store LLM responses. This way, you can retrieve them instantly without re-querying the LLM, which dramatically reduces latency and cost. It’s like having a cheat sheet for common answers!
- Asynchronous Operations: This is about making sure your workflow doesn’t get stuck waiting around.
- Non-blocking Calls: Whenever possible, use non-blocking operations, especially for external API calls. While n8n handles a lot of this under the hood, always be aware of how long external services take to respond. For very long-running tasks, consider using a ‘Webhook’ node at the start and then a ‘Respond to Webhook’ node later in the workflow. This allows the initial request to complete quickly, giving the user an immediate response, while the heavy lifting continues in the background. It’s like telling someone, “I got your request, I’m working on it!” instead of making them wait.
- Batch Processing: Instead of processing items one by one in rapid succession (which can hit API rate limits or overwhelm services), use the ‘Split In Batches’ node to send requests in controlled groups. This prevents you from overwhelming external services and helps manage your resource usage more effectively.
- Database and Vector Store Optimization: If you’re using external storage (and you should be, as per Tip 1!), make sure it’s optimized.
- Indexing: Ensure your external databases (like PostgreSQL in Supabase) and vector stores (PGVector) are properly indexed. Indexes are like the index in a book – they significantly speed up data retrieval for chat history and RAG embeddings, which is absolutely critical for real-time AI agents. Without them, your database is just scanning every single entry, which is slow!
- Query Optimization: Design your database queries to be as efficient as possible. Avoid
SELECT *when you only need a few columns, and always use appropriateWHEREclauses to filter data as early as possible. Don’t pull more data than you need!
- Workflow Design and Resource Management: How you build your workflow matters.
- Minimize Nodes: While modularity is good (Tip 3!), try to avoid having an excessive number of nodes that perform really trivial operations. Each node adds a small bit of overhead. Consolidate logic where it makes sense, perhaps using a ‘Code’ node for multiple small transformations instead of many ‘Set’ nodes.
- Resource Allocation: If you’re self-hosting n8n, make sure your n8n instance has enough CPU, RAM, and network bandwidth to handle your expected load. Monitor your resource utilization to identify any bottlenecks. You wouldn’t run a marathon on a bicycle, right?
- Error Handling Overhead: While essential (Tip 4!), be mindful that overly complex error handling logic can also add overhead. It’s about balancing robustness with efficiency. Don’t over-engineer it if a simpler solution works.
By systematically applying these optimization techniques, you can ensure your n8n AI automations are not only functional but also highly performant, cost-effective, and fully capable of handling the demands of a production environment. You’ll be building automations that are ready for prime time!
To effectively monitor and optimize performance, understanding the execution flow and resource usage is key. The image below, while showing an execution log, implicitly relates to performance by allowing users to identify bottlenecks and optimize resource allocation. The ‘Executions’ sidebar with ‘Succeeded’ and ‘Error’ statuses, along with the ‘2 items’ labels on connections, provides crucial data for performance analysis.
This execution log is a vital tool for performance optimization, allowing developers to review workflow durations, identify nodes that take too long, and understand how multiple items are processed, which can inform strategies for batching or parallelization to improve overall efficiency.
Conclusion: Elevating Your n8n Skills for Future-Proof AI Automations
Wow, what a journey! We’ve covered a lot of ground today, haven’t we? Mastering n8n for scalable AI automations really means moving beyond just the basics and adopting some expert-level strategies. We dug into 10 critical tips, from leveraging external, production-ready memory and vector stores like Supabase (say goodbye to those in-memory headaches!) to intelligently picking the perfect LLM for your task, structuring your workflows for ultimate clarity, and implementing robust error handling that makes your automations truly resilient.
These practices aren’t just suggestions; they’re the fundamental building blocks for creating AI agents that are reliable, easy to maintain, and capable of scaling to meet real-world demands. By understanding n8n’s clever automatic looping, tapping into its amazing workflow library, and using code nodes for those tricky, advanced data manipulations, you can truly unlock the platform’s full potential. It’s like becoming a wizard of automation!
Looking ahead, the world of AI automation is constantly evolving, and n8n is right there at the forefront, empowering creators like us to build increasingly sophisticated solutions. The ability to integrate with hundreds of applications and seamlessly incorporate cutting-edge AI models positions n8n as a pivotal tool for future-proofing your automation strategies. As AI capabilities continue to advance, your proficiency in designing scalable and resilient n8n workflows will be a key differentiator, enabling you to adapt to new technologies and build even more intelligent agents. You’ll be ready for whatever the future throws at you!
To truly elevate your n8n skills, I encourage you to actively apply these tips in your own projects. Experiment with Supabase for persistent storage, test out different LLMs to find the optimal performers, and systematically implement those error workflows. Dive into the n8n workflow library for inspiration – it’s a goldmine! – and don’t be afraid to leverage code nodes to tackle those complex challenges. Continuous learning and practical application are the cornerstones of expertise, my friend. By embracing these principles, you’ll not only build more effective AI automations but also become a highly skilled n8n practitioner, ready to tackle the next generation of intelligent automation challenges. Go forth and automate!
Frequently Asked Questions (FAQ)
Q: Why are in-memory solutions not suitable for production AI agents in n8n?
A: In-memory solutions store data directly in the n8n instance’s RAM. While great for prototyping, they don’t scale well, consume excessive memory with high usage, lead to performance degradation, and most critically, result in data loss if the n8n instance restarts or scales down. For production, you need persistent and scalable external storage like Supabase.
Q: How do I choose the best LLM for my n8n workflow?
A: The “best” LLM depends on your specific use case. Consider factors like required intelligence/reasoning (e.g., Claude 3.5 Sonnet for top performance), processing speed (e.g., Groq for speed), and cost per token (e.g., GPT-4o mini for affordability). Also, use text-embedding-3-small for RAG embeddings and ideally the same LLM for chat and RAG chunk processing for consistency.
Q: What are the key benefits of using sub-workflows and modular design in n8n?
A: Sub-workflows and modular design significantly improve maintainability, debugging, and collaboration. They allow you to break down complex tasks into smaller, focused, and reusable components. This enhances clarity, makes workflows easier to understand and update, and reduces the likelihood of errors, saving significant time and effort in the long run.
Q: How can n8n’s error workflows help me build more resilient automations?
A: Global error workflows provide a centralized mechanism to handle errors across multiple main workflows. They can send instant notifications (e.g., Slack, email) with detailed error information, log errors for analysis, and even attempt automated remediation steps. This ensures critical issues are addressed promptly and your automations can gracefully recover from transient problems.
Q: When should I use a Code node instead of standard n8n nodes?
A: Use a Code node when standard n8n nodes don’t offer the precise logic or data manipulation capabilities you need. This includes complex data transformations (parsing irregular formats, custom aggregation), intricate conditional logic, or building highly dynamic API calls and integrations. Code nodes provide a flexible way to inject custom JavaScript logic, extending n8n’s functionality for unique scenarios.