Watch the Video Tutorial
💡 Pro Tip: After watching the video, continue reading below for detailed step-by-step instructions, code examples, and additional tips that will help you implement this successfully.
So, you want to learn how to create an X bot with n8n? Awesome! Boyce here, and you’ve just found the perfect launchpad. Building a bot to automate your X (formerly Twitter) tasks sounds complex, but with n8n’s visual workflow builder, it’s like assembling digital LEGOs. In this step-by-step guide, I’m going to demystify the entire process for you. We’ll walk through getting your free X API keys, connecting them securely to n8n, and building your very first bot that can post tweets automatically. Forget complex code; let’s build your social media assistant right now!
TL;DR
Alright, let’s get you up and running with connecting n8n to X (that’s Twitter, for my fellow old-schoolers!). Think of this as your quick cheat sheet, a cosmic shortcut to getting things done.
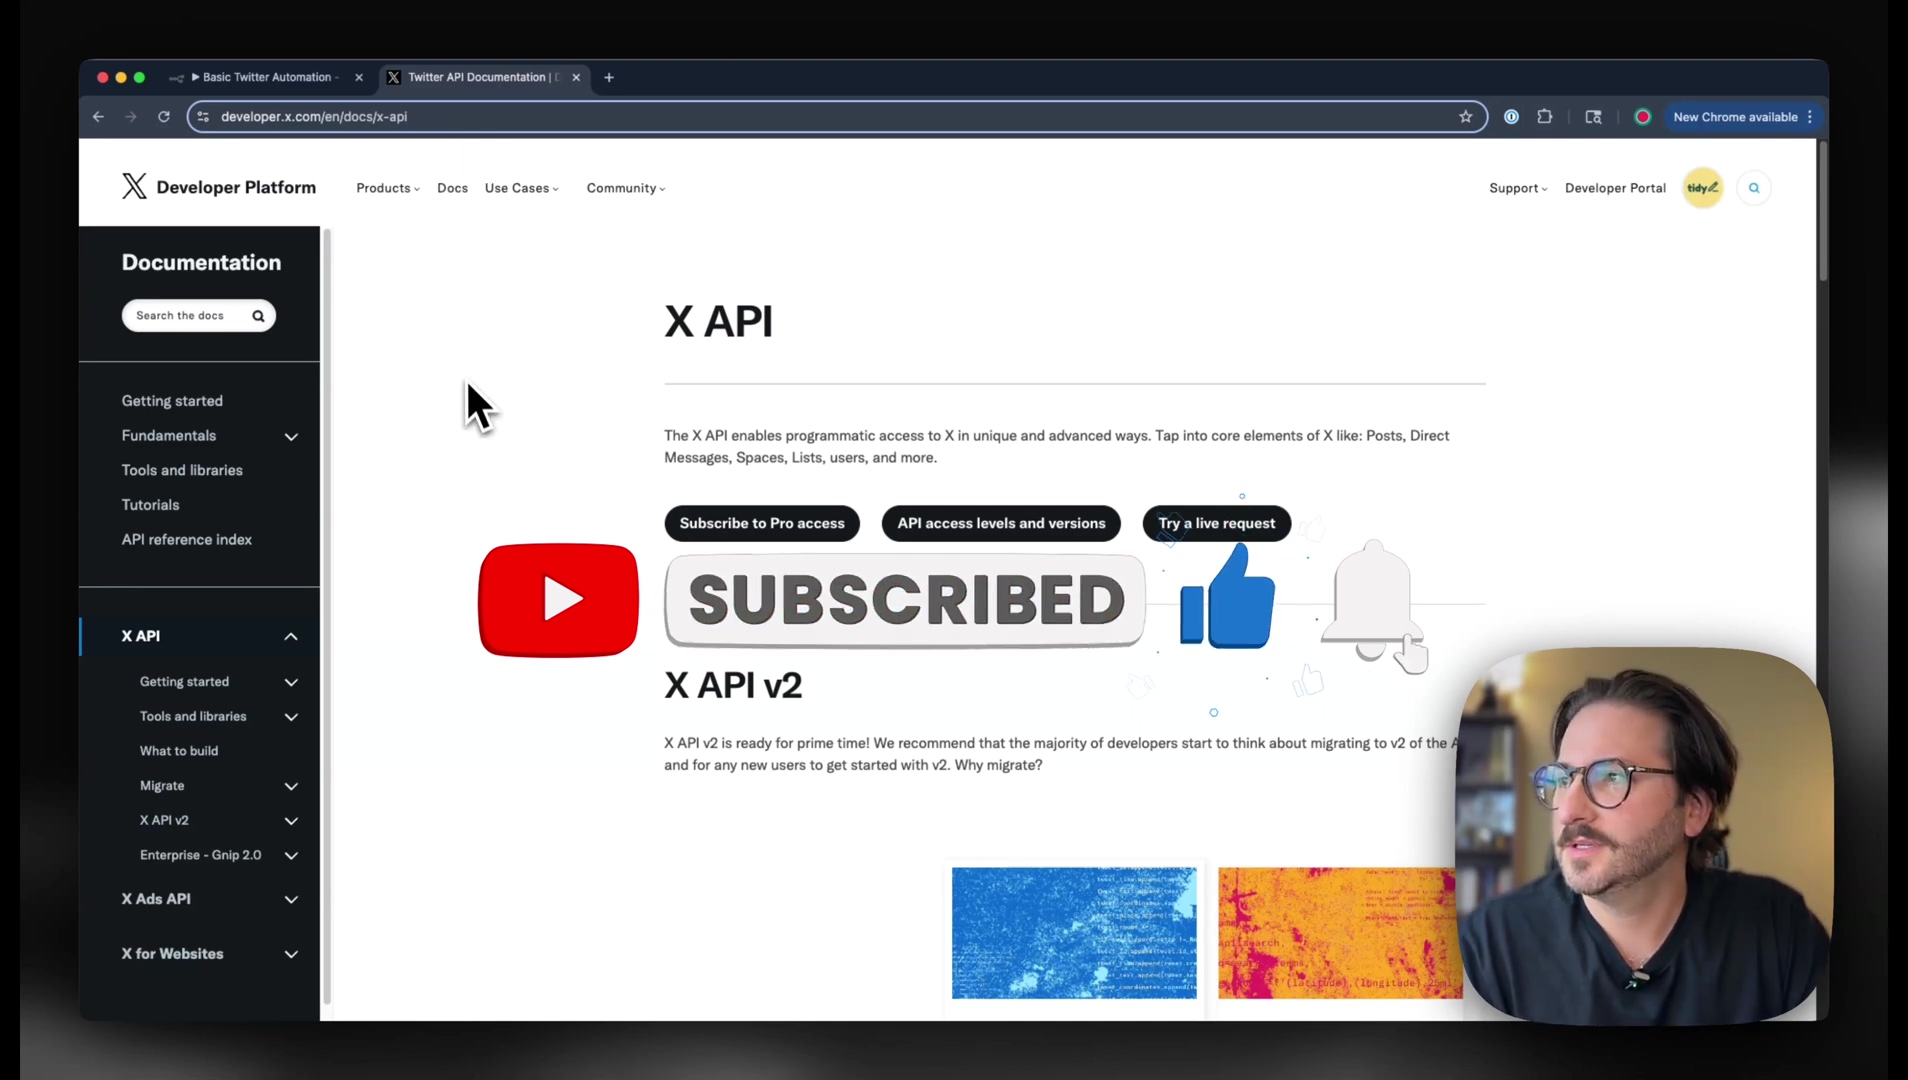
- Access X Developer Platform: First things first, you’ll need to find the X Developer Platform. Just search for “Twitter API” and click that first link that pops up. Easy peasy.
- Sign Up for Free Account: Once you’re on the developer portal, look for the “Sign up for free account” option. Don’t get distracted by the shiny paid tiers; we’re going for the free stuff today!
- Create Developer Project and App: You’ll be setting up an “App” within your project. This is like giving your n8n workflow its own little identity on X. Make sure to configure its “User authentication settings” as a web app and give it
Read and Writepermissions. This lets n8n actually do things, not just look. - Retrieve API Credentials: After your app is all set, the X Developer Portal will hand you your golden keys: the Client ID and Client Secret. Guard these with your digital life!
- Connect n8n: Hop over to n8n, add a new X credential, paste in those Client ID and Client Secret values, and then authorize the connection through the pop-up window. It’s like a digital handshake.
- Verification: If you’ve nailed it, n8n will show you a glorious green checkmark. That means your connection is solid, and you’re ready to automate!
This guide is your personal star chart for connecting n8n to Twitter (now known as X) for all your automation dreams. We’re going to walk through a super-streamlined setup for the X API, focusing on how to use the free tier so you can automate without breaking the bank. Just follow these steps to get your development environment and application details configured, and you’ll be unleashing powerful social media automations in no time. It’s like giving your social media presence a robotic assistant, and who doesn’t want that?
Table of Contents
Open Table of Contents
- Introduction to n8n and Twitter (X) Integrations
- Navigating the X Developer Platform: Account Setup and Access
- Creating Your Developer Project and App on X
- Obtaining API Keys and Access Tokens for n8n
- Connecting X Credentials within n8n: A Step-by-Step Guide
- Building Your First X Automation Workflow in n8n
- Best Practices for X API Usage and n8n Workflows
- Troubleshooting Common X-n8n Connection Issues
- Advanced X Automation with n8n: Beyond the Basics
- Frequently Asked Questions (FAQ)
- Q: What is n8n and why use it with X?
- Q: Is the X API free to use for n8n integrations?
- Q: What permissions do I need for my X app in n8n?
- Q: What is a Redirect URL and why is it important?
- Q: How do I troubleshoot “Unauthorized” errors when connecting n8n to X?
- Q: Can I post images or videos to X using n8n?
- Q: How can I avoid hitting X API rate limits in n8n?
- Final Summary
Introduction to n8n and Twitter (X) Integrations
Hey there, future automation wizard! Boyce here, and I’m super excited to show you how integrating n8n with the X (formerly Twitter) platform can unlock a whole universe of automation possibilities. We’re talking everything from scheduling your posts like a pro, curating content without lifting a finger, diving into sentiment analysis, and even setting up automated responses. It’s like having a digital clone managing your social media!
This guide is all about getting that foundational connection established. We’ll be leveraging n8n’s incredibly robust workflow capabilities with X’s extensive API. My goal? To completely demystify the API setup process and get you quickly implementing custom automations without getting tangled in complex technical jargon. Trust me, I’ve been there, staring at screens, wondering where to even begin. By the time we’re done, you’ll have a fully authenticated n8n instance, ready to chat with X’s API, opening up new avenues for super-efficient digital communication and engagement strategies. How cool is that?
Leveraging n8n for X Automation
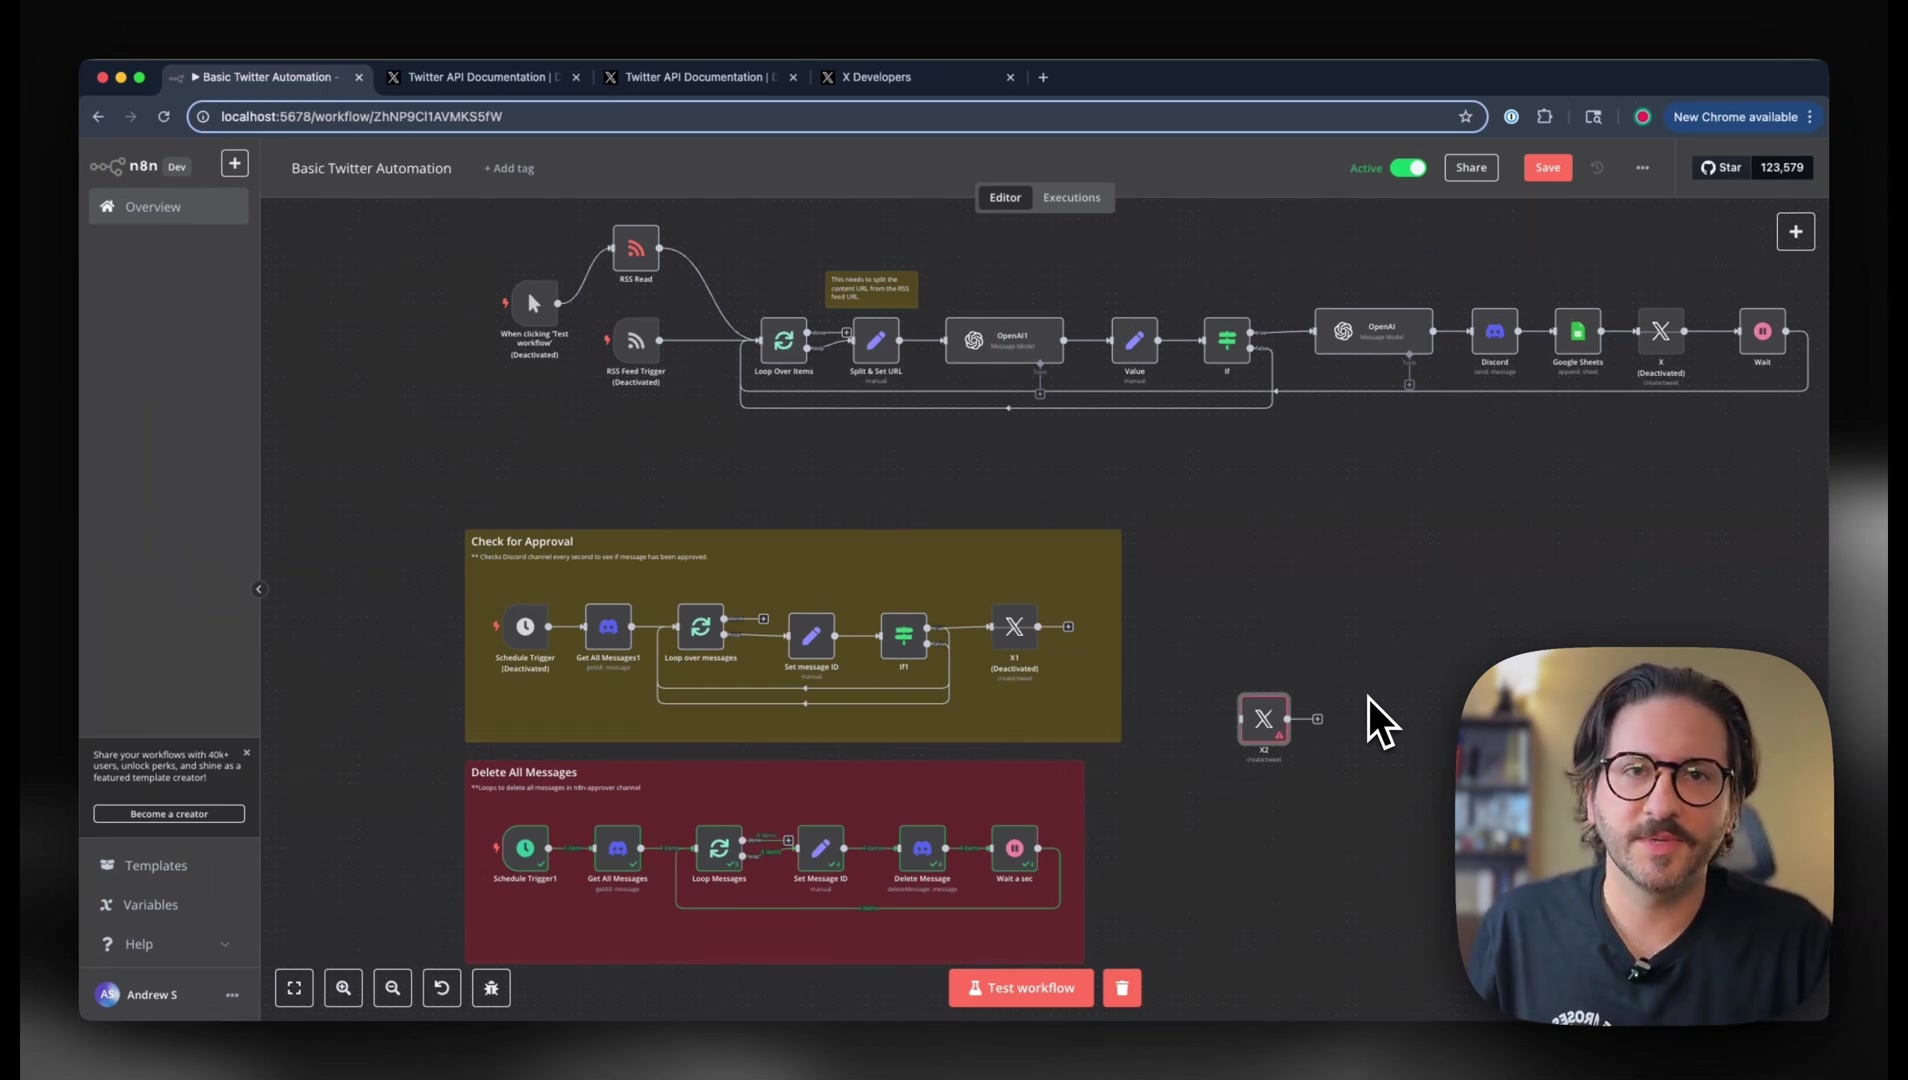
So, what exactly is n8n? Well, it’s a powerful, open-source workflow automation tool that lets you visually connect different services and APIs. Think of it like building with digital LEGOs! When you integrate it with X, it transforms those repetitive, routine tasks into automated processes. This means you can automatically post updates, keep an eye on specific keywords (social listening, anyone?), engage with mentions, or even pull out data for analysis. The best part? n8n’s modular nature means you can build some seriously complex workflows with relative ease, whether you’re a seasoned techie or just starting your automation journey. It’s designed to be user-friendly, so you don’t need to be a coding guru to make magic happen.
Use Cases for X Automations
Now, why would you even want to automate X? Oh, the possibilities are endless! Here are just a few common use cases that n8n can help you with:
- Content Scheduling: Imagine automatically publishing your posts exactly when you want them, straight from your content calendar. No more frantic last-minute posting!
- Social Listening: Want to know what people are saying about your brand, products, or even specific keywords? n8n can monitor those mentions and trigger alerts so you’re always in the loop.
- Customer Service: You can set up automations to respond to common inquiries or even direct support requests to your internal systems. It’s like having a 24/7 customer service bot!
- Data Analysis: Collect tweet data for market research or to identify trending topics. This is super handy for understanding what’s buzzing in your industry.
Each of these can be built and managed right inside n8n, significantly boosting your operational efficiency on the X platform. It’s all about working smarter, not harder, right?
Navigating the X Developer Platform: Account Setup and Access
Alright, space cadets, before we can launch our n8n automations, we need to get our spaceship (n8n) connected to the X mothership. The very first step is to access and set up an account on the X Developer Platform. This is where all the magic happens, providing us with the necessary tools and credentials to talk to the X API. Whether you’re a developer, a marketer, or just an automation enthusiast like me, you’ll need to navigate this platform to secure API access, even for the most basic automation tasks. Don’t worry, I’ll be your co-pilot!
Access the X Developer Platform
Goal: Our mission, should we choose to accept it, is to access the X Developer Platform and kick off the API setup process. Let’s do this!
- Search for X API: Open up your favorite web browser (mine’s Chrome, but you do you!) and type in “Twitter API” or “X API”. You’ll usually find the official developer platform link right at the top of the search results. Click that one! It’s usually something like
developer.twitter.com.
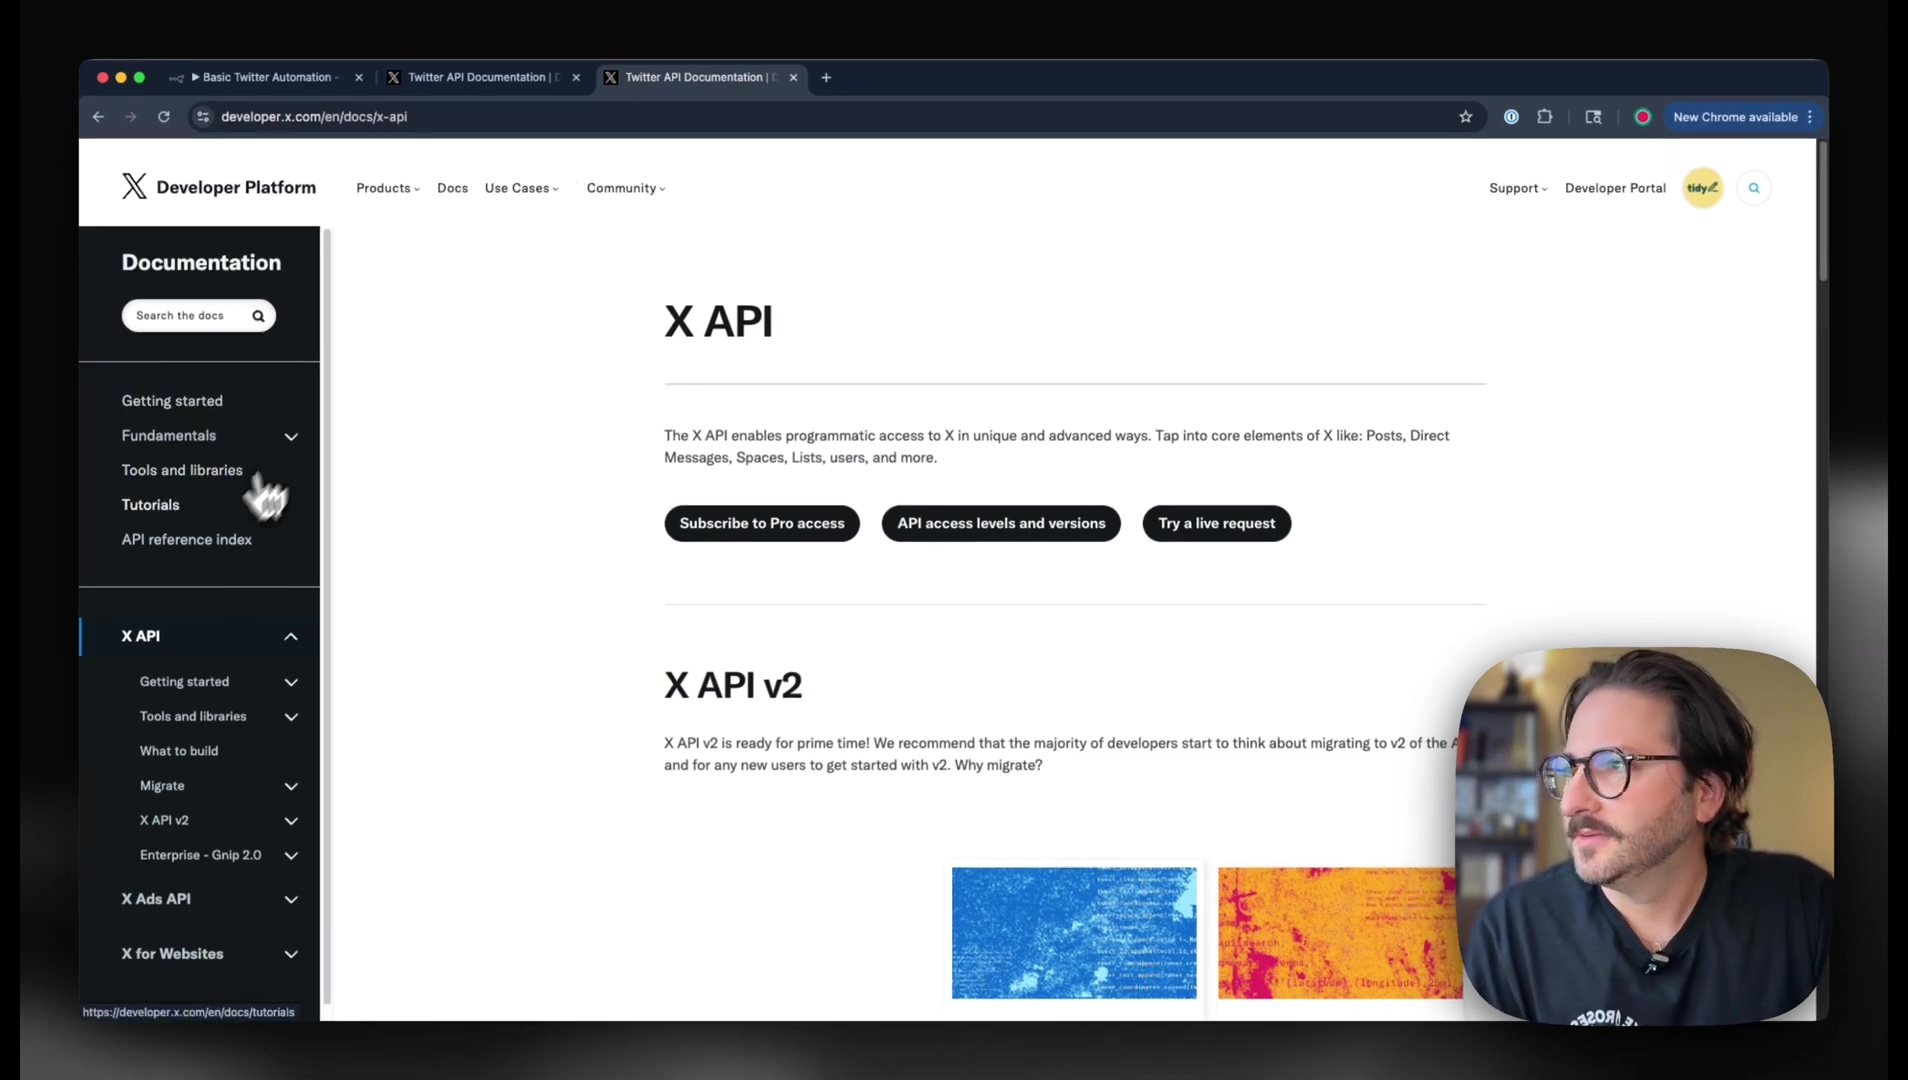
- Navigate to Developer Portal: Once you land on the X Developer Platform homepage, keep an eye out for a link that says “Developer Portal”. This portal is like the control center for all our API-related configurations. Give it a click!
Free Tier Options and Account Creation
Goal: Now, this is a crucial step! We want to sign up for a free developer account. Why? Because we’re smart automators, and we want to avoid any immediate payment requirements. Let’s keep those wallets tucked away for now.
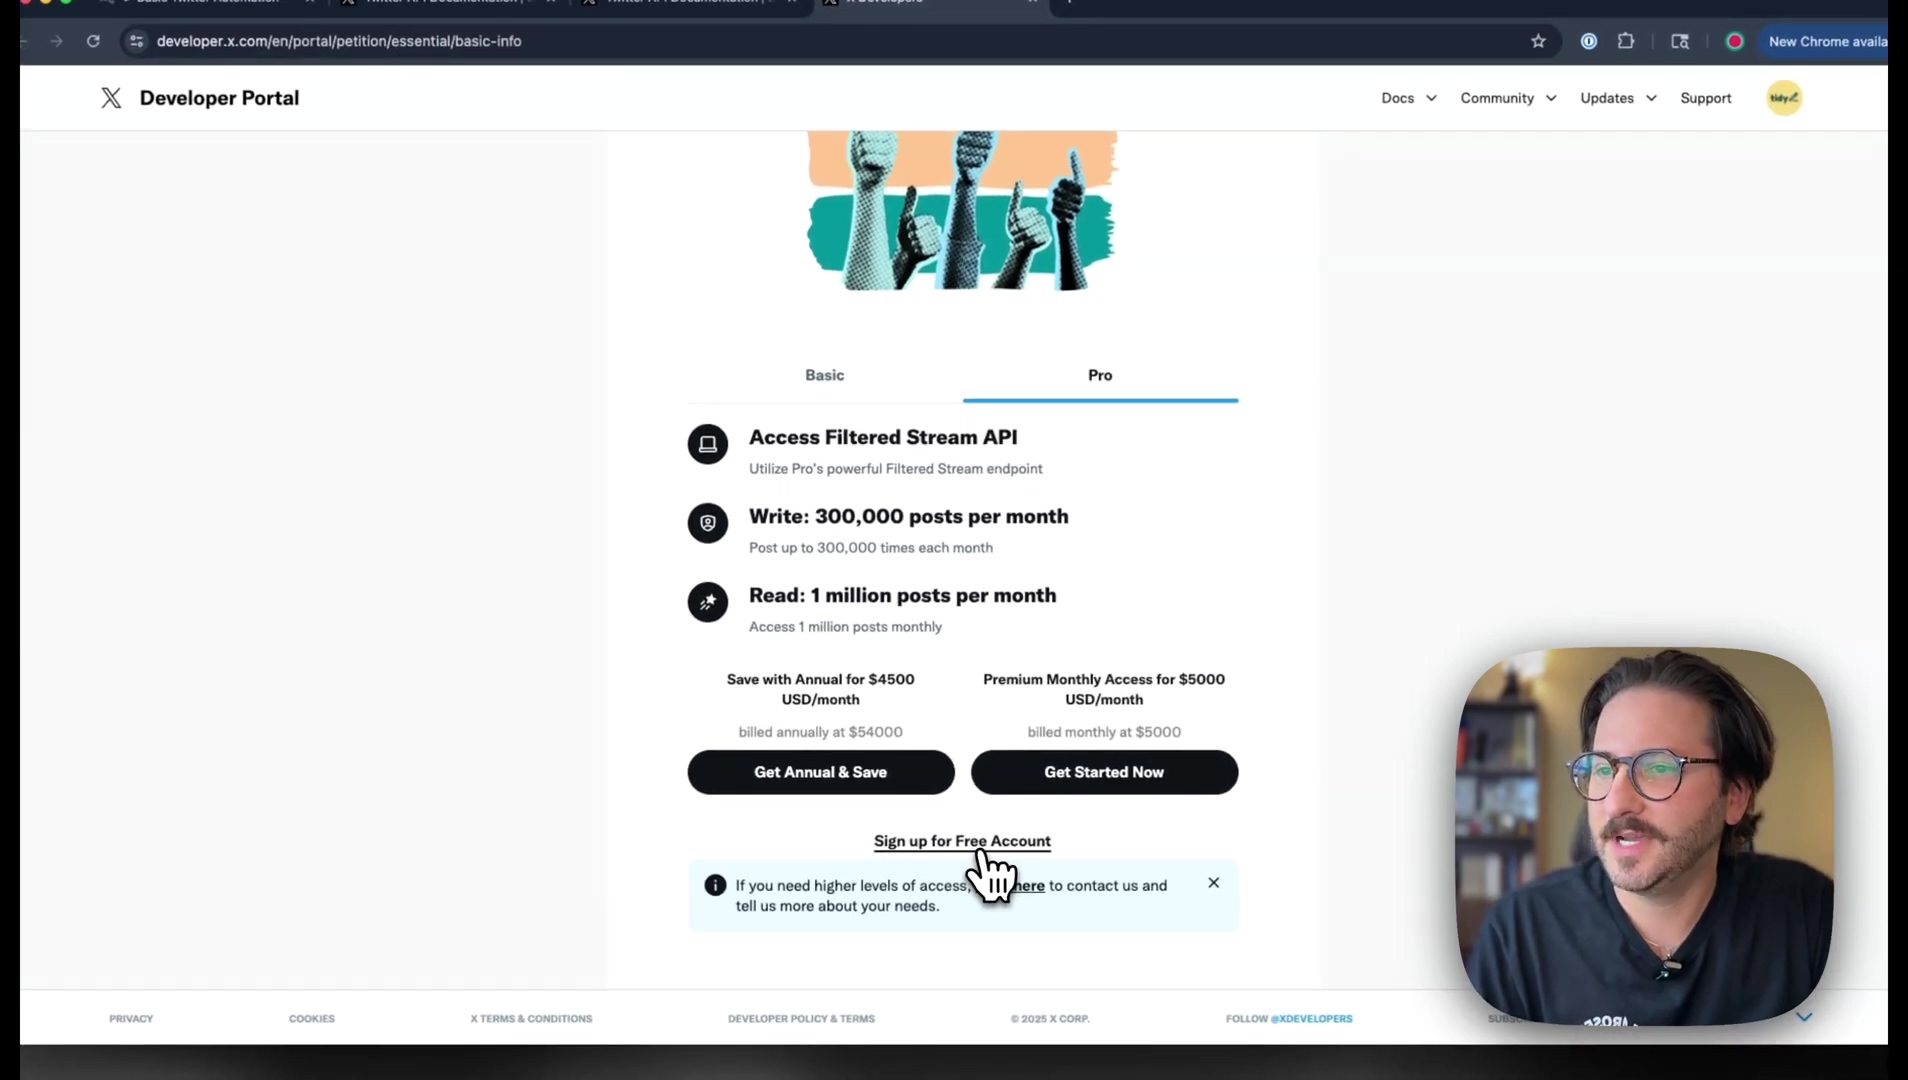
- Identify Pricing Tiers: As you explore the developer portal, you’ll probably stumble upon options for “Basic” and “Pro” access. These might show some pretty intimidating pricing, and trust me, I’ve had my fair share of sticker shock moments in tech. But don’t panic!
- Select Free Account: Here’s the secret handshake: crucially, bypass those paid options. Look for the “Sign up for free account” option. It’s often a bit hidden, like a secret level in a video game, but it’s there! This choice grants you access to the essential API functionalities without costing you a dime. Sweet!
- Provide Justification: The platform will ask you for a brief explanation of what you plan to do with your project. Don’t overthink this! While the specific content usually doesn’t have a huge impact on approval (they just want to know you’re not a bot… or maybe you are, but a good bot!), provide a concise description of your intended use. Something like “testing for YouTube” or “personal automation project” usually does the trick. Just make sure your description hits the minimum character count of 250 characters. It’s like writing a mini-essay, but for robots!
- Accept Terms: Finally, take a moment to review (or at least scroll through) and accept the X Developer Platform’s terms and conditions. Standard procedure, just like agreeing to terms on any new app.

Creating Your Developer Project and App on X
Alright, you’ve successfully navigated the initial setup! Pat yourself on the back. Now that your developer account is all set up, the next big step is to create a new project and an application (or “App”) within the X Developer Portal. Think of this app as the dedicated communication channel, the walkie-talkie, through which n8n will talk to the X API. Getting the app’s details and authentication settings just right is super important for a smooth integration. No pressure, but this is where we lay the groundwork for our automation empire!
Set Up a New Project
Goal: Our goal here is to create a new project. This helps keep all your applications and credentials organized, like a well-maintained toolbox.
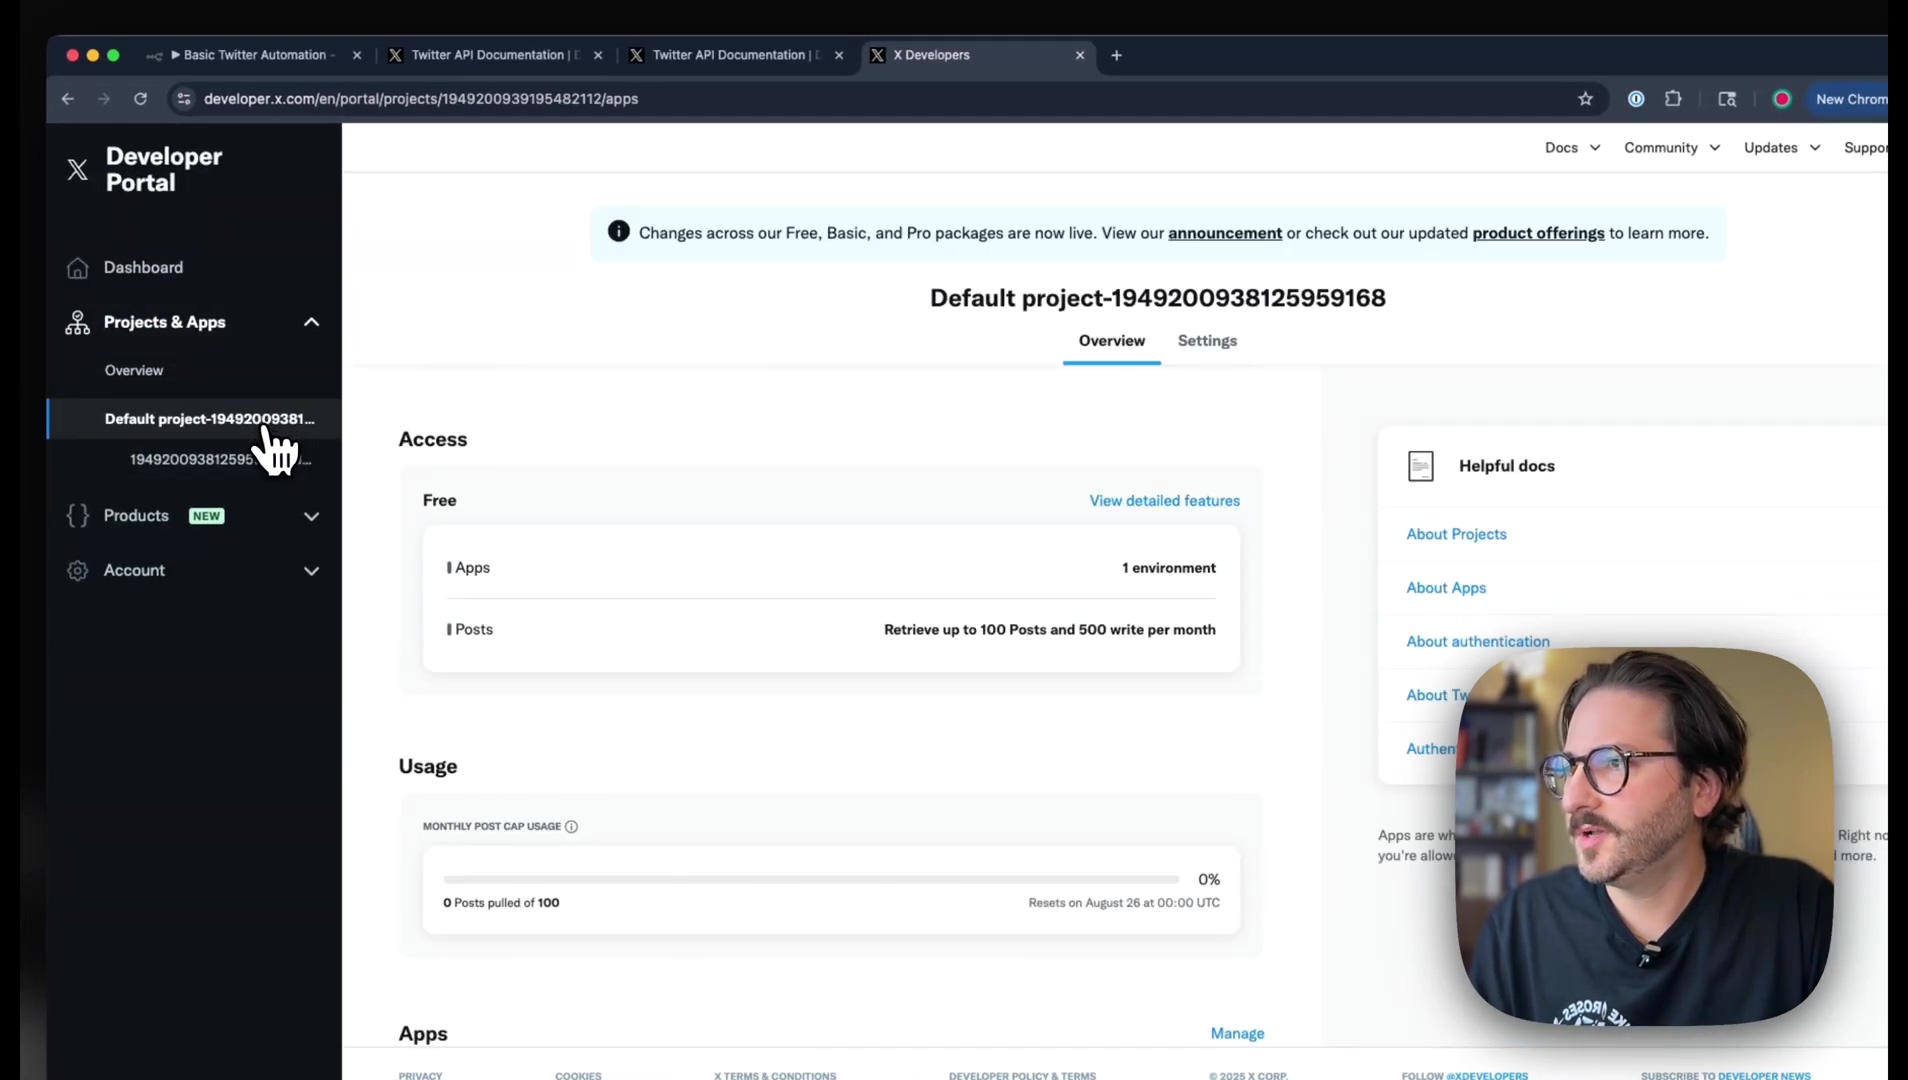
- Access Dashboard: After logging in, you’ll typically land on a dashboard. This dashboard will either show you any existing projects you have or give you a clear option to create a new one. Sometimes, X even provides a default project for you to start with, which is super convenient!
- Start with Default or New Project: For simplicity, especially if this is your first rodeo, you can totally just use the provided default project. If you’re feeling fancy or plan to have multiple X integrations, creating a new project can help keep things tidy. For this guide, let’s just roll with whatever’s easiest, probably the default one.
Configure App Details and User Authentication
Goal: This is where we define our application’s settings and tell X how our app will authenticate with users. It’s like giving our app its personality and security clearance.
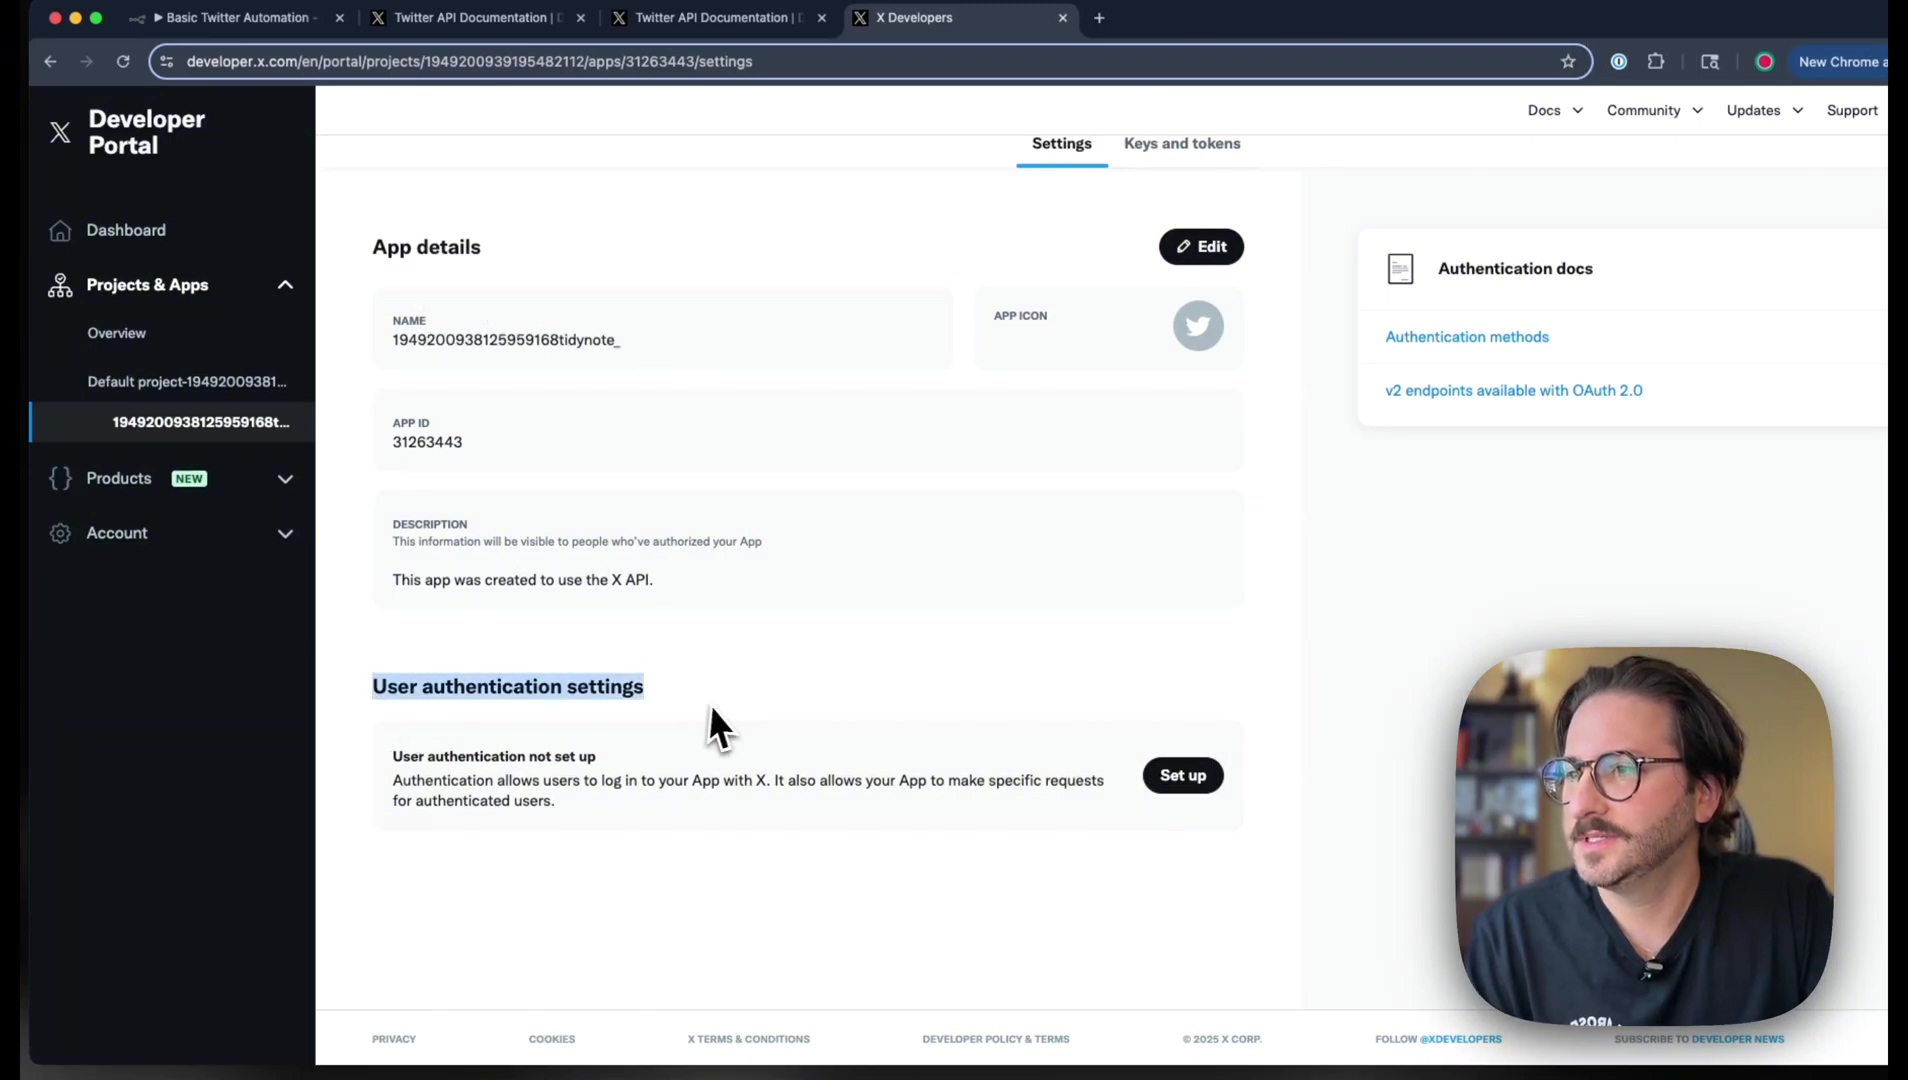
- Navigate to App Settings: Within your chosen project (whether it’s the default or a new one), look for and click on “App Settings.” This section is where all the juicy configurations for your application live. It’s your app’s control panel!
- Initiate User Authentication Setup: Now, find the “User authentication settings” and click “Set up.” This is a critical step because it defines how your app will authenticate with X users. It’s like setting up the security protocols for your digital assistant.
- Define App Permissions: This is important! You need to select the right permissions for your application. For most n8n automations, especially if you want to do things like post tweets, you’ll need Read and Write permissions. If you only select “Read,” n8n won’t be able to send out those awesome automated tweets, and that would be a bummer, right?
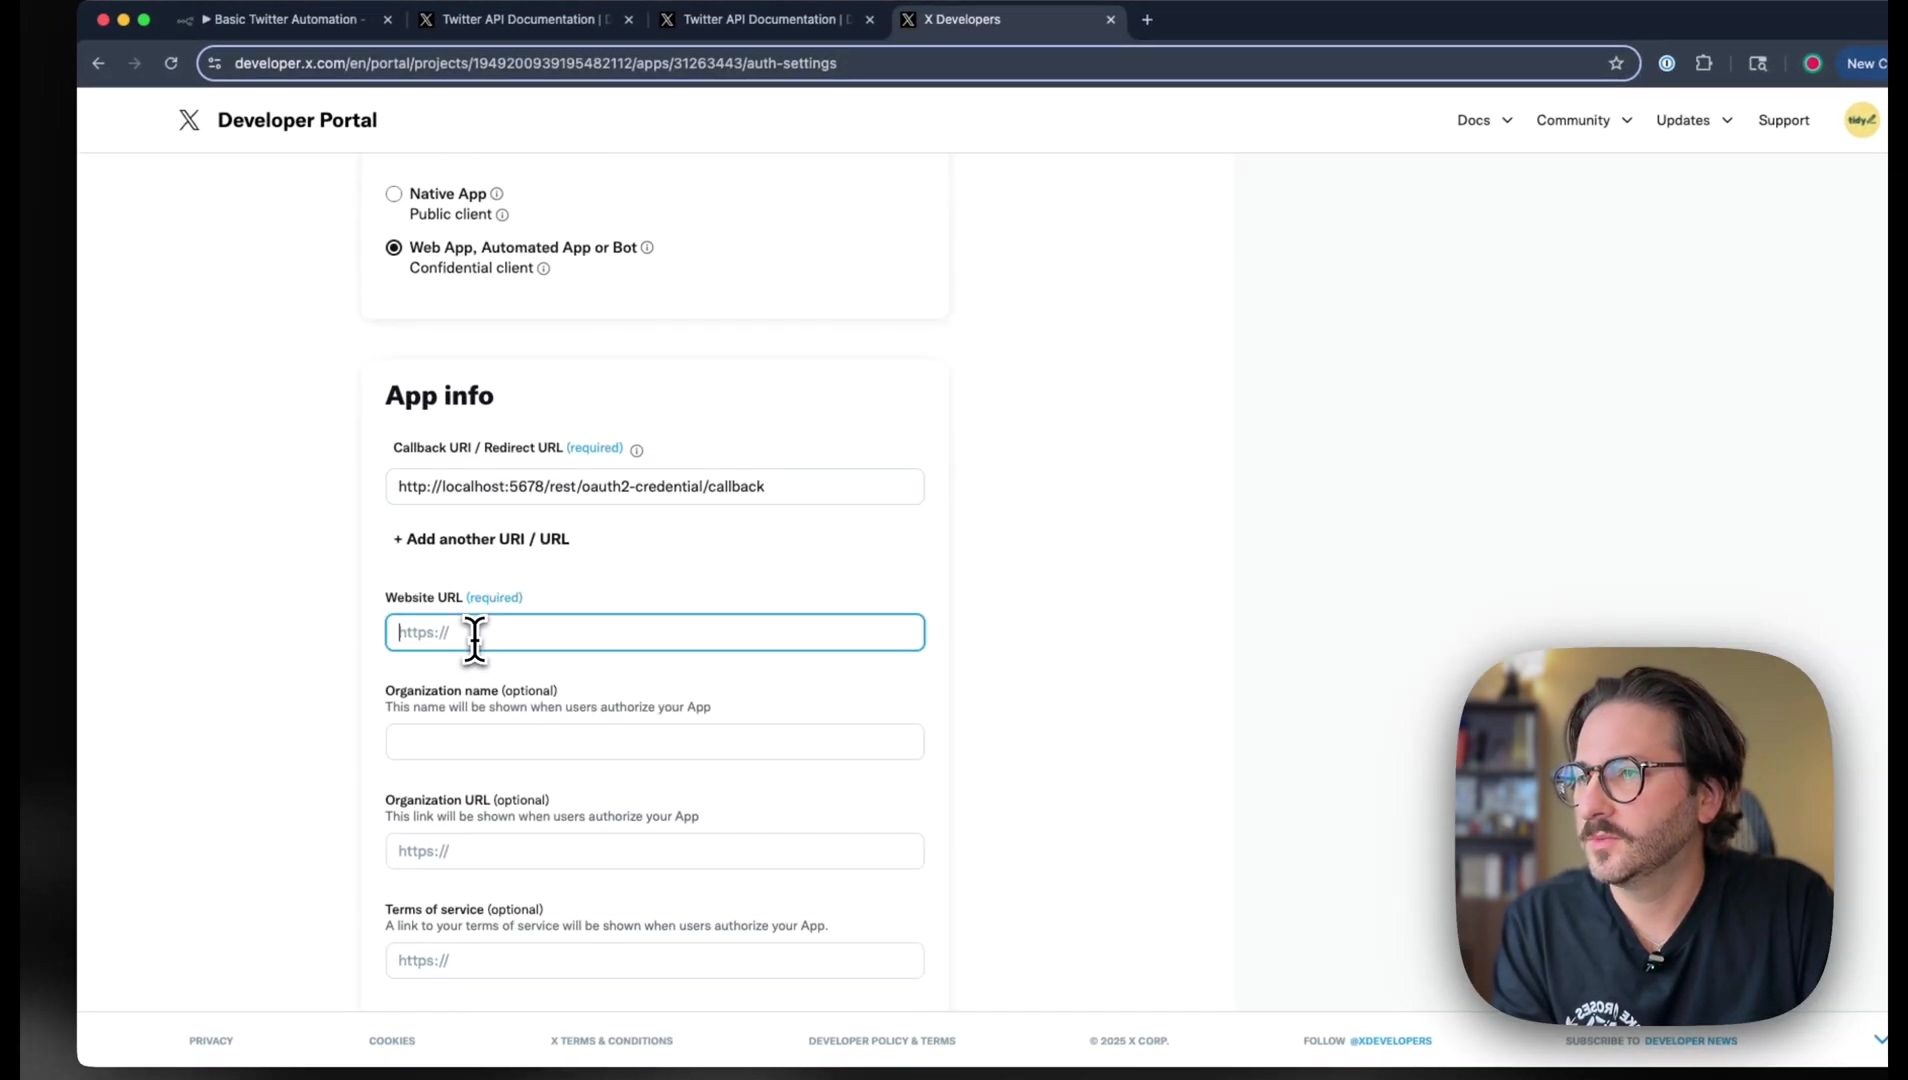
- Specify App Type: Tell X that your application is a “Web App.” This helps X understand how your app will behave and interact.
- Configure Redirect URL: This is a super important piece of the puzzle. You need to input the
redirect URLthat n8n provides. This URL is absolutely essential for the authentication flow. It’s how X knows where to send the user back after they’ve successfully authorized your application. If this is wrong, the whole process breaks down, so double-check it! - Add Website URL: Provide a valid website URL for your application. This could be your personal website, a project page, or even a placeholder if you’re just using this strictly for internal stuff. Just make sure it’s a real URL.
- Save Settings: Once you’ve got all those fields filled out, hit that save button! The platform will then magically generate your Client ID and Client Secret. These are the keys we’ve been waiting for, necessary for n8n to authenticate with your X app.
These steps generate the foundational credentials for connecting n8n to your X application. Seriously, treat these credentials like top-secret government documents. Keep them secure, because they grant access to your X developer account’s functionalities. You wouldn’t leave your house keys lying around, would you?
Obtaining API Keys and Access Tokens for n8n
Okay, you’ve done the hard work of setting up your developer project and app. Now, the X Developer Portal is ready to hand over the goods: your critical API Keys, API Secret Keys, Access Tokens, and Access Token Secrets. These credentials are the absolute backbone of authentication for your n8n workflows. They’re what allow n8n to securely chat with the X API. Understanding where to find them and how to manage them is paramount for a successful and secure integration. Think of these as the secret codes that let n8n into X’s inner sanctum.
Locating Your Client ID and Client Secret
Goal: Our immediate goal is to retrieve the Client ID and Client Secret that were generated when you set up your app. These are your golden tickets!
- Review App Settings: After you hit save on those user authentication settings in the previous step, the platform should proudly display your Client ID and Client Secret. These are unique identifiers specifically for your application. If you can’t find them, go back to your app settings, and they should be there.
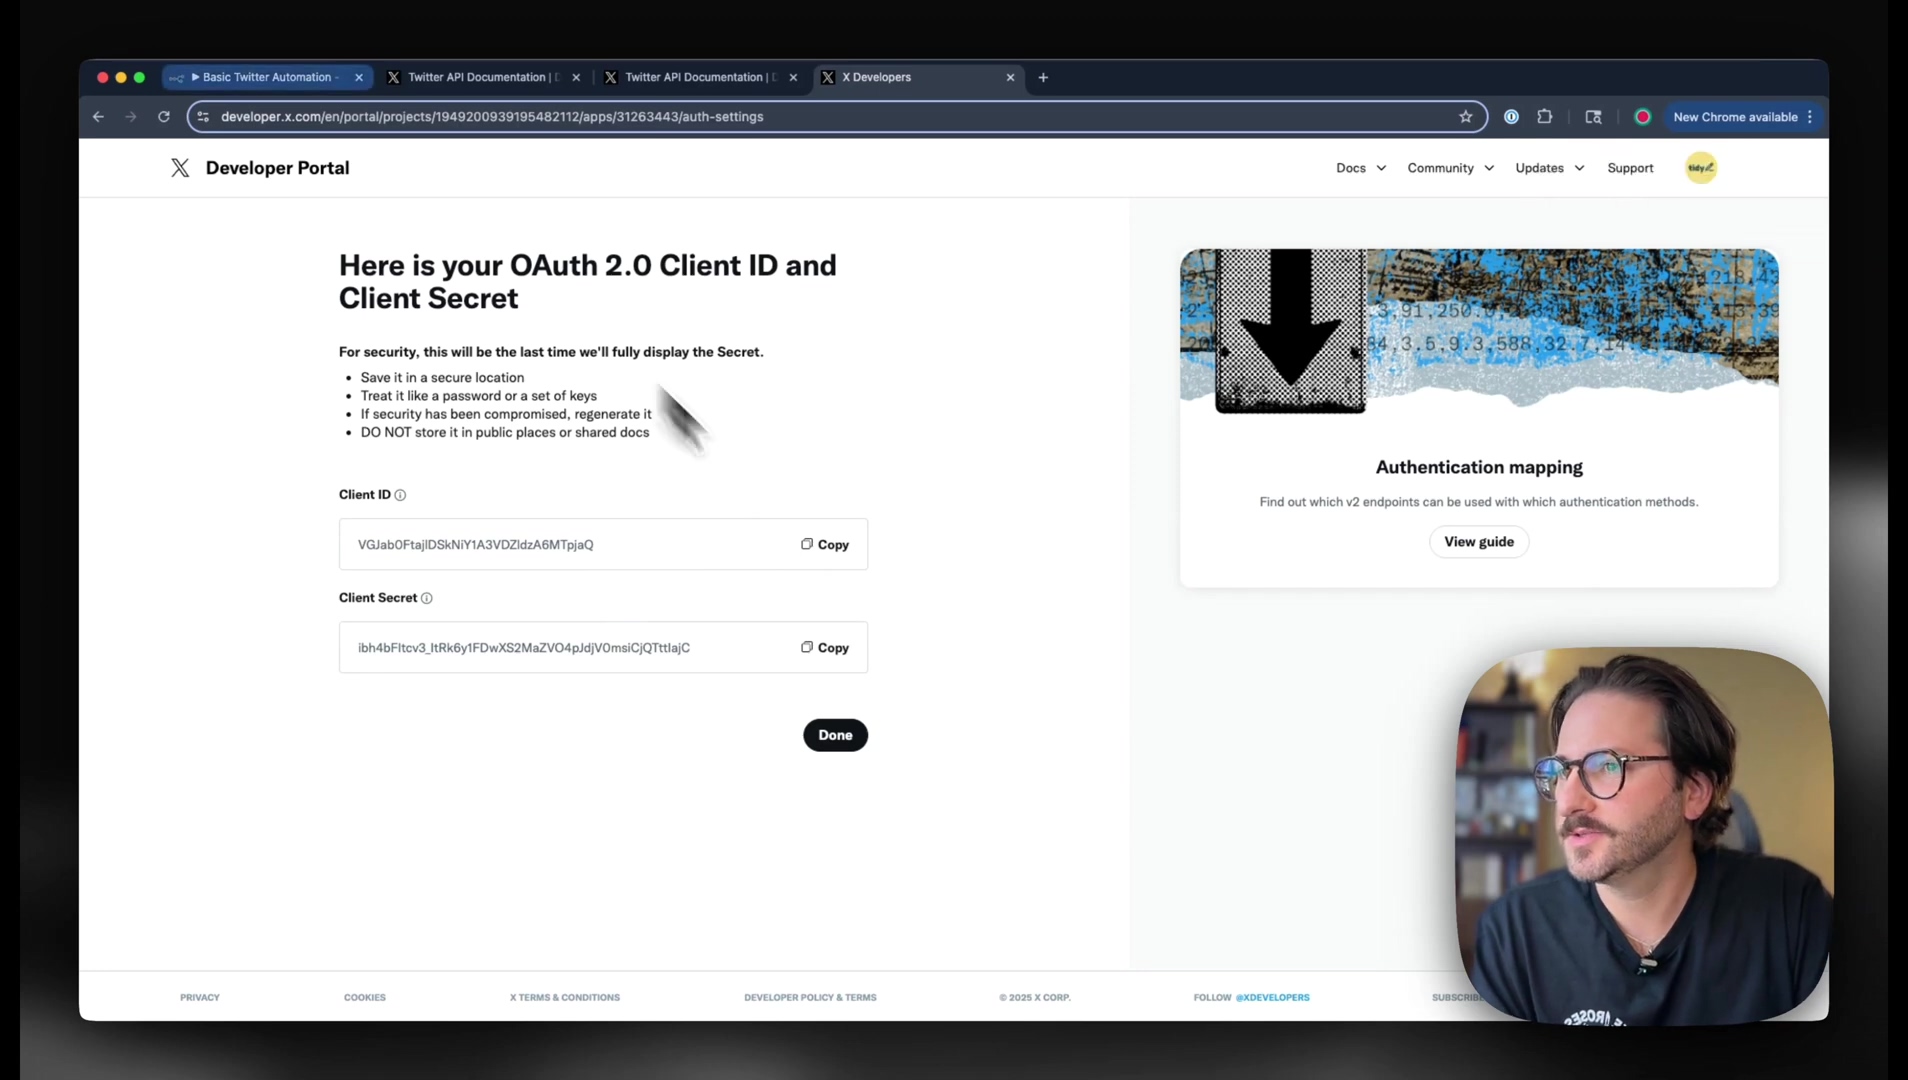
- Securely Record Credentials: This is a non-negotiable step! Immediately copy and store these credentials in a super secure location. I’m talking password manager, encrypted note, whatever makes you feel safe. They are absolutely vital for n8n to authenticate with your X app. Seriously, don’t just leave them in a sticky note on your desktop!
Understanding API Credential Types
To clear up any confusion, because let’s be honest, API keys can sound like a bunch of sci-fi jargon, here’s a quick rundown of the different credential types and what they’re for:
| Credential Type | Purpose | Configuration Location/Platform |
|---|---|---|
| Client ID | Identifies your application to the X API during OAuth 2.0 flows. | X Developer Portal |
| Client Secret | A confidential key used with the Client ID for application authentication. | X Developer Portal |
| Access Token | Grants temporary, specific permissions to an application acting on behalf of a user. | Generated during OAuth handshake |
| Access Token Secret | A confidential key paired with the Access Token for secure access. | Generated during OAuth handshake |
Best Practices for Credential Security
Look, I’ve seen enough digital security mishaps to know that protecting these keys is crucial. Here are some best practices to keep your credentials safe and sound:
- Keep Private: This should go without saying, but never expose your Client ID, Client Secret, or any access tokens publicly. Treat them with the same reverence you’d treat your bank account password. Seriously.
- Environment Variables: For any production environment (or even if you’re just getting serious about your automations), use environment variables to store your credentials. This prevents them from being hardcoded directly into your workflows, which is a big no-no for security.
- Rotate Keys: If your platform allows it (and X often does), periodically regenerate and update your API keys and tokens. It’s like changing the locks on your digital house every now and then, just to be extra safe.
By carefully managing these credentials, you’re not just ensuring your X automations work; you’re also ensuring the integrity and security of your entire setup within n8n. You’re becoming a digital security pro, one step at a time!
Connecting X Credentials within n8n: A Step-by-Step Guide
Alright, you’ve got your X API keys (that’s your Client ID and Client Secret) safely tucked away. Now comes the exciting part: integrating these credentials into n8n! This is the moment we establish that secure connection, allowing n8n to finally execute actions on X, like posting those brilliant tweets or pulling down valuable data. Proper credential management within n8n isn’t just good practice; it’s absolutely essential for your workflows to run smoothly, like a well-oiled machine.
Adding X Credentials in n8n
Goal: Our mission now is to configure the X credentials right inside your n8n instance. Let’s get n8n talking to X!
- Open n8n Workflow: First, navigate to your n8n instance. If you’re starting from scratch, just create a new workflow. If you’ve got one already, open it up! This is where our automation magic will happen.
- Add X Node: From the ‘Nodes’ panel on the left (it’s like your toolbox in n8n), search for “X” (or “Twitter” if you’re still thinking old-school). Drag and drop that ‘X’ node onto your canvas. This node is our direct line to the X platform.
- Select ‘New Credential’: In the ‘X’ node’s settings panel (usually on the right), you’ll see a field called ‘Credentials’. Click on the dropdown and select “New credential.” This will prompt n8n to open a new configuration window specifically for your X API keys. It’s like n8n saying, “Okay, hand over the secret codes!”
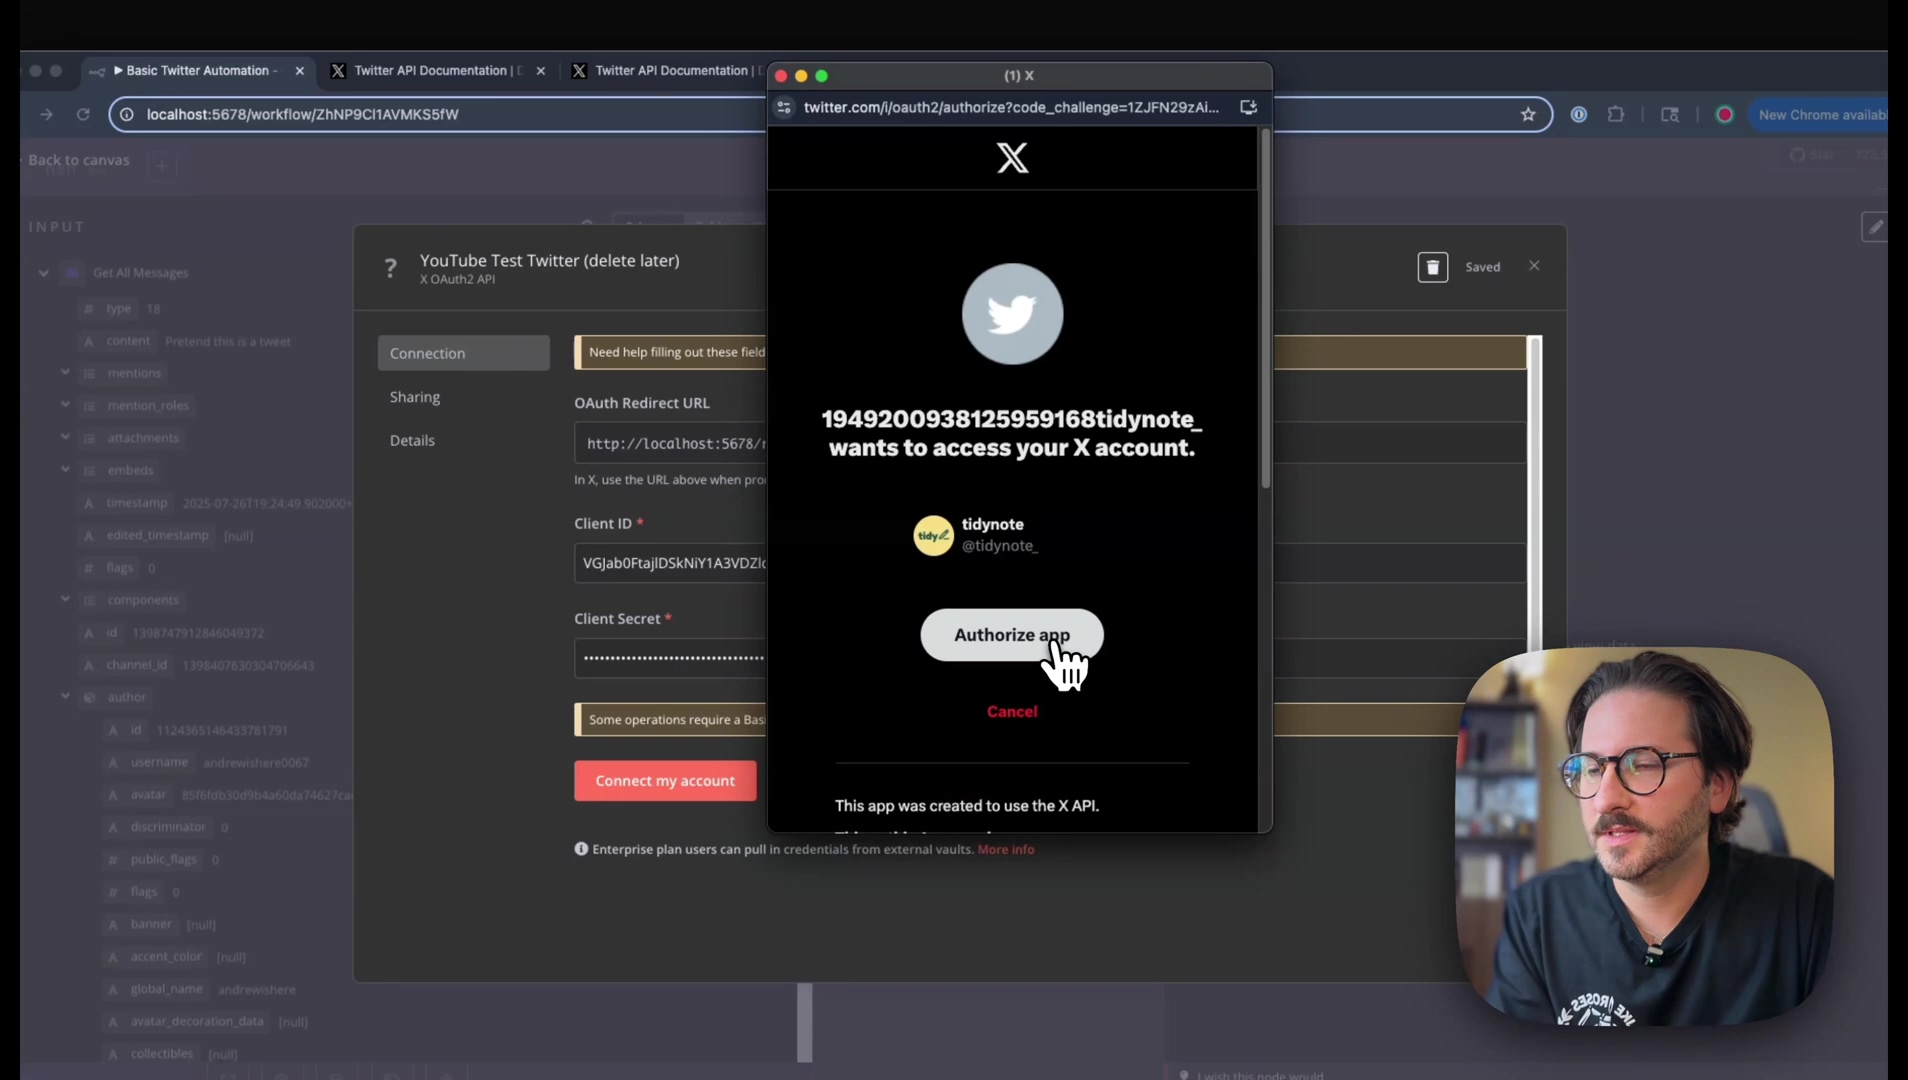
- Input Client ID and Client Secret: Remember those Client ID and Client Secret you secured earlier? Now’s their time to shine! Copy your Client ID and paste it into the ‘Client ID’ field in n8n’s credential setup. Do the same for your Client Secret in its respective field. Make sure there are no extra spaces before or after the keys – those little devils can cause big problems!
- Name Your Credential: Give your credential a descriptive name. Something like “YouTube Test Twitter” or “My X Automation” works great. This helps you easily identify which X account or app this credential belongs to, especially when you start building more workflows.
- Connect Account: Once you’ve filled everything in, click the “Connect Account” button. This is the big moment! What should happen next is a pop-up window appearing, or you’ll be redirected to the X authorization page. This is X asking for your permission to let n8n do its thing.
- Authorize Application: In that X authorization window, you might be asked to sign in to your X account if you’re not already logged in. Once you’re in, you’ll see a button like “Authorize app.” Click that! This grants n8n the necessary permissions to interact with your X account. It’s like giving n8n a temporary pass to your X profile.
Verifying the Connection
Goal: We need to make sure that the n8n-X connection is successfully established. No loose ends!
- Observe for Green Checkmark: If everything went perfectly (and I’m sure it did!), the n8n credential setup window will display a glorious green checkmark or some other success indicator. This is your confirmation that n8n has successfully authenticated with your X account. You’ve nailed it! Your digital assistant is now officially linked to your X presence.
By following these steps, your n8n instance is now securely linked to your X developer application, ready to execute automation workflows. You’re officially an X automation pioneer!
Building Your First X Automation Workflow in n8n
Congratulations, you’ve got your X credentials all configured in n8n! That’s a huge milestone. Now, let’s put that connection to work and build your very first automation workflow. This section is all about creating a basic workflow to post a tweet. It’s like building your first LEGO model – simple, but it shows you how all the pieces fit together to perform actions on X. This hands-on example will give you a foundational understanding for tackling even more complex automations down the line. Get ready to tweet automatically!
Designing a Basic Tweet Workflow
Goal: Our goal is to create an n8n workflow that posts a simple tweet to your X account. We’re going to make n8n say “Hello, World!” to X.
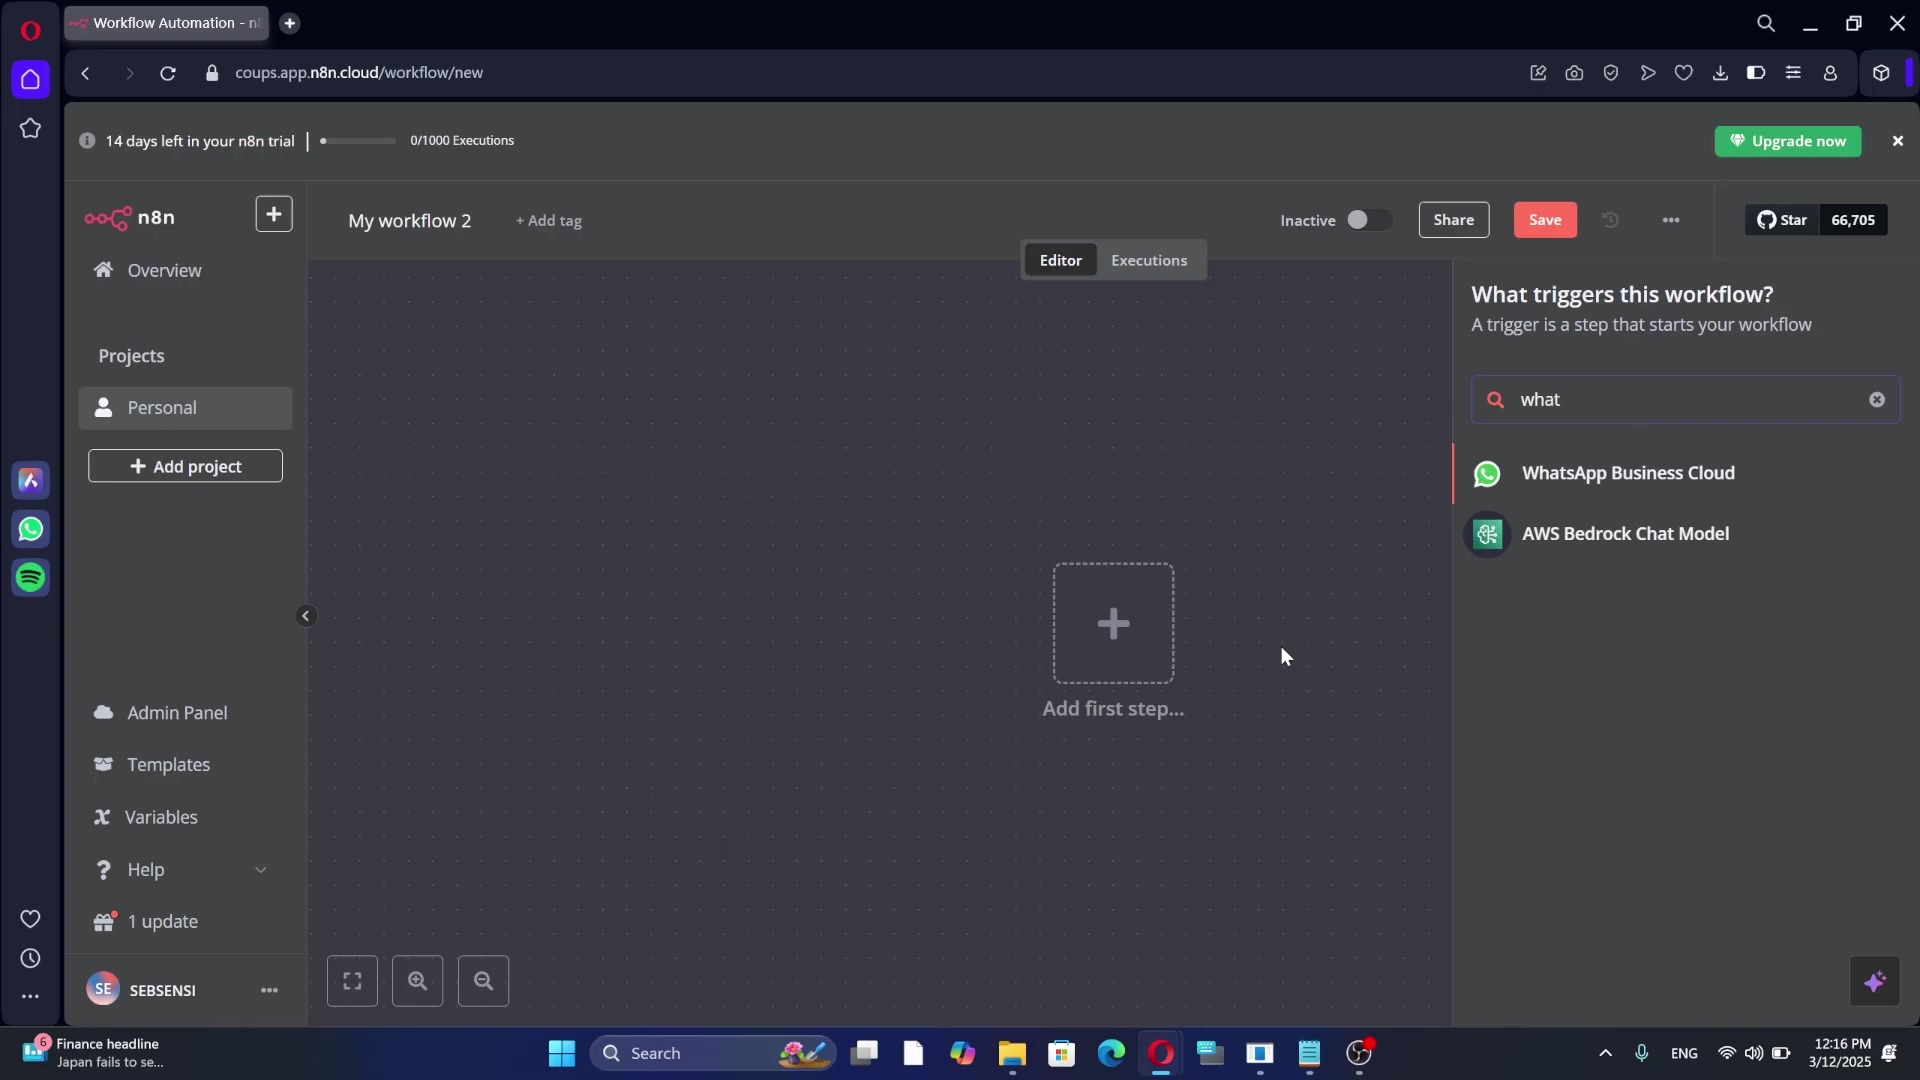
- Start New Workflow: In your n8n editor, click on “New Workflow” (or the plus icon) to start with a fresh canvas. This is your blank slate for automation.
- Add Trigger Node: Every good workflow needs a starting point, a trigger. For this example, let’s use a ‘Schedule’ node. Search for “Schedule Trigger” in the nodes panel and drag it onto your canvas. This node defines when your tweet should be posted. For instance, you can set it to run once right now, or at specific intervals (like every day at 9 AM). For testing, just set it to run once manually.
- Add X Node: Drag and drop another ‘X’ node onto the canvas and connect it to your ‘Schedule Trigger’ node. Just click the output of the ‘Schedule Trigger’ and drag a line to the input of the ‘X’ node. This tells n8n to execute the X action after the schedule trigger fires.
- Configure X Node: Now, let’s tell the X node what to do:
- Credentials: In the X node’s settings, select the X credential you configured in the previous step. This tells the node which X account to use.
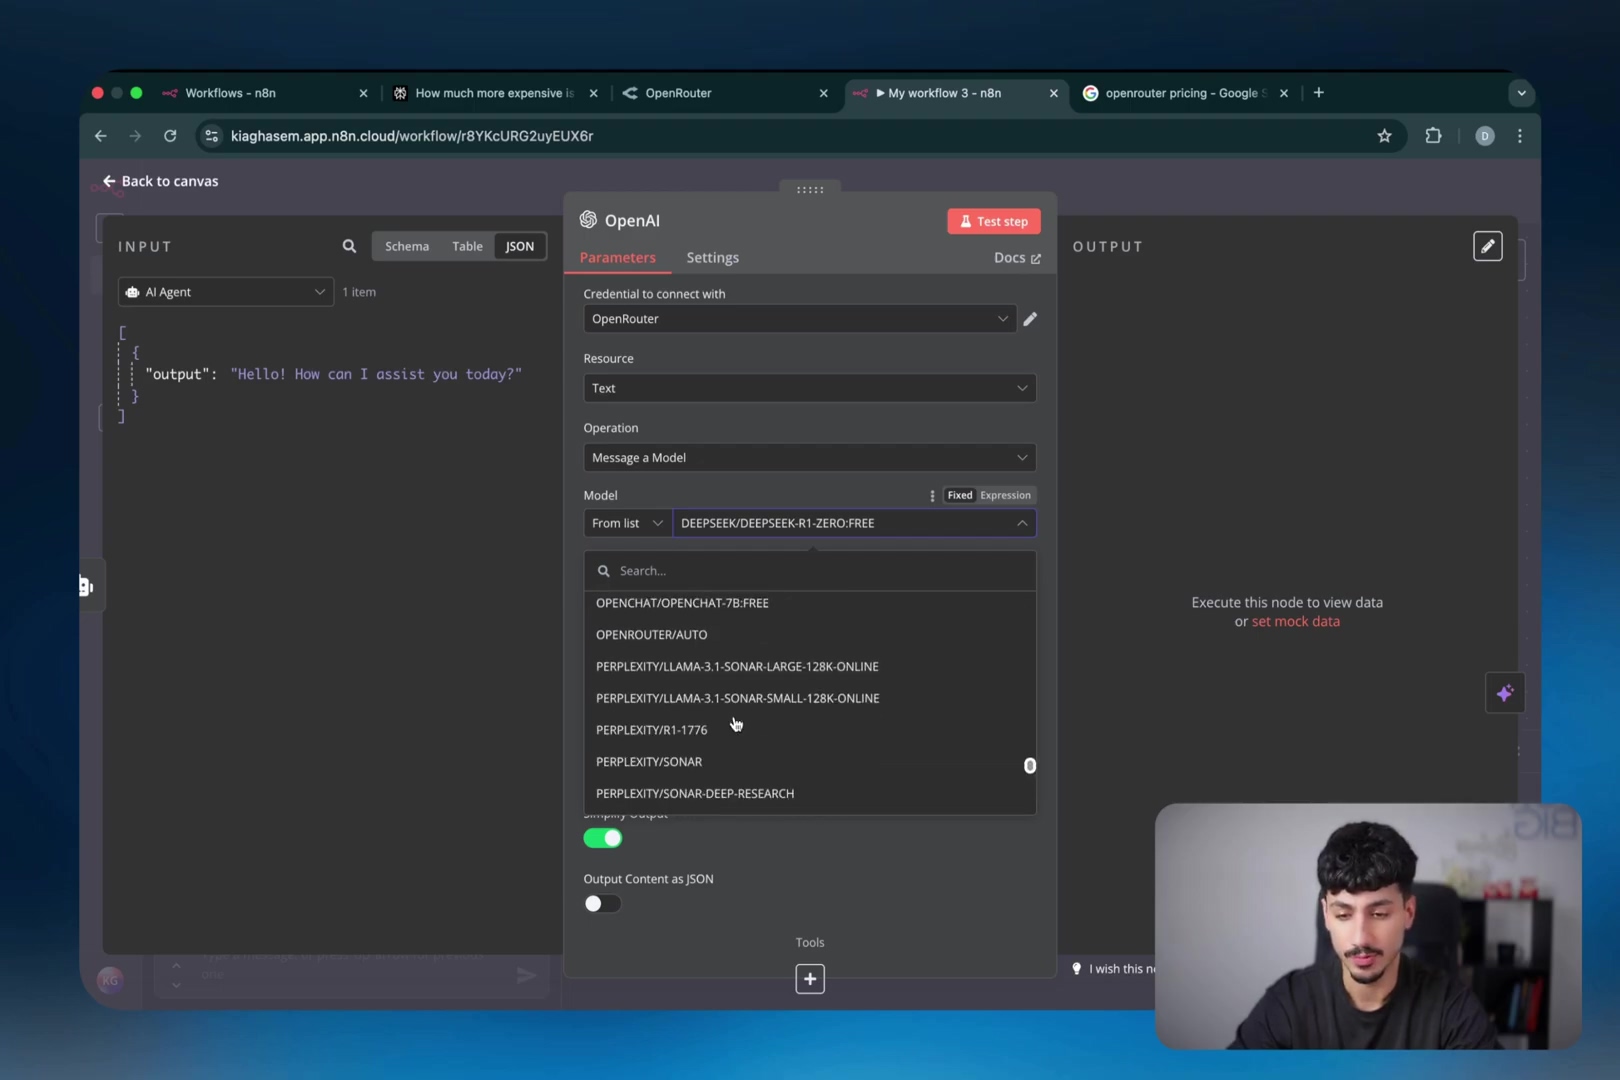
- Operation: From the ‘Operation’ dropdown, choose
Tweet. This is pretty straightforward – we want to send a tweet! - Text: In the ‘Text’ field, type out the content of your tweet. You can use static text like “Hello Twitter! This is an automated tweet from n8n. #n8n #automation” or even dynamic data from previous nodes if you were building something more complex. For now, let’s keep it simple.
- Execute Workflow: Once everything is set, click the ‘Execute Workflow’ button (usually found at the top right of the n8n editor). This will run your workflow manually and, if all goes well, post your tweet! Check your X account to see the magic happen.
Example: Posting a Scheduled Tweet
Let’s imagine a scenario where you want n8n to post a daily reminder. Here’s how that would look:
- Start Node: A ‘Schedule Trigger’ node, set to run
Every day at 9:00 AM. You can configure this in the node’s settings. - X Node: This node would be configured with your X credentials, the
Tweetoperation, and a message like: “Good morning! This is an automated tweet from n8n. #n8n #automation.” (Don’t forget those hashtags for extra visibility!)
Upon execution, the workflow will post this tweet to your connected X account at the specified time. This demonstrates the core process: connecting a trigger to an X action. This simple pattern forms the basis of almost all n8n automations, so understanding it is key!
Workflow Visualization
{
 "nodes": [
  {
   "parameters": {},
   "name": "ScheduleTrigger",
   "type": "n8n-nodes-base.scheduleTrigger",
   "typeVersion": 1,
   "position": [500, 300]
  },
  {
   "parameters": {
    "operation": "tweet",
    "text": "Hello Twitter! This is an automated tweet from n8n. #n8n #automation"
   },
   "name": "X",
   "type": "n8n-nodes-base.x",
   "typeVersion": 1,
   "position": [750, 300],
   "credentials": {
    "xApi": {
     "id": "[YOUR_CREDENTIAL_ID]",
     "resolve": true
    }
   }
  }
 ],
 "connections": {
  "ScheduleTrigger": [
   {
    "node": "X",
    "type": "main",
    "index": 0
   }
  ]
 }
}
This JSON represents a simple n8n workflow where a ScheduleTrigger node is connected to an X node to post a tweet. Remember to replace [YOUR_CREDENTIAL_ID] with the actual ID of your configured X credential in n8n. You can usually find this ID by looking at the URL when you edit your credential in n8n, or by checking the credential’s internal ID in n8n’s settings.
Best Practices for X API Usage and n8n Workflows
Alright, you’re building automations like a pro! But with great power comes great responsibility, right? Efficient and responsible use of the X API within your n8n workflows requires sticking to some specific best practices. These guidelines are super important for keeping your automations stable, preventing annoying service interruptions, and maintaining the security of your precious credentials. Think of these as the golden rules for a smooth-running automation universe.
Managing API Rate Limits
Goal: Nobody likes getting temporarily blocked! Our goal here is to avoid exceeding X API rate limits so your automations keep running without a hitch.
- Understand Limits: X, like most APIs, has strict rate limits on API requests. This is to ensure fair usage for everyone. These limits can vary depending on the specific endpoint you’re hitting and your API tier (remember that free tier?). Always consult the official X API documentation for the most up-to-date rate limit details. It’s like knowing the speed limit on a highway.
- Implement Delays: If your workflows involve making a lot of API calls in a short period, introduce ‘Wait’ nodes in n8n. These nodes are super handy for adding deliberate delays between requests. It’s like taking a breather between sprints.
- Batch Requests: Whenever possible, try to design your workflows to batch requests. Instead of making individual calls for each item, send them in groups. This significantly reduces the total number of API calls you make, keeping you well within those limits.
Error Handling in n8n
Things can go wrong, even in the best-designed systems. Our goal is to build resilient workflows that can gracefully handle API errors or unexpected responses. It’s like having a backup plan for your backup plan!
- Error Handling Branch: n8n has a fantastic ‘Error Workflow’ feature, or you can use conditional nodes (‘IF’ nodes) to catch errors. This allows you to execute fallback actions. For example, if a tweet fails to post, you could log the error to a Google Sheet and then try to retry after a short delay. It’s about being prepared!
- Notifications: Configure notifications (like sending an email or a message to Slack) to alert you instantly when a workflow encounters an error. This way, you can jump in and fix things promptly, rather than finding out hours later.
Security Considerations for API Keys
I can’t stress this enough: protect your API credentials from unauthorized access! This is paramount.
- Secret Storage: Never embed API keys directly into your workflow definitions. Always, always, always use n8n’s built-in credential management system. It encrypts and securely stores sensitive information, keeping it safe from prying eyes. It’s like putting your valuables in a bank vault instead of under your mattress.
- Minimum Permissions: When you set up your X app, grant only the necessary permissions. If your workflow only needs to post tweets, give it
Read and Writepermissions, not full admin access. It’s the principle of least privilege – only give what’s needed. - Regular Review: Make it a habit to periodically review your X app’s permissions and your n8n credentials. Just ensure they’re still appropriate and secure. Technology evolves, and so should your security practices.
Efficient Workflow Design
Let’s make sure your n8n workflows are lean, mean, automation machines! Our goal is to optimize them for performance and resource consumption.
- Modular Workflows: Break down complex automations into smaller, more manageable, modular workflows. This makes them easier to read, maintain, and debug. Think of it as breaking a big project into smaller tasks.
- Filtering Data: Use ‘Filter’ nodes early in your workflow. This allows you to process only the relevant data, reducing the load on subsequent nodes and API calls. Why process a ton of data if you only need a tiny bit? It’s like sifting for gold – you only want the good stuff.
Adhering to these best practices will lead to more reliable, secure, and efficient X automations using n8n. You’ll be a true automation master!
Troubleshooting Common X-n8n Connection Issues
Even the most seasoned automation consultants (like me!) run into snags sometimes. It’s just part of the journey! Even with careful setup, minor issues can pop up during the n8n-X integration process. Knowing how to identify and resolve these common problems is key to keeping your automation workflows running smoothly and continuously. This section is your go-to guide for frequent pitfalls and provides actionable solutions. Think of it as your digital first-aid kit!
Incorrect API Keys or Tokens
Goal: The first thing to check is the accuracy of your entered API credentials. This is often the culprit!
- Symptom: You’ll likely see an authentication failure message, or a dreaded
401 Unauthorizederror. This means X is saying, “Hey, I don’t recognize you!” - Solution: Double-check your Client ID and Client Secret in your n8n X credential against the values you have in your X Developer Portal. Seriously, copy and paste them again. And here’s a common trap: make absolutely sure there are no leading or trailing spaces during copy-pasting. Those invisible characters can mess everything up!
Insufficient App Permissions
Goal: We need to confirm that your X app has been granted the necessary permissions for whatever actions you’re trying to perform.
- Symptom: Specific operations, like trying to post a tweet, might fail even if you seemingly authenticated successfully. It’s like having a key that opens the front door but not the specific room you need.
- Solution: Head back to your X Developer Portal, find your app, and go to its “User authentication settings.” Verify that the app has the required
Read and Writepermissions. If it only hasRead, it can’t post! Adjust the permissions if needed, then save the changes.
Callback URL Mismatch
Goal: This one is critical! You need to ensure that the redirect URL you entered in your X app exactly matches n8n’s callback URL.
- Symptom: The authentication flow fails to redirect back to n8n after you authorize the app on X. You might get stuck on an X page or see an error about an invalid redirect URI.
- Solution: In the X Developer Portal, under your app’s “User authentication settings,” confirm that the
redirect URLyou provided exactly matches the URL that your n8n instance gives you. Even a single character difference, a missing slash, or an extra space will cause a failure. This is a common, frustrating error, so be meticulous here!
Rate Limit Exceeded
Goal: If you’re making too many requests too quickly, X might temporarily block you. Our goal is to address these blocks.
- Symptom: Your API requests will start returning
429 Too Many Requestserrors. This is X telling you to slow down! - Solution: Implement ‘Wait’ nodes in your n8n workflow to introduce deliberate delays between X API calls, especially for bulk operations. If you’re running a workflow very frequently, consider reducing its execution frequency. And as always, review X’s official rate limit documentation for specific endpoint limits. It’s all about being a good digital citizen!
Expired or Revoked Tokens
Goal: Sometimes, your access token might become invalid. We need to re-authenticate to get a fresh one.
- Symptom: You’ll see persistent authentication errors after a long period of inactivity, or if there was a security event that revoked your token.
- Solution: In n8n, go to your X credential (where you entered your Client ID and Secret) and click “Connect Account” again. This usually triggers a re-authorization process with X, which will issue a new access token. It’s like refreshing your security pass.
Troubleshooting these common issues will help you resolve most n8n-X connection problems, allowing your automations to run smoothly. You’re becoming a master debugger!
Advanced X Automation with n8n: Beyond the Basics
Alright, you’ve mastered the fundamentals of X automation with n8n. You’re posting tweets, handling credentials, and troubleshooting like a pro! But guess what? That was just the warm-up! n8n’s versatility means you can dive into even more complex and impactful workflows. By leveraging additional n8n features and integrating with other services, you can seriously level up your X presence and data management capabilities. Think of it as upgrading from a simple spaceship to a full-blown star cruiser!
Advanced Use Cases
Let’s dream a little bigger, shall we?
- Automated Content Curation: Beyond just scheduled posts, imagine fetching articles from RSS feeds, filtering them by keywords, summarizing them using powerful AI nodes (like OpenAI or Cohere), and then posting them to X. That’s next-level content automation!
- Engagement Analysis & Response: Monitor mentions or replies to your X account in real-time. Use AI nodes to classify the sentiment (positive, negative, neutral) of those interactions. Based on that, you could trigger specific n8n workflows for automated replies, forward urgent messages to a human agent, or log everything for detailed analytics. It’s like having a super-smart social media manager.
- Cross-Platform Content Sharing: Automatically share your brand-new blog posts (from platforms like WordPress or Ghost), fresh YouTube videos, or important LinkedIn updates directly to X. You can even enhance these posts with relevant hashtags or mentions that are dynamically generated by other n8n nodes. Talk about efficiency!
- CRM Integration: Want to keep track of your X interactions with customers? Integrate X directly into your Customer Relationship Management (CRM) system. When a lead or customer mentions your brand on X, n8n can automatically log it in Salesforce, HubSpot, or even a custom database. This keeps all your customer data in one place.
Extending with n8n Features
n8n is packed with features that can take your workflows to the next dimension:
- Data Transformation: Use ‘Code’ nodes (which let you write JavaScript) to manipulate data received from X or prepare data for X posts in highly customized ways. If you can imagine it, you can code it!
- Conditional Logic: Employ ‘IF’ nodes to create branching workflows. For example, if a tweet contains a specific keyword, then send an email notification; otherwise, just log it. It’s like giving your workflow a brain to make decisions.
- Webhooks for Real-time Triggers: Set up webhooks with X’s API (if available for specific events) or external services to trigger n8n workflows in real-time, rather than just polling at intervals. This means instant reactions to events!
- Iterative Processing: Use ‘Split in Batches’ or ‘Loop’ nodes to process multiple X objects (like a list of users to follow or multiple tweets to analyze) in a controlled, efficient manner. It’s great for handling large amounts of data.
Integrating with Other Services
The real power of n8n comes from its ability to connect to everything! Connect your X automations with a multitude of other services available in n8n, such as:
- Storage Services: Think Google Drive, Dropbox, AWS S3 for archiving X data or storing source content. Never lose a tweet again!
- Messaging Apps: Slack, Telegram, Discord for internal notifications about X activities. Keep your team in the loop.
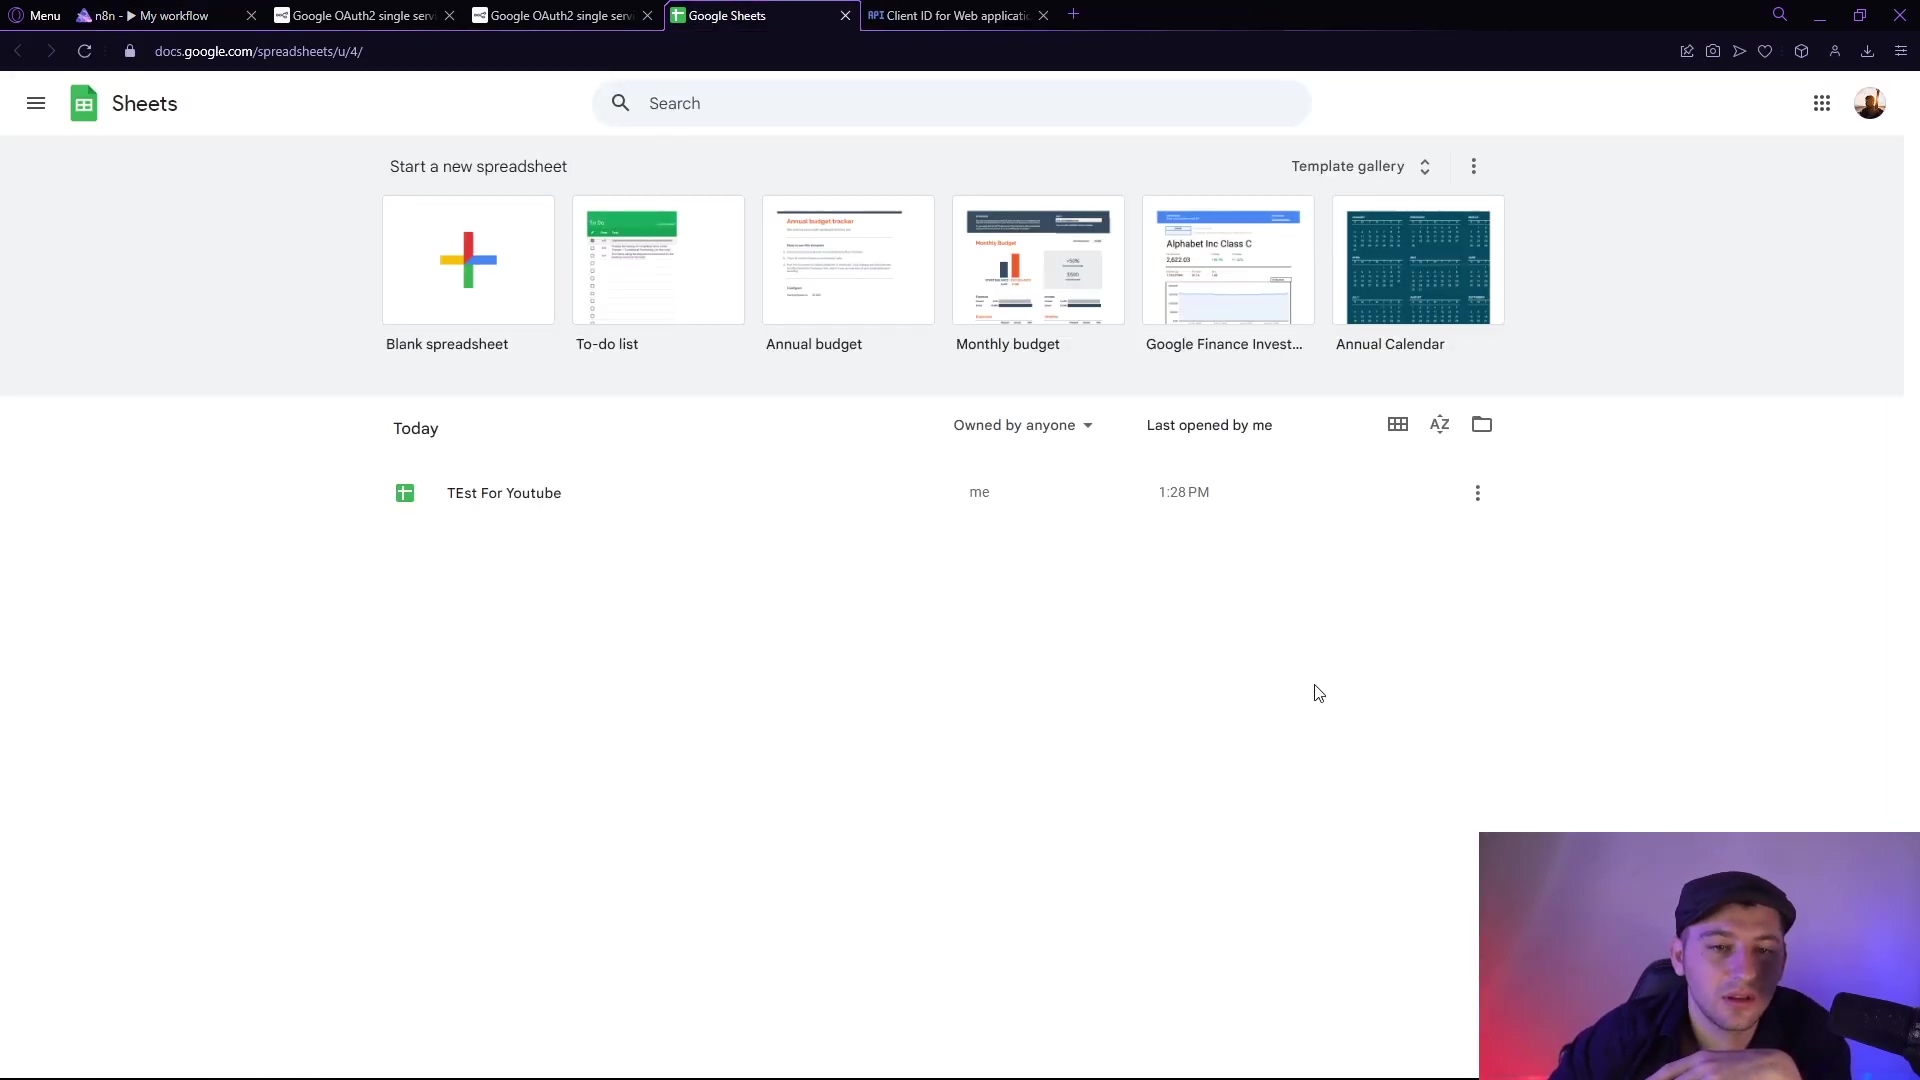
- Databases: PostgreSQL, MySQL, Google Sheets for tracking X analytics or managing your content calendar.
- AI Tools: For advanced natural language processing, image recognition, or even generating creative content for your X posts. The sky’s the limit!
This expanded integration capability positions n8n as a central hub for orchestrating complex digital strategies that involve the X platform. You’re not just automating; you’re building an interconnected digital ecosystem!
Frequently Asked Questions (FAQ)
Q: What is n8n and why use it with X?
A: n8n is an open-source workflow automation tool that allows you to connect various apps and services to automate tasks. Using n8n with X (formerly Twitter) enables you to automate social media interactions like posting tweets, monitoring mentions, or fetching data, all without needing to write custom code for each action. It streamlines your social media operations and saves you a ton of time, letting you focus on more creative tasks.
Q: Is the X API free to use for n8n integrations?
A: Yes, absolutely! X does offer a free tier for its API access. When you’re setting up your developer account, just make sure you select the “Sign up for free account” option. This way, you can access essential functionalities for basic automations without incurring any charges. It’s a great way to get started without any financial commitment.
Q: What permissions do I need for my X app in n8n?
A: For most common automations, especially if you want to do things like post tweets, reply to mentions, or interact with users, your X app will require Read and Write permissions. You can easily configure these permissions in the “User authentication settings” section within your X Developer Portal. Always grant only the permissions your workflow truly needs to maintain good security practices.
Q: What is a Redirect URL and why is it important?
A: The Redirect URL is a specific URL provided by your n8n instance. X uses this URL to send data back to n8n after a user successfully authorizes your application. It’s a crucial component of the OAuth authentication flow, ensuring a secure handshake between X and n8n. If the Redirect URL is incorrect or doesn’t match exactly, the authentication process will fail, leading to connection errors. So, double-check it carefully!
Q: How do I troubleshoot “Unauthorized” errors when connecting n8n to X?
A: An “Unauthorized” error almost always points to an issue with your API credentials. First, meticulously verify that your Client ID and Client Secret are correctly entered in n8n, ensuring no extra spaces. Then, confirm that your X app has the necessary Read and Write permissions in the X Developer Portal. Finally, make sure the Redirect URL in the X Developer Portal exactly matches the one provided by n8n. Mismatches here are a common cause of this error.
Q: Can I post images or videos to X using n8n?
A: Yes, you absolutely can! n8n’s X node is quite versatile and supports posting tweets with media attachments, including both images and videos. The specific implementation involves configuring the Tweet with Media operation within the n8n X node and then providing the file data or a URL to the media you wish to attach. It’s a fantastic way to make your automated posts more engaging!
Q: How can I avoid hitting X API rate limits in n8n?
A: To prevent running into rate limit issues, which can temporarily block your automations, it’s a good practice to implement ‘Wait’ nodes in your n8n workflows. These nodes introduce deliberate delays between successive X API calls. For workflows that involve many operations, consider batching your requests or scheduling processes during off-peak hours. Always consult the official X API documentation for the most accurate and up-to-date rate limit details for specific endpoints.
Final Summary
Wow, what a journey! You’ve just completed a comprehensive walkthrough, from setting up your X developer account all the way to building your very first automation with n8n. By meticulously following the steps for API key acquisition and secure integration, you’re now equipped to seamlessly automate your X interactions. You’re not just a user; you’re an architect of digital efficiency!
For your next step, I highly encourage you to explore the various operations available within the n8n X node. Dive into actions like ‘Get User,’ ‘Search Tweets,’ or ‘Direct Message’ to truly expand your automation capabilities. The universe of automation is vast, and you’ve just taken your first giant leap. Keep experimenting, keep building, and keep automating!